Changing the Needle
36
1 Press (Needle position button) to
raise the needle.
2 Touch to lock all keys and buttons.
* If the message [OK to automatically lower the
presser foot?] appears on the LCD screen, touch
[OK] to continue.
3 Remove the presser foot. (page 48)
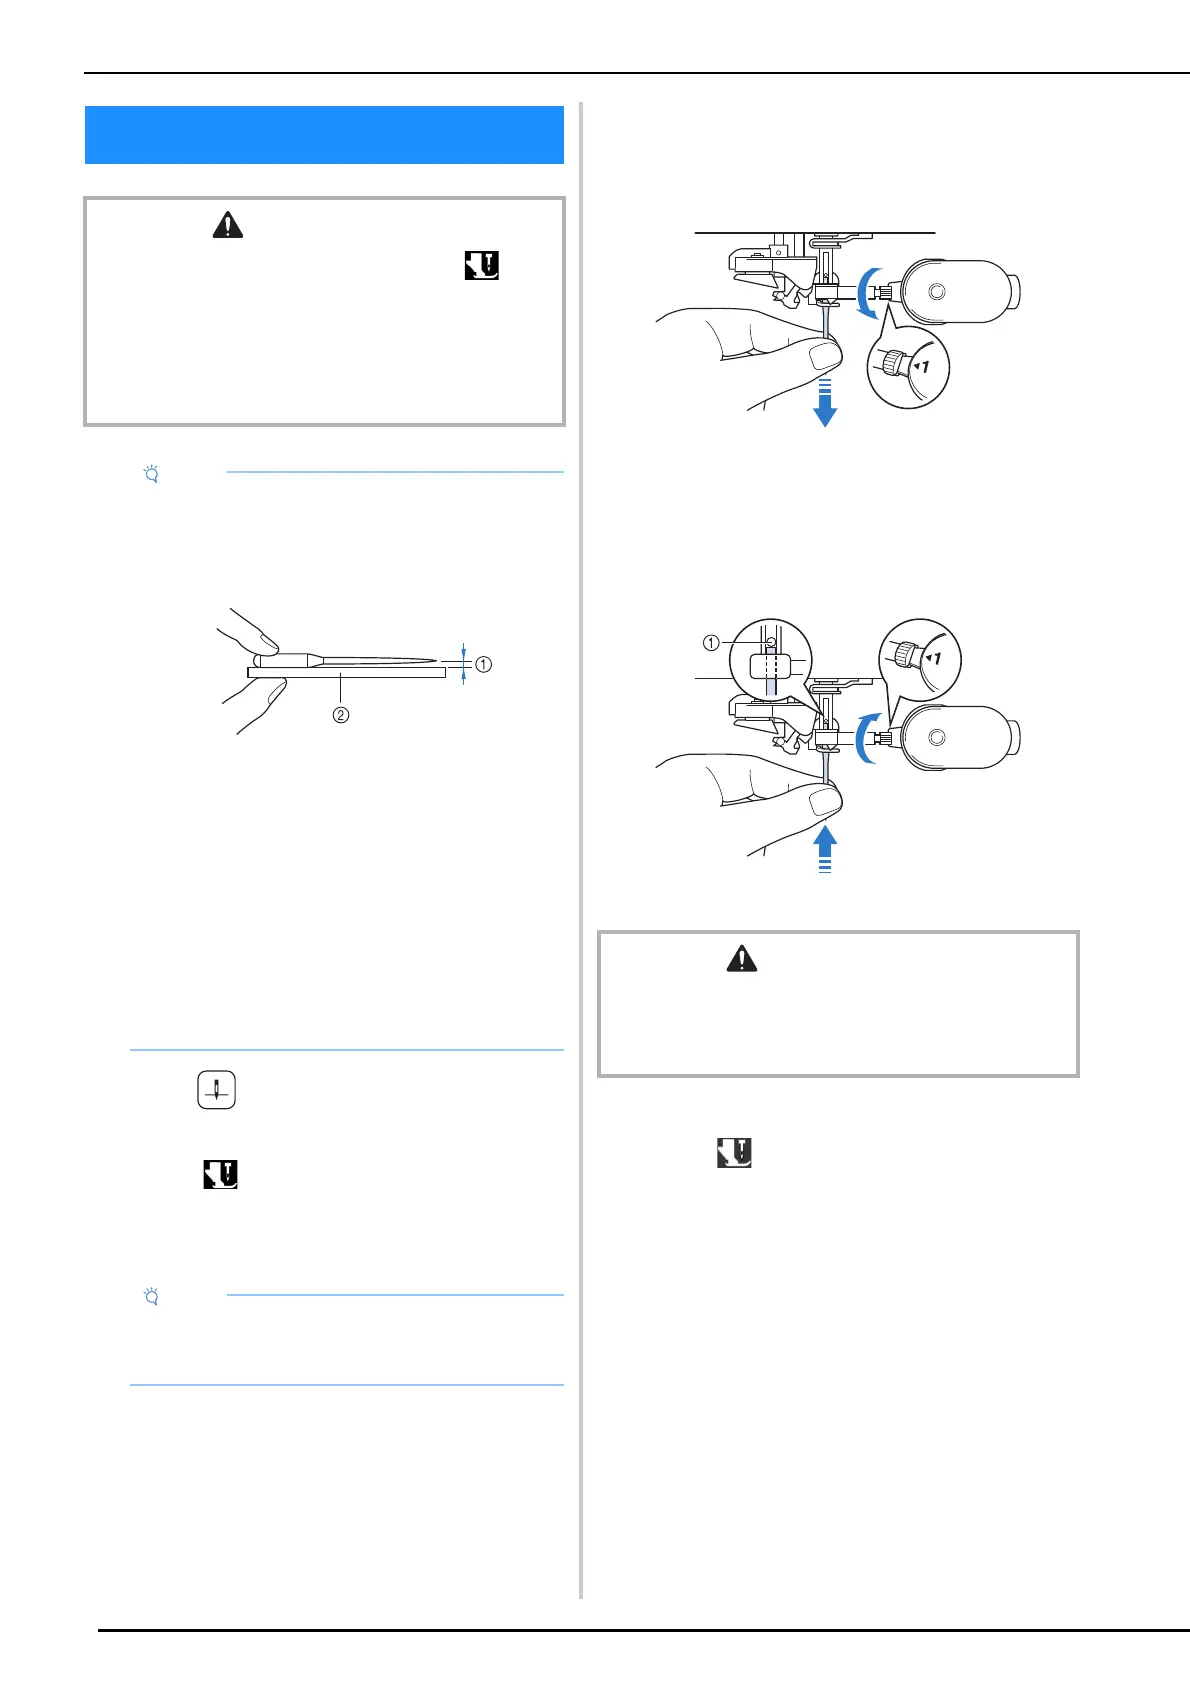
4 Use the screwdriver to turn the needle
clamp screw toward the front of the
machine and loosen the screw. Remove
the needle.
5 With the flat side of the needle facing the
back, insert the new needle until it
touches the needle stopper. Use a
screwdriver to securely tighten the
needle clamp screw.
a Needle stopper
6 Attach the presser foot. (page 48)
7 Touch to unlock all keys and buttons.
Changing the Needle
CAUTION
• When replacing the needle, be sure to touch on the
screen to lock all keys and buttons, otherwise injuries
may occur if the “Start/Stop” button or any other button is
pressed and the machine starts.
• Use only home sewing machine needles made for home
use. Other needles may break and may cause injury.
• Never sew with a bent needle. This may cause injury.
• To check the needle correctly, place the flat
side of the needle on a flat surface. Check the
needle from the top and the sides. Throw
away any bent needles.
a Parallel space
b Level surface (bobbin cover, glass, etc.)
• The machine needles are consumables.
Replace the needle in cases such as those
described below.
- If an unusual sound is produced when the
needle enters the fabric. (The tip of the
needle may be broken or dull.)
- If stitches are skipped. (The needle may be
bent.)
- Generally, after completing one project,
such as a piece of clothing.
• Before replacing the needle, cover the hole in
the needle plate with fabric or paper to prevent
the needle from falling into the machine.
CAUTION
• Be sure to insert the needle until it touches the needle
stopper and securely tighten the needle clamp screw
with the screwdriver, otherwise the needle may break
and cause injury.