Winding/Installing the Bobbin
40
1 Touch to lock all keys and buttons
and raise the presser foot.
* If the message [OK to automatically lower the
presser foot?] appears on the LCD screen, touch
[OK] to continue.
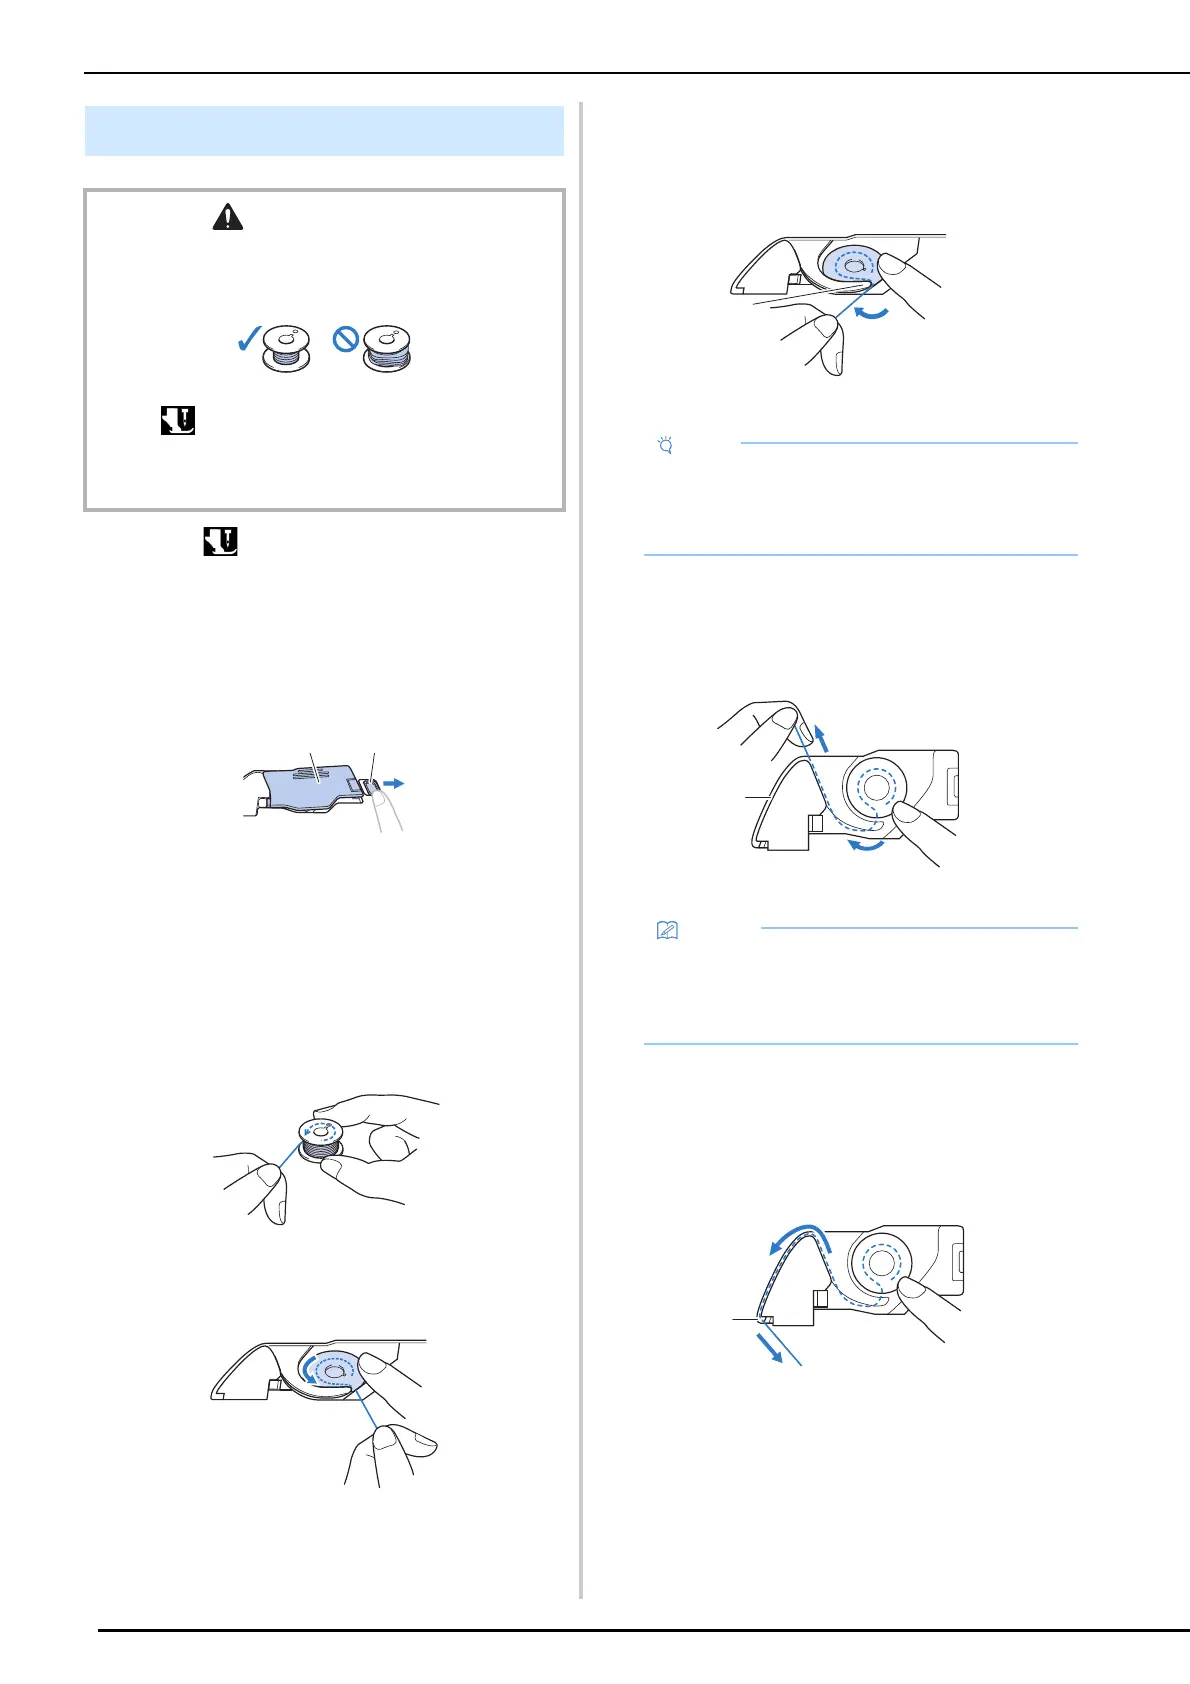
2 Slide the bobbin cover latch to the right.
a Bobbin cover
b Latch
3 Remove the bobbin cover.
4 Hold the bobbin with your right hand and
hold the end of the thread with your left
hand.
5 Set the bobbin in the bobbin case so that
the thread unwinds to the left.
6 Lightly hold down the bobbin with your
right hand, and then guide the end of the
thread around the tab of the needle plate
with your left hand.
a Tab
7 While lightly holding down the bobbin
with your right hand, guide the thread
through the slit in the needle plate and
lightly pull it with your left hand.
a Slit
8 While lightly holding down the bobbin
with your right hand, continue guiding
the thread through the slit with your left
hand. Then, cut the thread with the
cutter.
a Cutter
Setting the Bobbin
CAUTION
• Use a bobbin thread that has been correctly wound.
Otherwise, the thread tension may be incorrect and the
needle may break, causing injuries.
• Before inserting or changing the bobbin, be sure to
touch in the LCD to lock all keys and buttons,
otherwise injuries may occur if the “Start/Stop” button or
any other button is pressed and the machine starts
sewing.
• Be sure to hold down the bobbin with your
finger and unwind the bobbin thread correctly.
Otherwise, the thread may break or the thread
tension will be incorrect.
• By pulling the thread as shown in step 7, the
thread will enter the tension spring of the
bobbin case to apply the appropriate tension
to the bobbin thread during sewing.
a