Using the Projector with the Dual Purpose Stylus
Sewing Basics
71
2
Selecting a Stitch Pattern
1
Press the button of the dual purpose
stylus to turn on the light over .
2 Press the button of the dual purpose
stylus over until the desired stitch
pattern is displayed, and then press the
button over .
a Stitch pattern to be set
When selecting a stitch that uses
the buttonhole foot
1
Select a buttonhole stitch. Attach
buttonhole foot “A+” and pull out the
button holder plate on the presser foot,
and insert the button.
* For details, refer to “One-Step Buttonholes” on
page 87.
* When a bar tack or darning stitch is selected, set
the scale to the length that you wish to sew. For
details, refer to “Bar Tacks” on page 93 and
“Darning” on page 93.
2 Touch .
The selected stitch pattern and the adjustment
keys are projected onto the fabric.
3 Press (Presser foot lifter button) to
lower buttonhole foot “A+”.
The buttonhole length is reflected in the projected
stitch pattern.
4 If necessary, use the dual purpose stylus
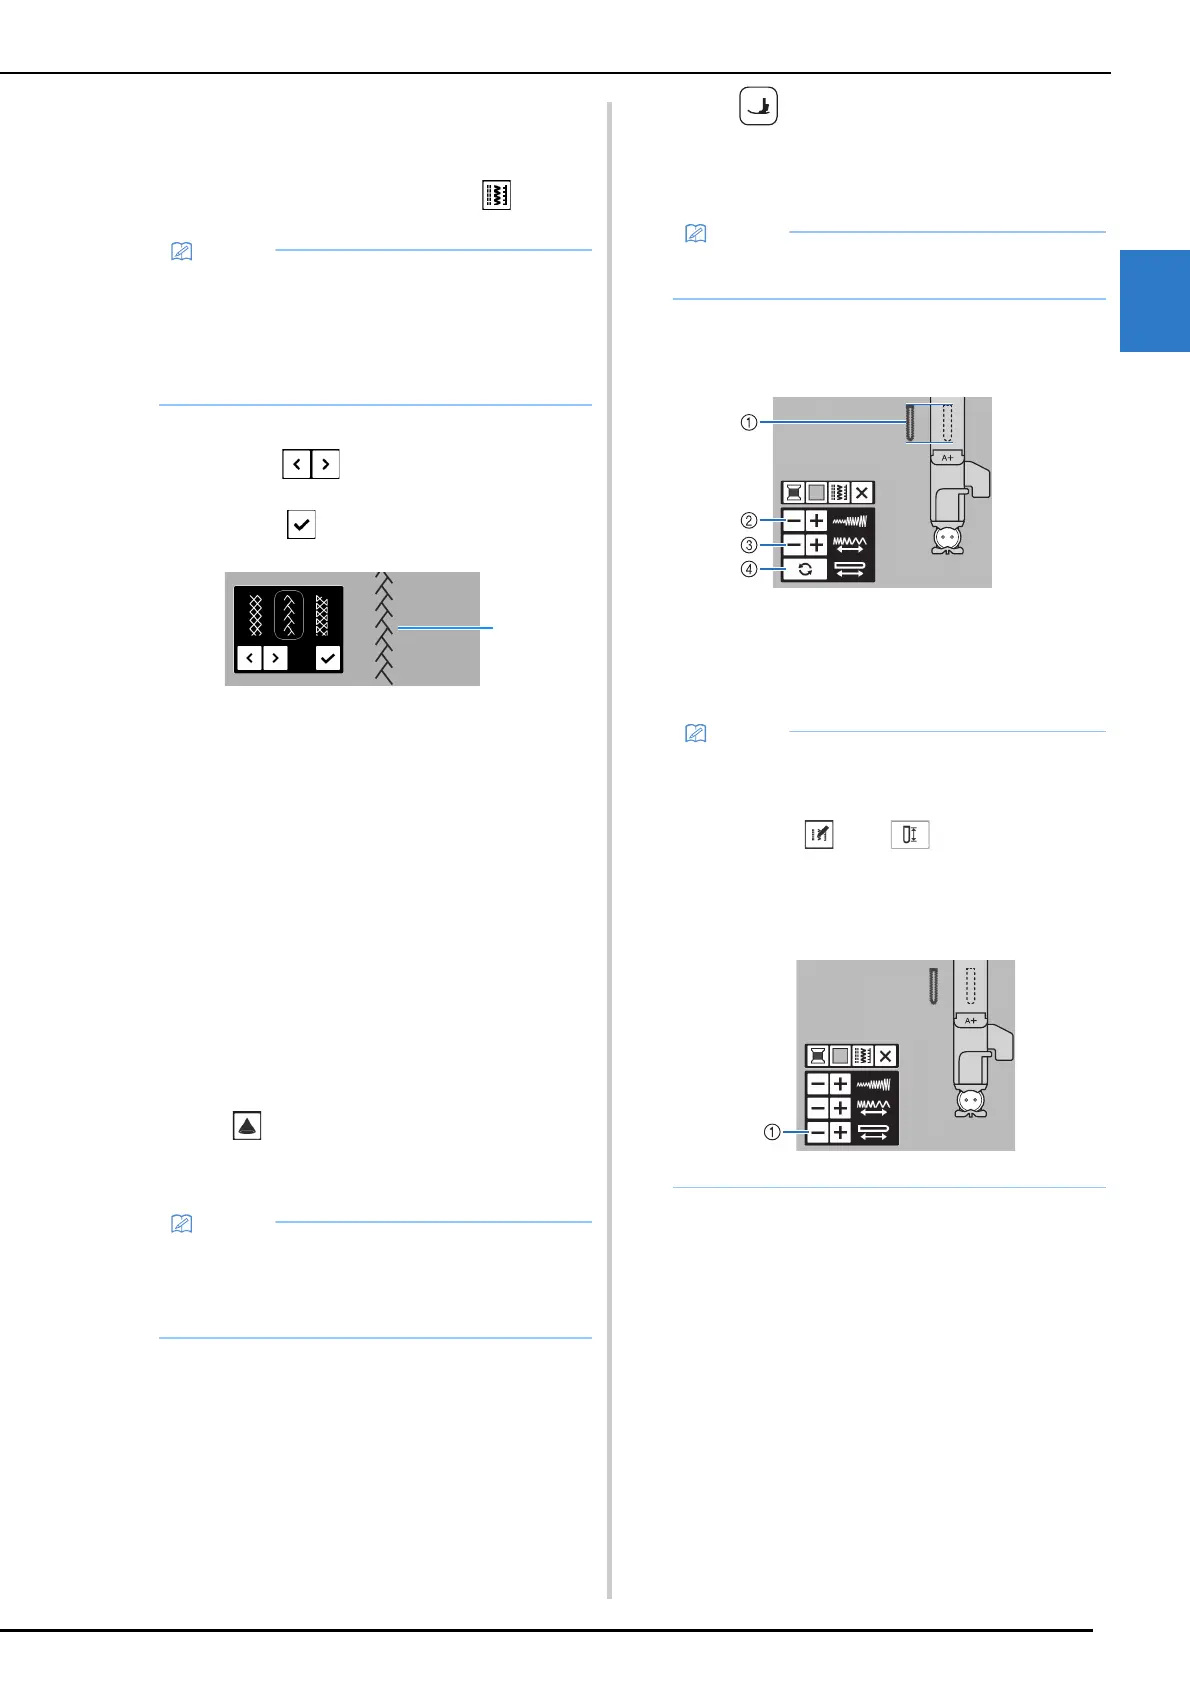
to change the stitch settings.
a Projected buttonhole stitch
b Set the stitch width.
c Set the stitch length.
d The buttonhole length is reflected in the projection.
• A stitch pattern cannot be selected from the
LCD while a stitch pattern is being projected
by the projector. In order to select a stitch
pattern from the LCD, touch [Cancel] in the
screen. The projector is turned off, when
touching [Cancel].
• The stitch pattern is projected beside
buttonhole foot “A+”.
• When the presser foot is lowered, the
adjustment keys are not projected.
• When buttonhole foot “A+” is lowered, the
buttonhole length is reflected in the projection.
• Buttonhole length can be set by setting [Slit
Length] instead of inserting the button on the
buttonhole foot “A+”. [Slit Length] can be set
by touching , then on the screen.
(page 89)
When specifying the buttonhole length with
[Slit Length], the adjustment keys are
projected as shown below.
a Set the slit length.