Quilting
114
4 Position the free motion echo quilting
foot “E” on the left side of the presser bar
with the holes in the quilting foot and
presser bar aligned.
5 Tighten the screw (small) with the
included screwdriver (large).
6 Using the measurement on the quilting
foot as a guide, sew around the motif.
a 6.4 mm (approx. 1/4 inch)
7 Touch to cancel the free motion
sewing mode.
The stitch regulator allows free-motion quilting
and free-motion basting with a set stitch length.
The machine detects how the fabric is being
moved and makes adjustments to ensure the set
stitch length.
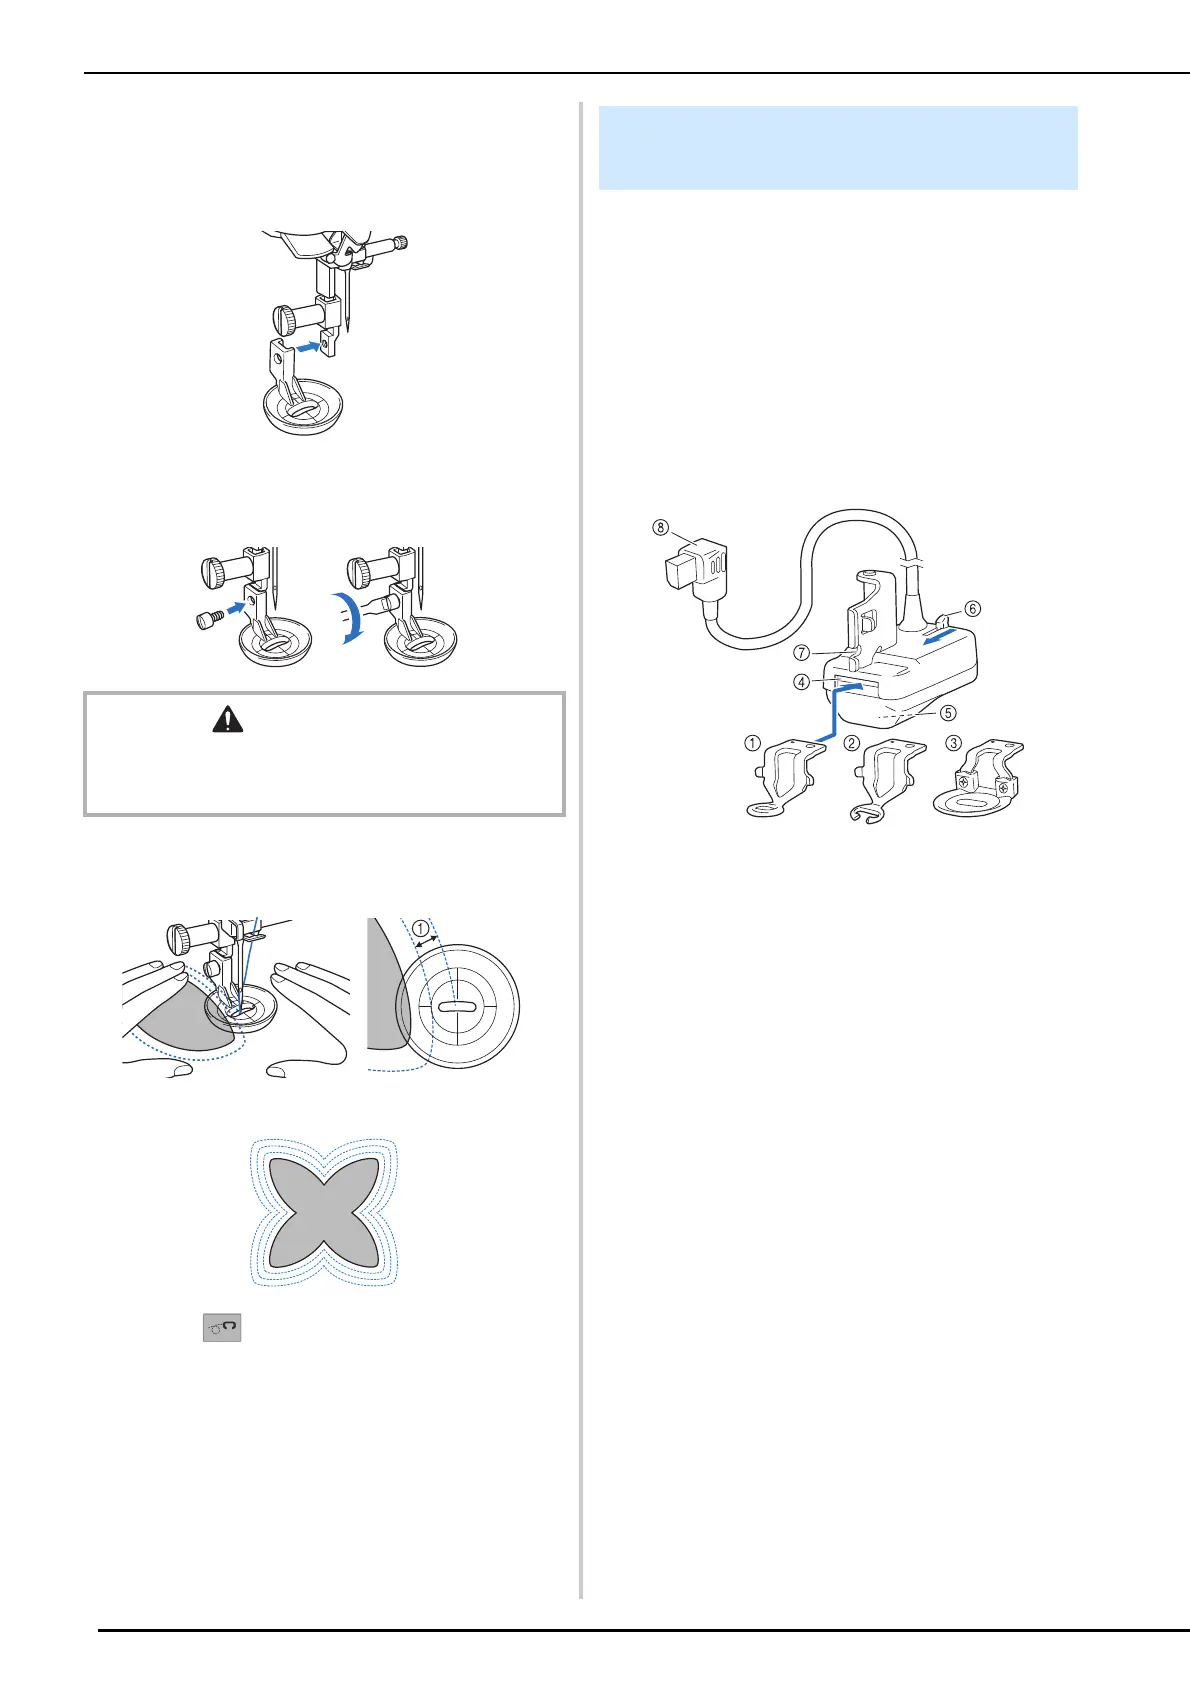
Names of Parts and Their
Functions
Replace the presser foot to be used with the stitch
regulator, according to your needs.
a Stitch regulator quilting foot
Used for general quilting.
b Stitch regulator open toe quilting foot
This presser foot enables you to easily check the needle and
stitching. Carefully sew, making sure that the fabric does not
catch on the tips of the presser foot. Do not use this foot when
selecting [Basting mode].
c Stitch regulator echo quilting foot
Used for echo quilting. This presser foot is also suitable for
sewing furry fabric or fabric with an uneven surface or for
sewing different types of fabric together.
d Presser foot slot
e Stitch regulator window
The inner sensor detects fabric movement.
f Presser foot release button
Push this toward you to remove the presser foot.
g Notch in the stitch regulator
h Connector of the stitch regulator
CAUTION
• Be sure to securely tighten the screws with the included
screwdriver (large). Otherwise, the needle may touch
the quilting foot, causing it to break and causing injury.
Free-Motion Quilting/Basting with
the Stitch Regulator