Checking/Editing the Embroidery Pattern Projected Onto Fabric
154
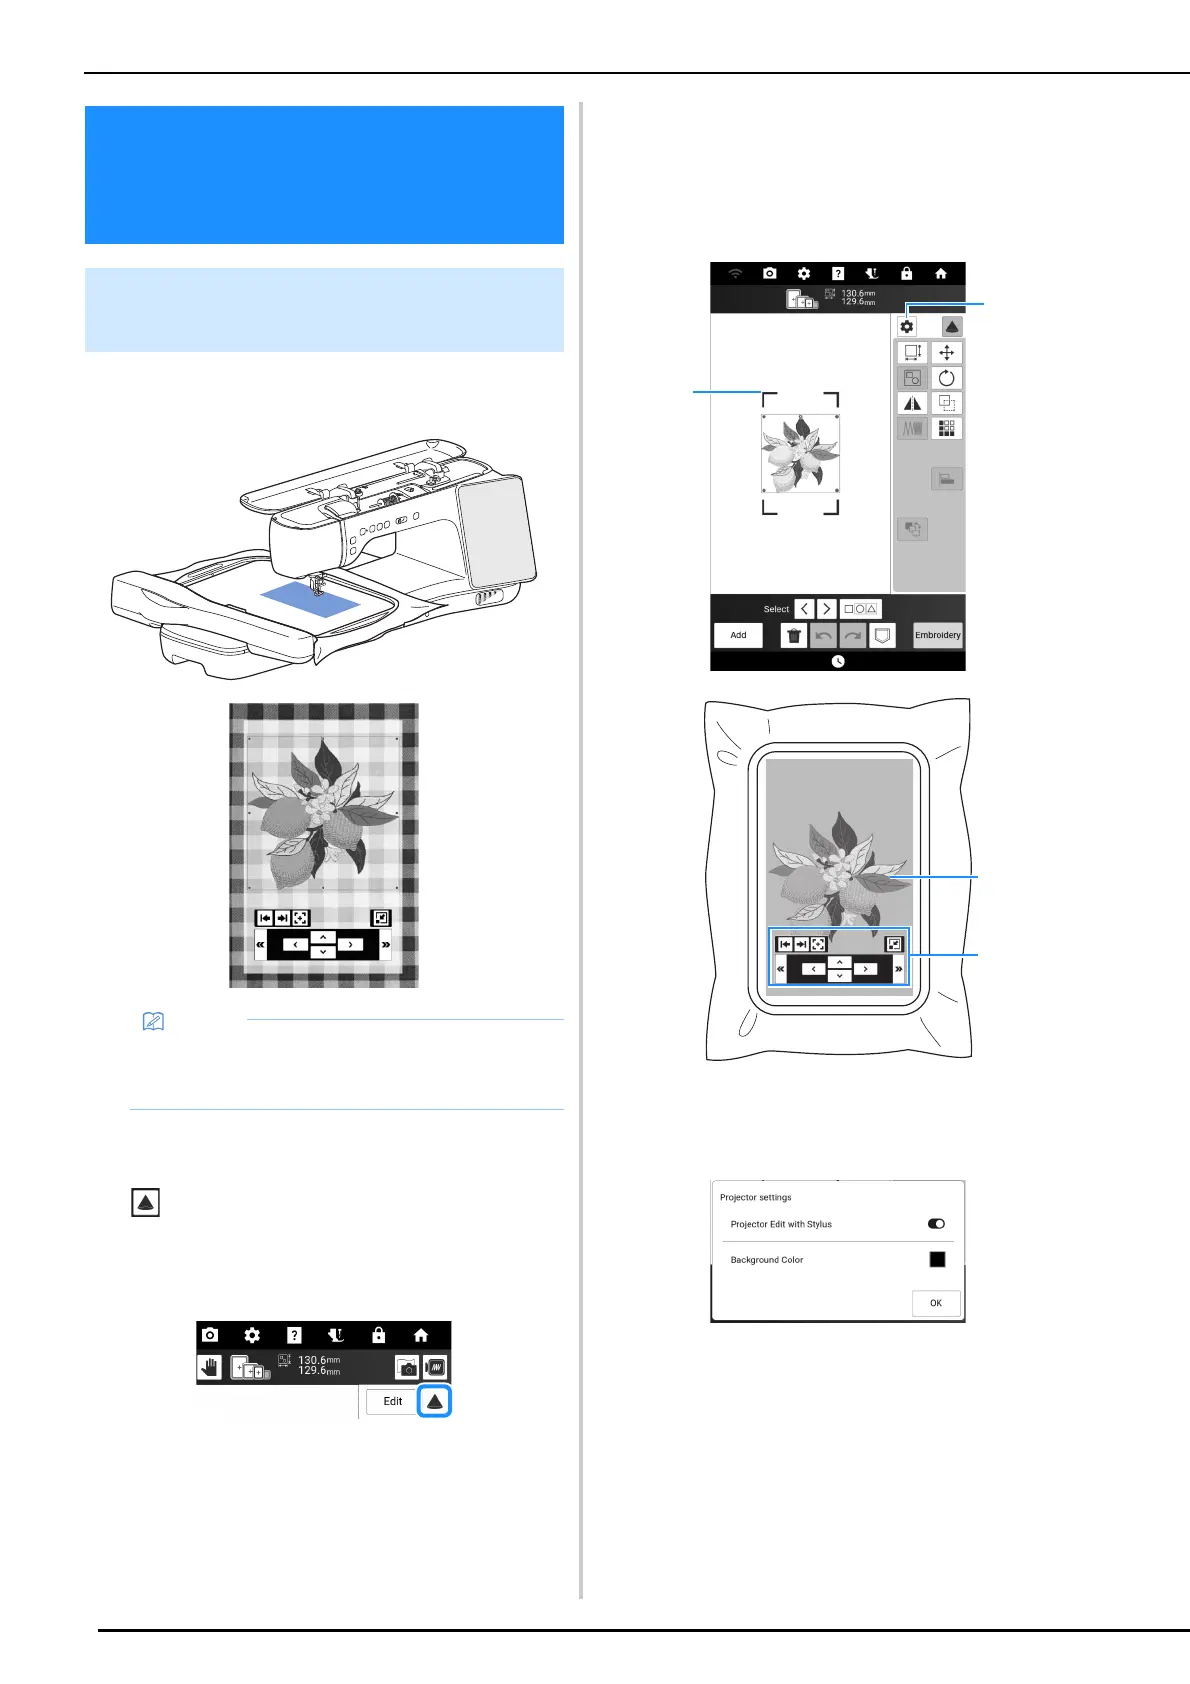
Using the projector, the selected embroidery
pattern can be projected onto the fabric.
1 Make sure that the embroidery frame is
attached to the machine, and then touch
in the following screens.
• Embroidery edit screen
• Embroidery screen
• Stitch settings screen of My Design Center
If a message appears, warning that the carriage
will be moved, touch [OK].
The embroidery pattern is projected onto the fabric.
2 Check the embroidery pattern projected
onto the fabric. If necessary, from the
screen of the machine, change the
location of the projection area on the
fabric and the projector settings.
a Drag a blue line at one of the four corners to move
the embroidery frame and change the location of
the projection area on the fabric.
b Touch to display the following screen.
The function [Projector Edit with Stylus], which
projects editing keys onto the fabric, can be
switched on or off.
With [Background Color], the background color of
the projector can be selected.
c Embroidery pattern projected by the projector
d Editing keys for operating with the dual purpose
stylus. (page 155)
Checking/Editing the
Embroidery Pattern
Projected Onto Fabric
Checking the Embroidery Pattern
with the Projector
• The illustrations of the projections shown in
this manual are for illustrative purposes only
and may differ from the actual projections.
 Loading...

