LCD Screen
Getting Ready
25
1
Embroidery Settings
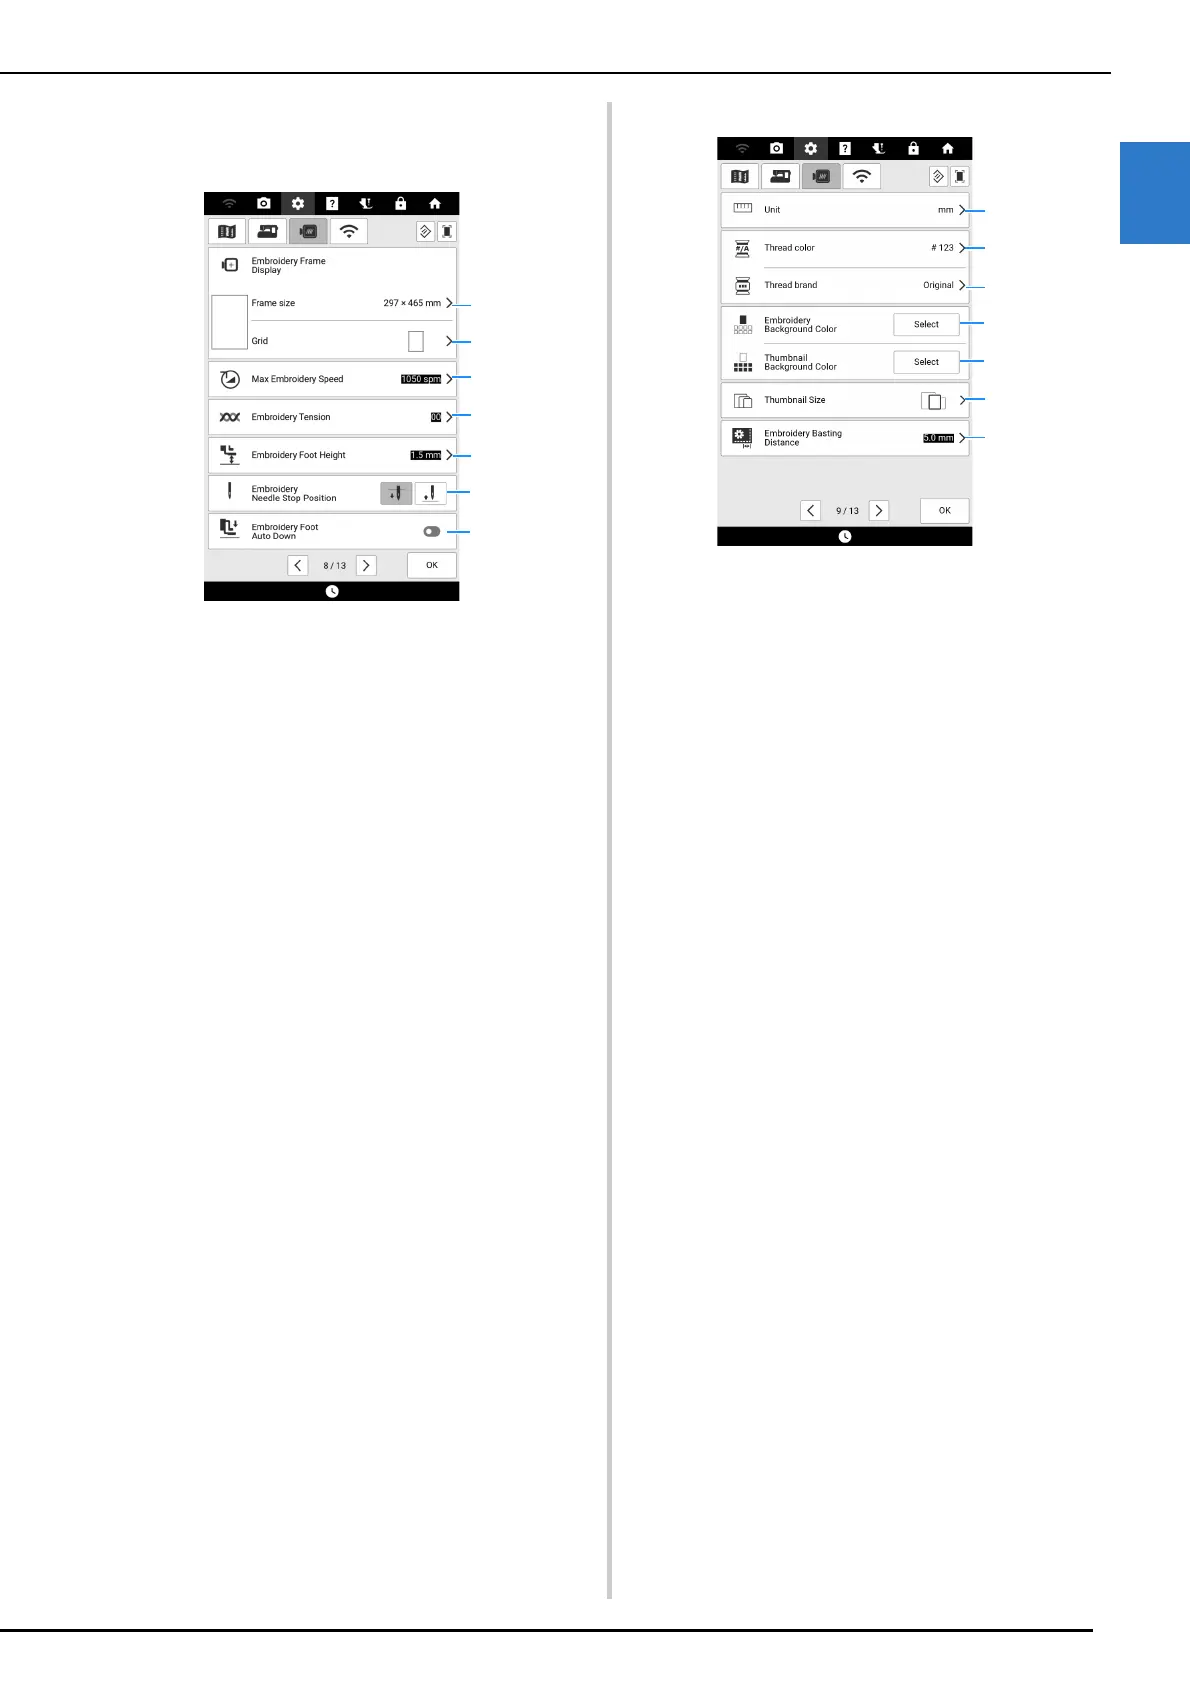
Page 8
a Select the embroidery frame to be used.
(page 227)
b Change the center point marker or grid lines.
c Adjust the maximum embroidery speed setting.
d Adjust the upper thread tension for embroidering.
(page 165)
e Select the height of the embroidery foot during
embroidering.
f Select the needle stop position for embroidering.
g When set to on, and the presser foot is raised,
pressing the “Start/Stop” button will automatically
lower the presser foot when starting embroidery.
Page 9
a Change the display units (mm/inch).
b Change the thread color display on the embroidery
screen. Select [Name of Color] or [#123] (thread
number).
c
Select the thread brand of the thread color display.
[Original] is set as a default and will retain the brand
thread used by the designer who created the
pattern.
The thread brand setting is reflected the next time a
pattern is imported.
(page 140)
d Change the color of the background for the
embroidery display area.
e Change the color of the background for the
thumbnail area.
f Touch to specify the size of pattern thumbnails.
g Adjust the distance between the pattern and the
basting stitching. (page 173)