Various Embroidering Functions
174
Follow the procedure described below to
embroider linked characters in a single row when
the entire pattern extends beyond the embroidery
frame.
Example: Linking “DEF” to the characters “ABC”
using embroidery frame 10 cm × 10 cm (approx.
4 inches × 4 inches)
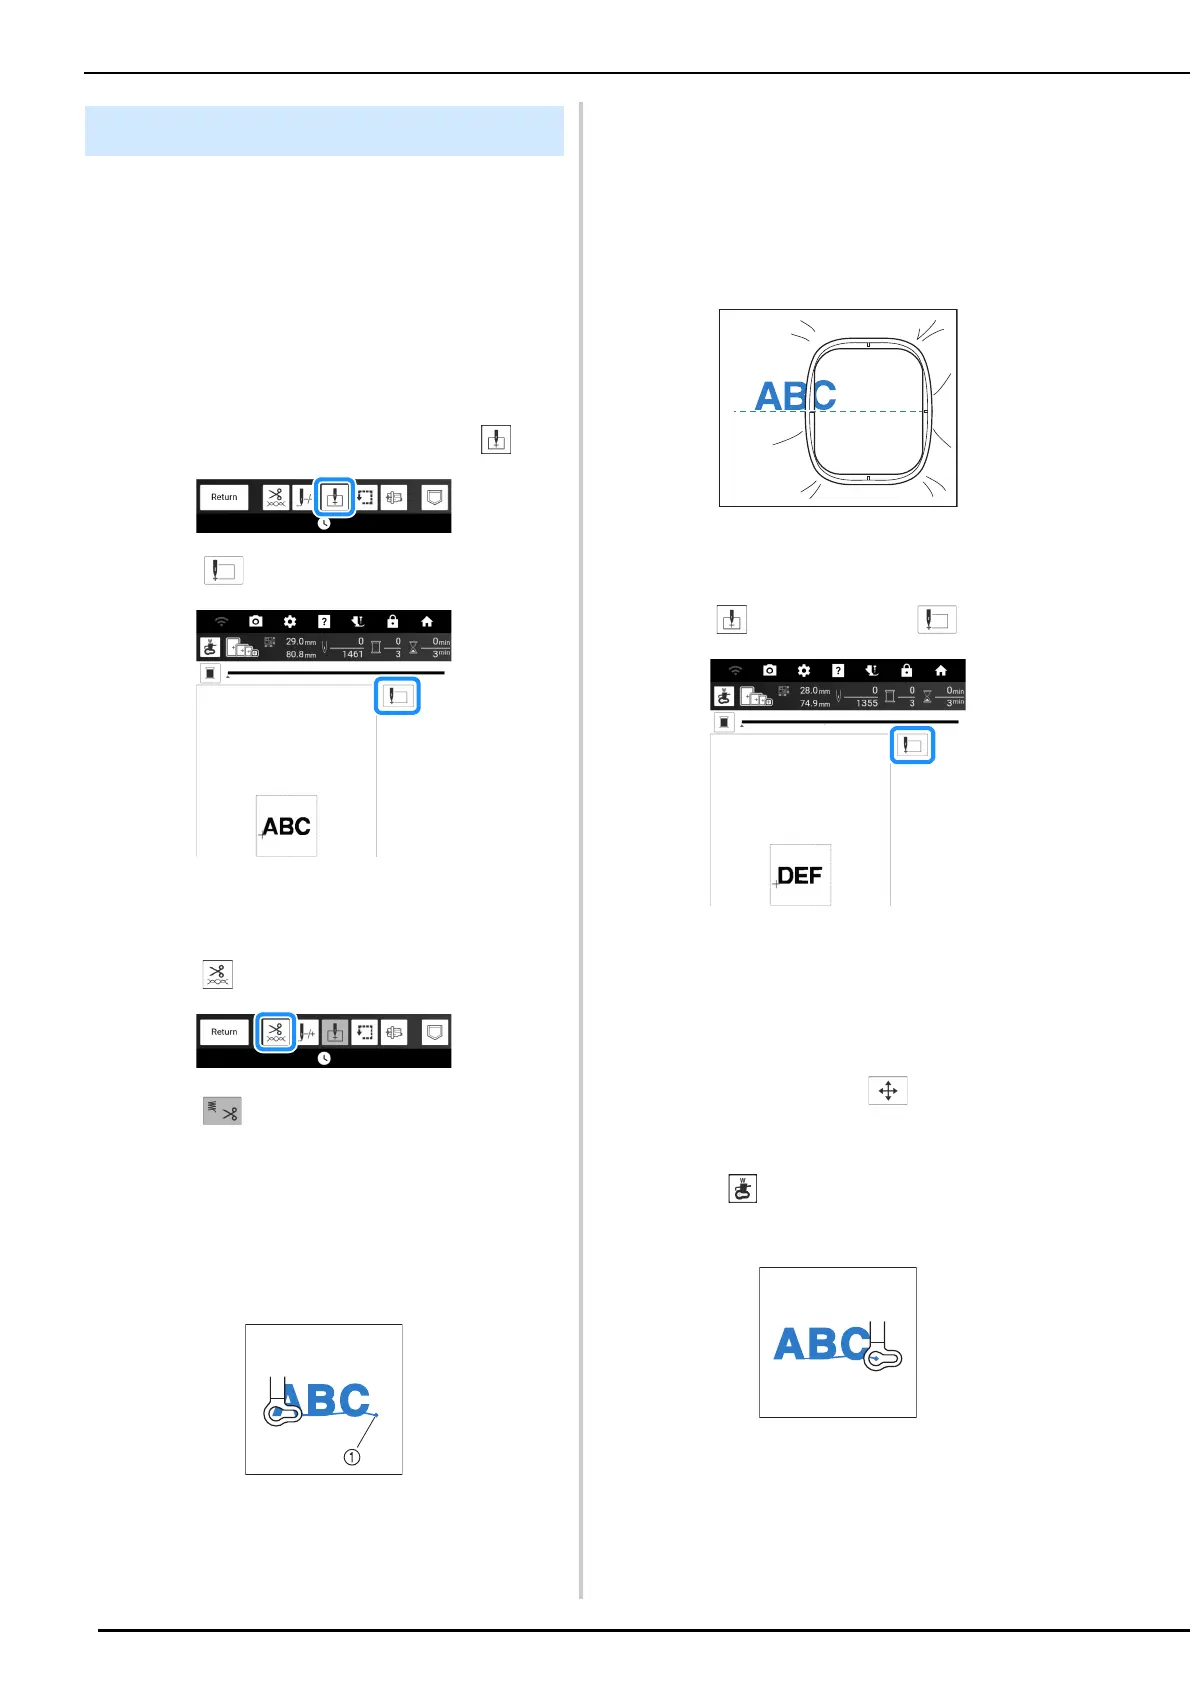
1 Select the character patterns for “ABC”.
2 On the embroidery screen, touch .
3 Touch and then touch [OK].
The needle is positioned in the lower-left corner of
the pattern. The embroidery frame will move to the
specified needle position.
4 Touch .
5 Touch to turn off the thread cutting
function and then touch [OK]. (page 141)
6 Press the “Start/Stop” button.
7 After the characters are embroidered, cut
the threads to a generous length, remove
the embroidery frame.
a End of the embroidering
8 Reposition the fabric in embroidery
frame so that the right side of the letter
“C” will be partially inside the embroidery
frame; being careful so letters remain
straight and level. Then reattach frame
again so that the remaining characters
(“DEF”) can be embroidered.
9 As in step 1, select the character
patterns for “DEF”.
10 Touch and then touch .
The carriage moves so that the needle is
positioned in the lower-left corner of the pattern.
You will need to match this point to the end of
embroidering for the previous pattern.
11 Touch [OK].
12 Touch [Layout], then to align the
needle with the end of embroidering for
the previous pattern.
* Touch so that the pointer of the projector
indicates the needle drop point onto the fabric.
(page 139)
Embroidering Linked Characters