Embroidering Preparation
Basic Embroidery
129
4
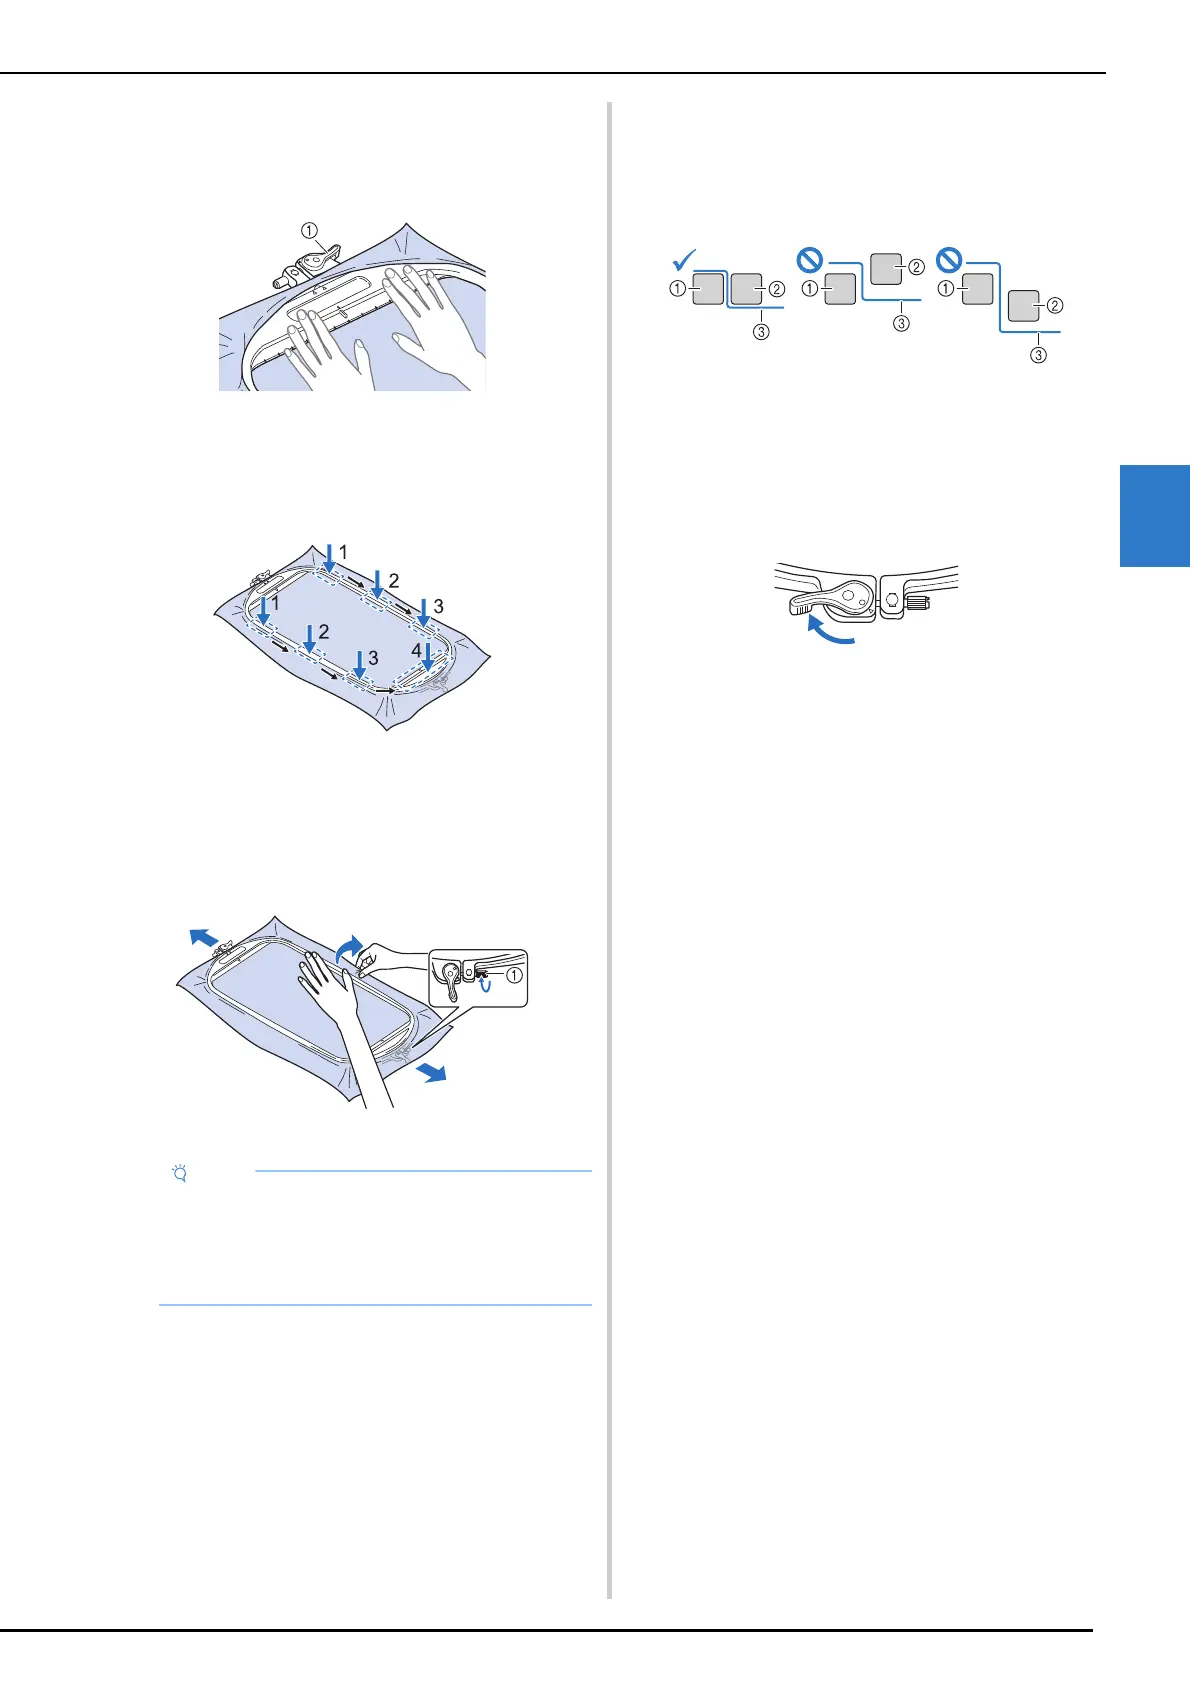
3 With the lever at the top tightened, push
the inner frame down into the outer
frame.
* Loosen the lever at the bottom.
a Tighten the lever at the top.
4 Push the inner frame down into the outer
frame in the order shown (from top to
bottom).
5 Gently smooth out the fabric. With the
lever at the bottom loosened, slightly
tighten the frame adjustment screw, and
then pull the edges of the fabric to
remove any slack.
a Frame adjustment screw
6 After stretching the fabric, make sure that
it is taut and that the inner and outer
frames are aligned.
* Make sure the inner and outer frames are even
before you start embroidering.
a Outer frame
b Inner frame
c Fabric
7 Tighten the lever at the bottom.
* If the lever cannot be tightened, loosen the frame
adjustment screw.
Inserting Fabric into Embroidery
Frame (272 mm × 272 mm
(approx. 10-5/8 inches × 10-5/8
inches))
1
Loosen the lever on the outer frame, and
then remove the inner frame.
* Refer to step 1 of “Inserting Fabric into
Embroidery Frame (465 mm × 297 mm (approx.
18-1/4 inches × 11-5/8 inches))” on page 128.
2 Perform steps 2 through 5 of “Inserting
the Fabric into Embroidery Frame
without Levers” on page 130.
3 Tighten the frame adjustment screw and
tighten the lever.
* Refer to “Inserting Fabric into Embroidery Frame
(465 mm × 297 mm (approx. 18-1/4 inches × 11-5/
8 inches))” on page 128, then go to step
7.
• If the fabric is not taut at the top, such as when
thick fabric is used, slightly loosen the lever at
the top, loosen the frame adjustment screw at
the top, and then pull the edges of the fabric to
remove any slack.
 Loading...

