Utility Stitches
88
1 Select a buttonhole stitch, and attach
buttonhole foot “A+”.
Position the upper thread under the presser foot by
guiding thread through the hole in the presser foot
before attaching the buttonhole foot “A+”.
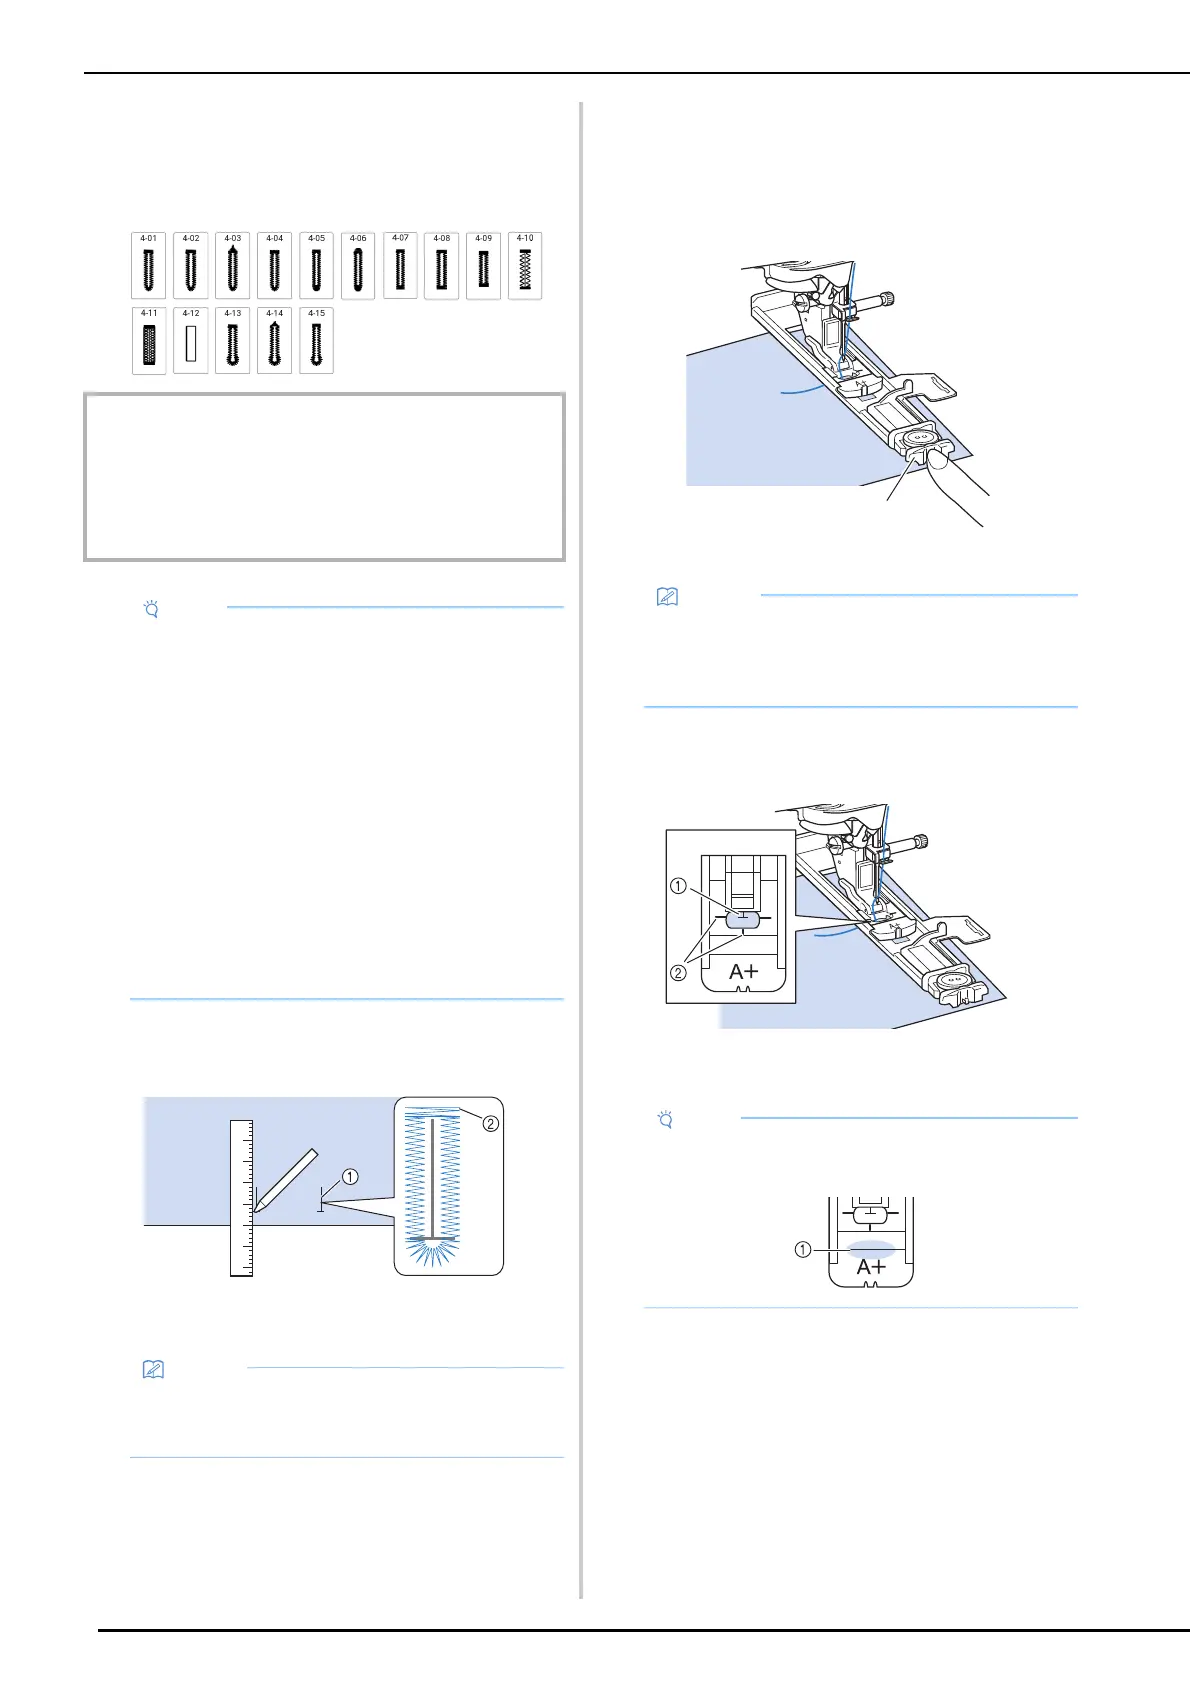
2 Mark the position and length of the
buttonhole on the fabric.
a Marks on fabric
b Buttonhole sewing
3 Pull out the button holder plate on the
presser foot, and insert the button that
will be put through the buttonhole. Then
tighten the button holder plate around
the button.
a Button holder plate
4 Align the presser foot with the mark on
the fabric, and lower the presser foot.
a Mark on the fabric
b Marks on the presser foot
IMPORTANT
• When attaching and removing buttonhole foot “A+”, do
not apply excessive force to the presser foot, otherwise
it may be damaged. In addition, be careful not to hit the
needle when attaching and removing buttonhole foot
“A+”.
• Before attaching the presser foot, check that
there is enough thread in the bobbin.
• Sew trial stitches on fabric that is the same as
that used in your project, referring to “Fabric/
Thread/Needle Combinations” on page 34.
• The built-in camera detects the position of
buttonhole foot “A+”. Do not touch the camera.
(Refer to “Names of Machine Parts” on
page 13.)
• Do not peel the “A+” sticker off buttonhole foot
“A+” or cover the sticker with the upper thread,
etc., otherwise the camera cannot detect the
presser foot or buttonholes cannot be sewn.
• If the fabric does not feed correctly, such as
when sewing stretchy fabrics, install the
buttonhole foot stabilizer. (page 90)
• The maximum buttonhole length is about 47
mm (approx. 1-3/4 inches) (diameter +
thickness of the button).
• The size of the buttonhole is determined by
the size of the button in the button holder
plate. If the button does not fit in the button
holder plate, refer to page 89.
• After lowering the presser foot, make sure that
there is no gap in 1.