Sewing
54
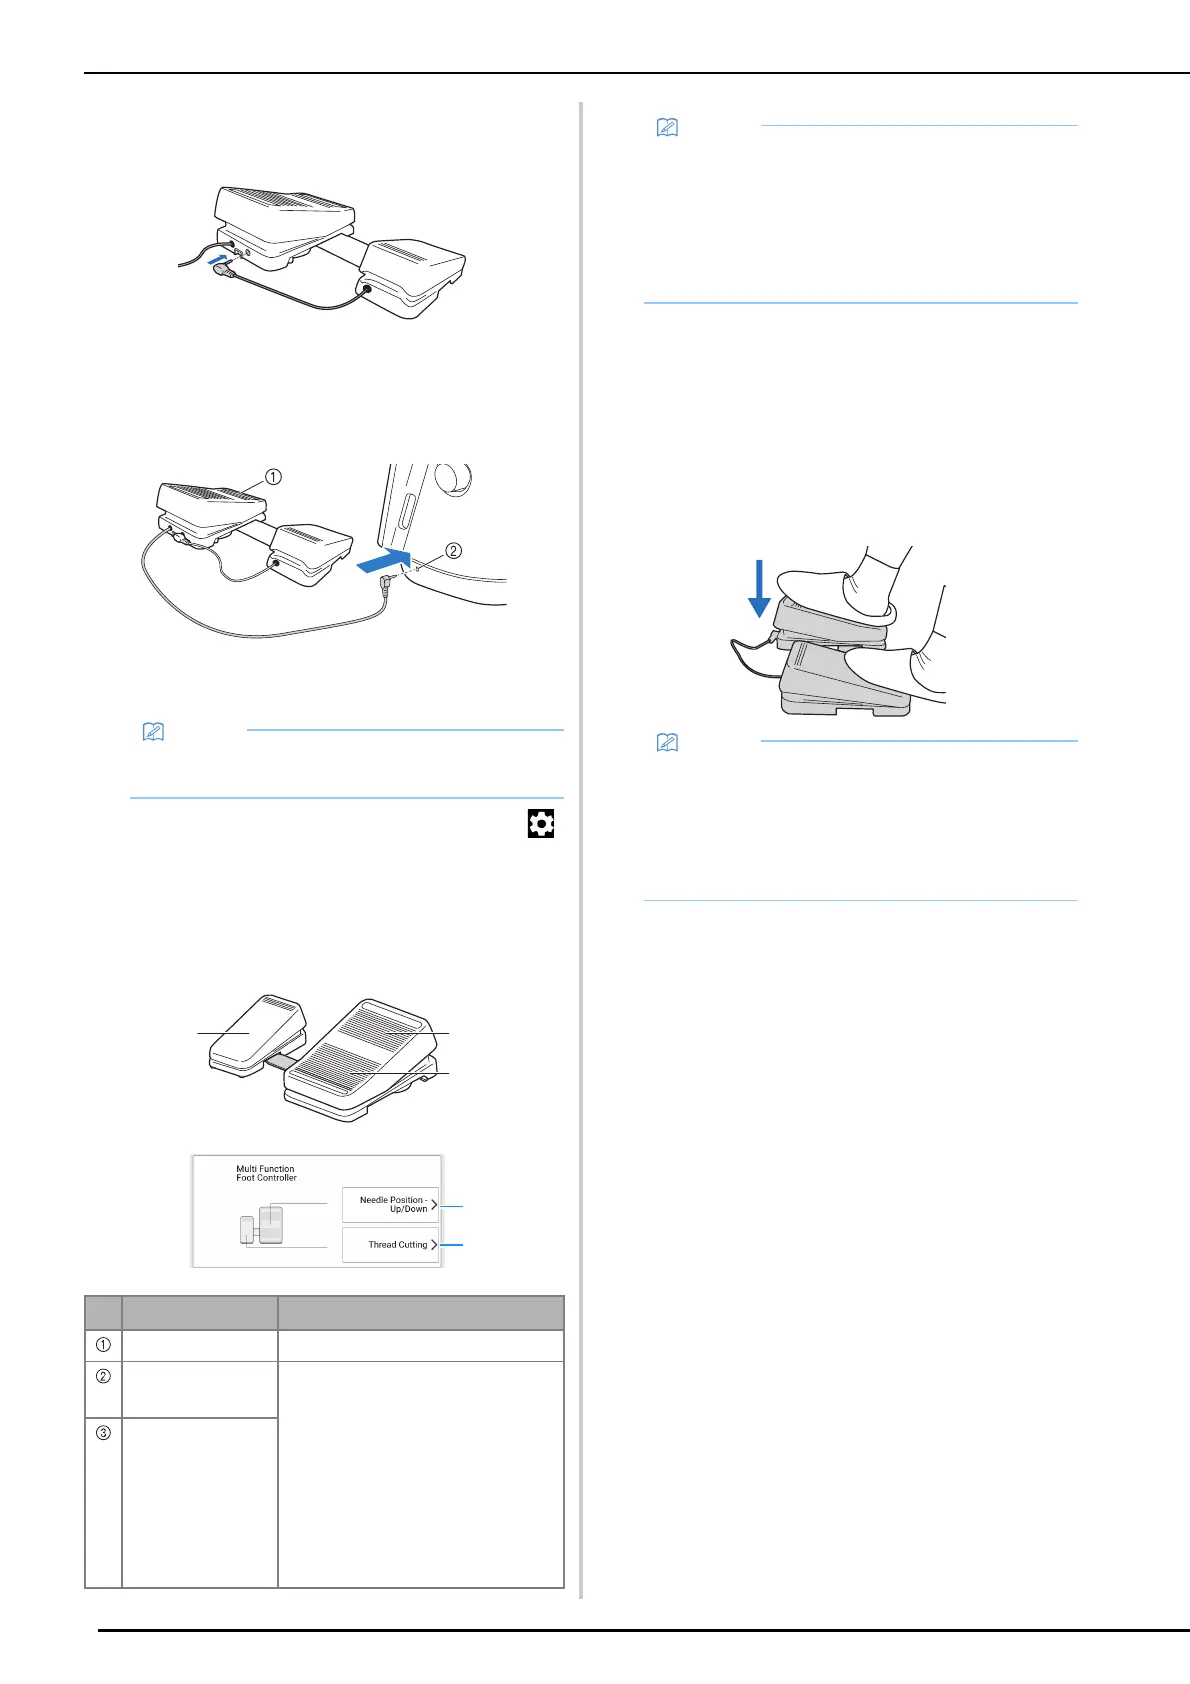
4 Insert the plug for the side pedal into the
jack on the main foot controller.
5 Insert the plug for the main foot
controller into the foot controller jack on
the right side of the machine.
a Main foot controller
b Foot controller jack
6 Turn on the machine. And then touch
and display [Multi function Foot
Controller] of the settings screen.
7 Select the functions to be performed by
the multi-function foot controller.
8 Touch [OK].
9 Sew trial stitches and confirm that the
settings are as desired.
Pressing down on the main foot controller increases
the sewing speed; releasing the pressure on the main
foot controller decreases the sewing speed.
Release the main foot controller or side pedal to stop
sewing.
• The length of the cord for the main foot
controller can be adjusted. (page 55)
Controller Functions that can be specified
Main foot controller Start/Stop
Heel switch Select any of the following:
• [Thread Cutting]
• [Needle Position – Up/Down]
• [Single Stitch]
• [Reverse Stitch]
(Reinforcement stitching may be
applied depending on the selected
stitch pattern. (page 56))
• [Reinforcement Stitch]
• [Presser Foot Up/Down]
• [No Setting]
Side pedal
a
b
c
• If you set [Reverse Stitch] on the side pedal,
you can create a darning stitch effect using
zigzag stitches. With both feet, keep pressing
the main foot controller, and repeat pressing
and releasing the side pedal to sew forward
and reverse in turn. Machine will reverse at the
speed you press the main foot controller.
• The speed that is set using the sewing speed
controller will be the main foot controller’s
maximum sewing speed.
• When the multi-function foot controller is
connected, the “Start/Stop” button cannot be
used to start sewing.