Sewing
52
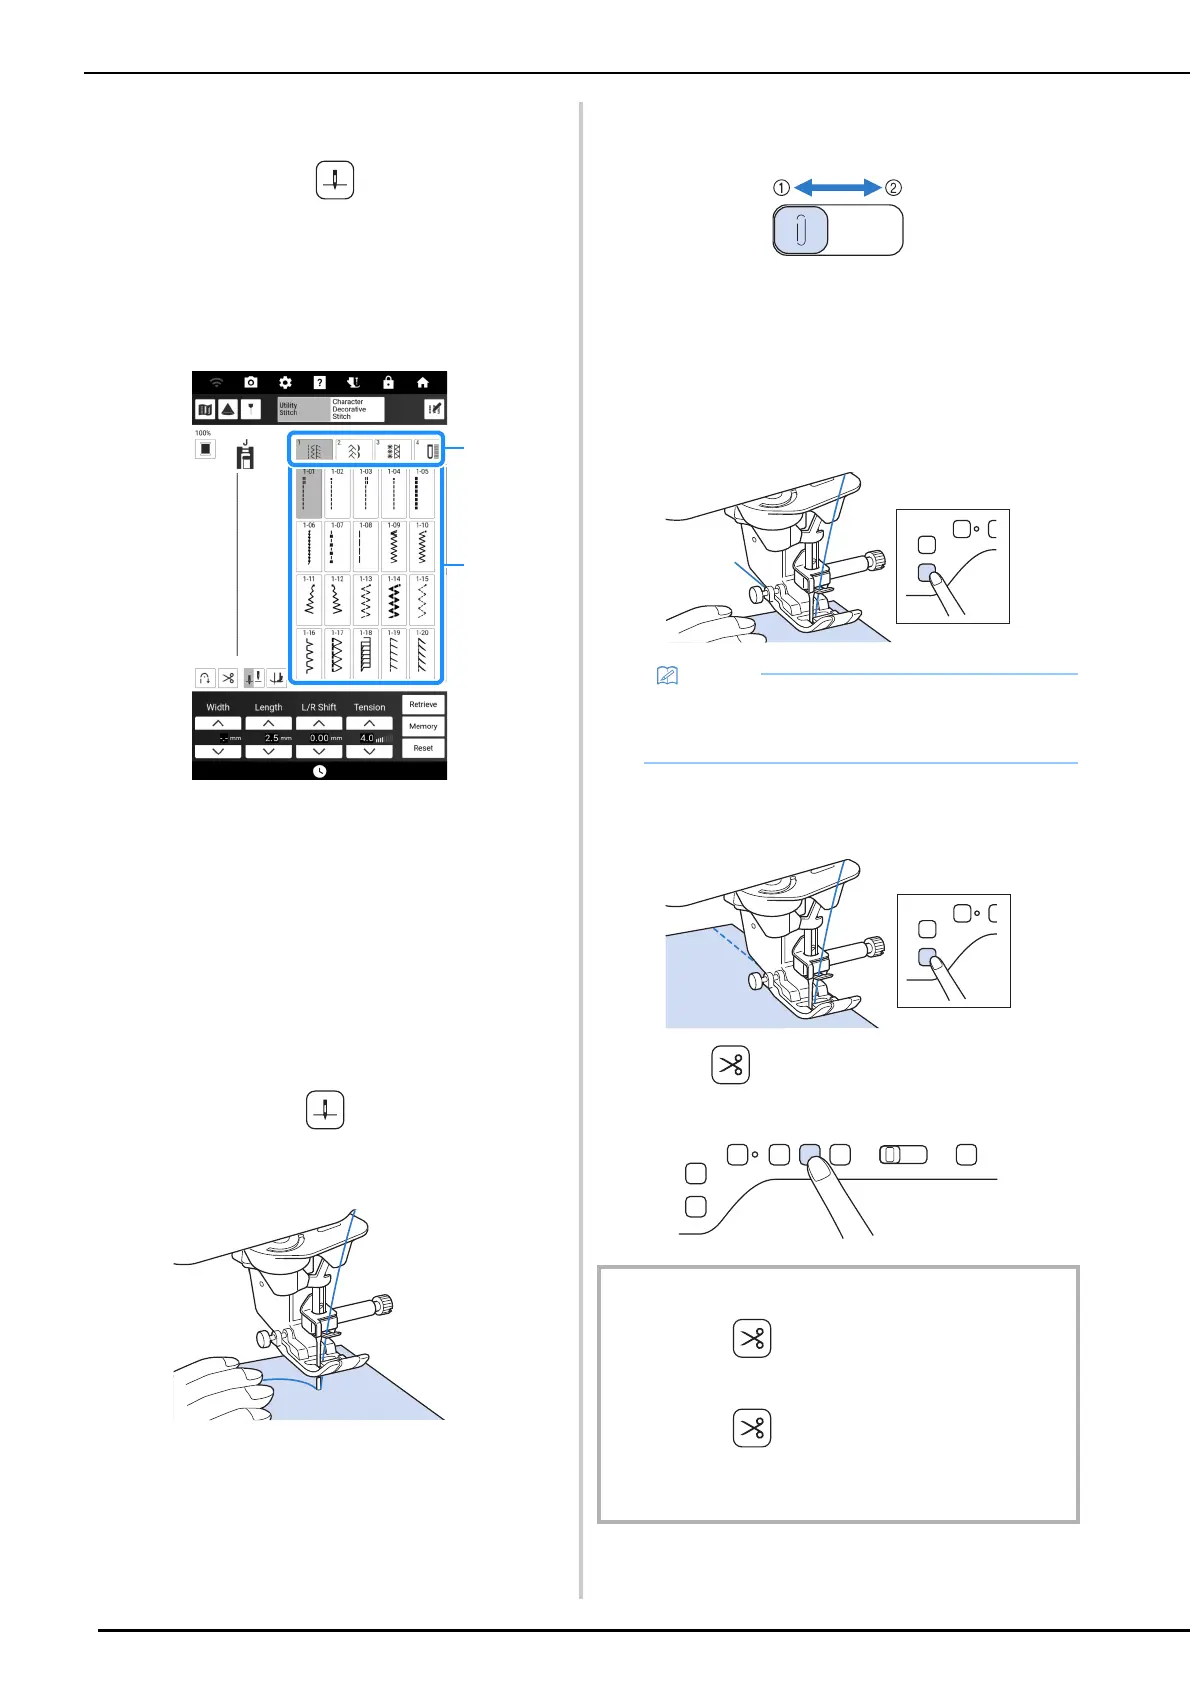
1 Touch [Sewing] in the home page screen
to display the utility stitches. If the needle
is lowered, press (Needle position
button) to raise the needle.
2 Select the category, and then touch the
key of the stitch you want to sew.
* Swipe the key of a category sideways to display
hidden categories.
a Category
b Key of the stitch
The symbol of the correct presser foot will be
displayed in the upper left corner of the LCD
screen.
3 Check which presser foot is indicated in
the upper-left corner of the screen, and
then attach it. (page 48)
4 Set the fabric under the presser foot.
Hold the fabric and thread in your left
hand, and press (Needle position
button) to set the needle in the sewing
start position.
5 Lower the presser foot.
* You do not have to pull up the bobbin thread.
6 Adjust the sewing speed with the speed
control slide.
a Slow
b Fast
7 Press the “Start/Stop” button to start
sewing.
* Guide the fabric lightly by hand.
8 Press the “Start/Stop” button again to
stop sewing.
9 Press (Thread cutter button) to trim
the upper and bobbin threads.
• When the foot controller is being used, you
cannot start sewing by pressing the “Start/
Stop” button.
IMPORTANT
• Do not press (Thread cutter button) after the
threads have been cut. Doing so could tangle the thread
or damage the machine.
• Do not press (Thread cutter button) when there is
no fabric set in the machine or during machine
operation. The thread may tangle, possibly resulting in
damage.