Utility Stitches
100
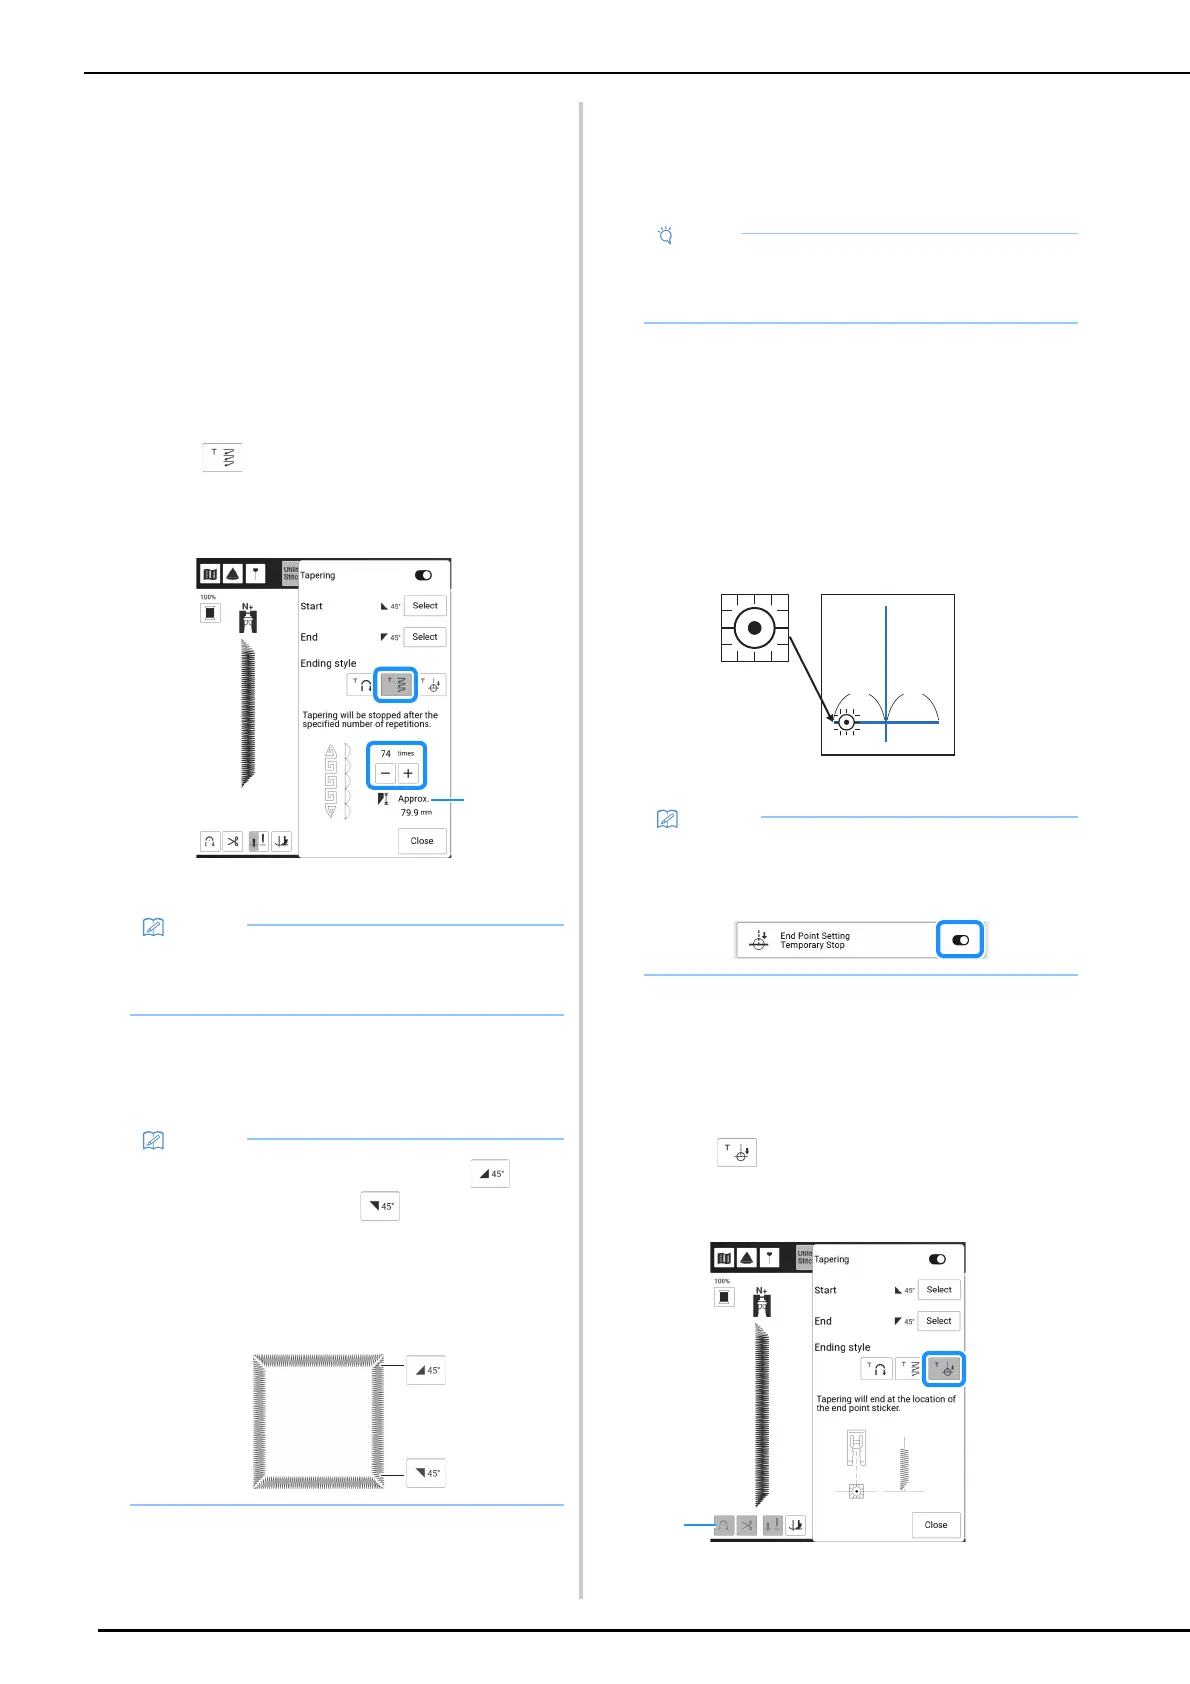
Method 2: Sewing a Specified
Number of Stitch Patterns
With this method, the number of stitch patterns
(including those used to change the angle) are
specified. This allows stitch patterns of the same
length to be repeatedly sewn.
1 Refer to steps 1 through 4 of “Method 1:
Begin Changing the Angle at the End of
Sewing by Pressing the “Reverse Stitch”
Button” on page 98 to select the angle
settings for the start and end of sewing.
2 Touch , and then specify the number
of stitch patterns (including those used
to change the angle).
a Approximate length of the stitch pattern
3 Start sewing.
The machine stops automatically when sewing is
finished.
Method 3: Specifying the Sewing
End Point with an End Point
Sticker
1
With a chalk pencil, mark the fabric with
lines for sewing the stitch pattern and for
the end of stitching.
2 Affix an end point sticker, avoiding the
sewing area. Attach the end point sticker
within 4 cm (approx. 1-1/2 inches) to the
left or right of the chalkline where the end
point for sewing has been drawn.
a 4 cm (Approx. 1-1/2 inches)
3 Refer to steps 1 through 4 of “Method 1:
Begin Changing the Angle at the End of
Sewing by Pressing the “Reverse Stitch”
Button” on page 98 to select the angle
settings for the start and end of sewing.
4 Touch .
* If the key appears in light gray, this function cannot
be used with the selected stitch length.
a Automatic reinforcement stitching function and
automatic thread cutting function are not available.
• The number of stitch patterns used to change
the angle depends on the pattern and angle.
Perform trial sewing to check the result.
• To sew stitching in a square, select for
the start of sewing and for the end of
sewing, and then continue sewing the same
stitch pattern, rotating the fabric 90° after
sewing each line of stitching.
The pivot setting is useful when changing the
sewing direction. (page 72)
• For details on the procedure as well as
precautions, refer to “Specifying the Sewing
End Point” on page 75.
• If you cannot affix an end point sticker
avoiding the sewing area, refer to “Temporary
Stop Setting” on page 77.
 Loading...

