Create the Pattern Using Scanned Images or Image Data Files
242
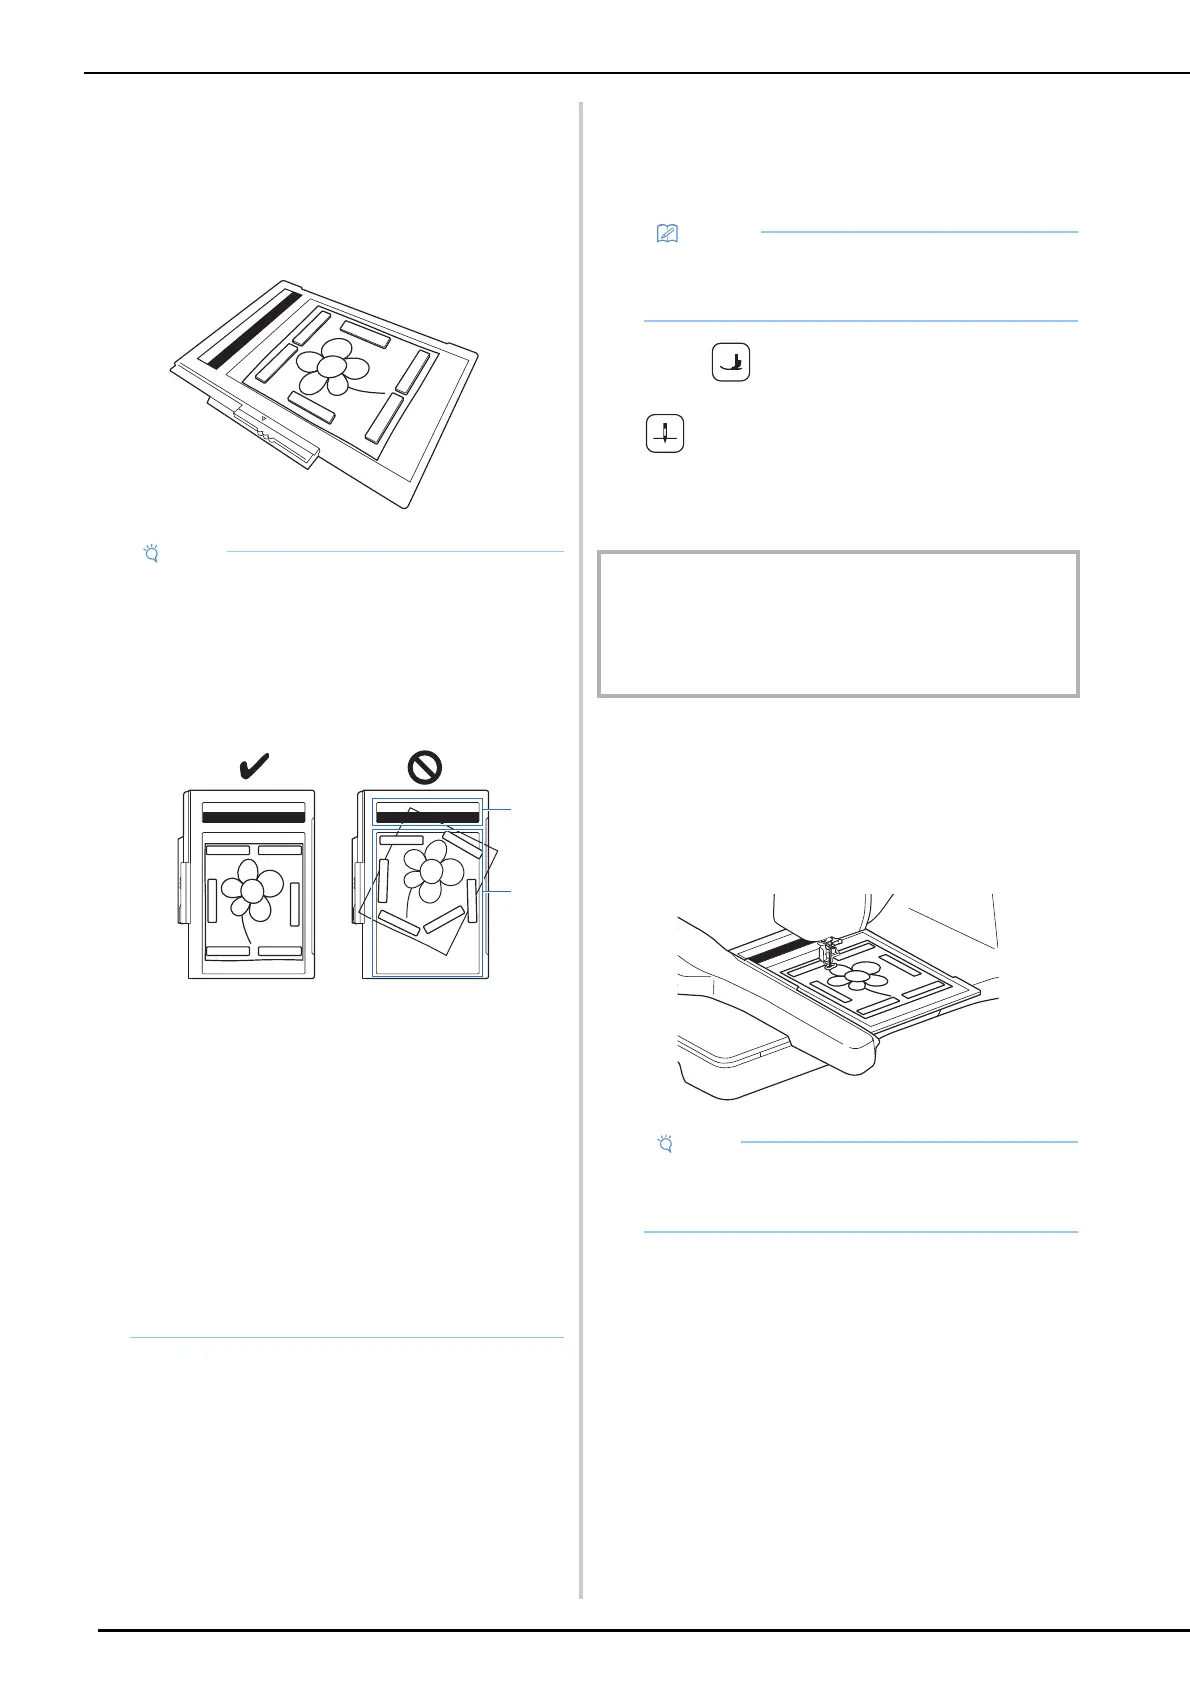
2 Place the paper to be scanned in the
scanning frame, and then secure the
paper in place with the magnets.
* Place the magnets at six locations around the
paper to secure it, making sure that the line
drawing is not covered.
3 Attach the embroidery unit to the
machine, and then turn on the machine.
* Refer to “Attaching the Embroidery Unit” on
page 126.
4 Press (Presser foot lifter button) to
raise the embroidery foot, and then press
(Needle position button) to raise the
needle.
* The embroidery foot is not raised high enough
when raised with the presser foot lever.
5 After attaching the scanning frame to the
embroidery unit, swing the frame-
securing lever toward you to secure the
scanning frame.
* Refer to “Attaching the Embroidery Frame” on
page 131.
• When placing the paper in the scanning frame,
make sure that the white balance area is not
hidden; otherwise, the drawing cannot be
scanned correctly. At the same time, be sure
to place the scan image within the scan area.
The image out of the scan area will not be
scanned.
a White balance area
b Scan area
• Make sure that the white balance area or the
scan area is not dirty or scratched; otherwise,
the image cannot be scanned correctly.
• Be sure to use the magnets which are
included with the scanning frame.
• Be sure to place the magnets so that they
secure the paper firmly. If the paper is placed
unevenly, the image cannot be scanned
correctly.
• If the scanning frame is dirty, gently wipe it
with a soft cloth that has been soaked in
lukewarm water then firmly wrung.
• Unthread the machine to avoid having the
thread slipping out of the needle or getting
caught on the embroidery frame.
IMPORTANT
• Make sure that embroidery foot and needle are fully
raised. If scanning is started with the embroidery foot
and needle lowered, the scanning frame may hit the
machine, causing damage.
• Be sure not to attach any embroidery foot
other than the embroidery foot “W”, otherwise
the embroidery foot will be scanned.