Projecting the Guidelines onto the Fabric
Sewing Basics
69
2
When Arranging Buttonholes
Horizontally
1
Follow steps 1 through 3 of “When
Arranging Buttonholes Vertically” on
page 68.
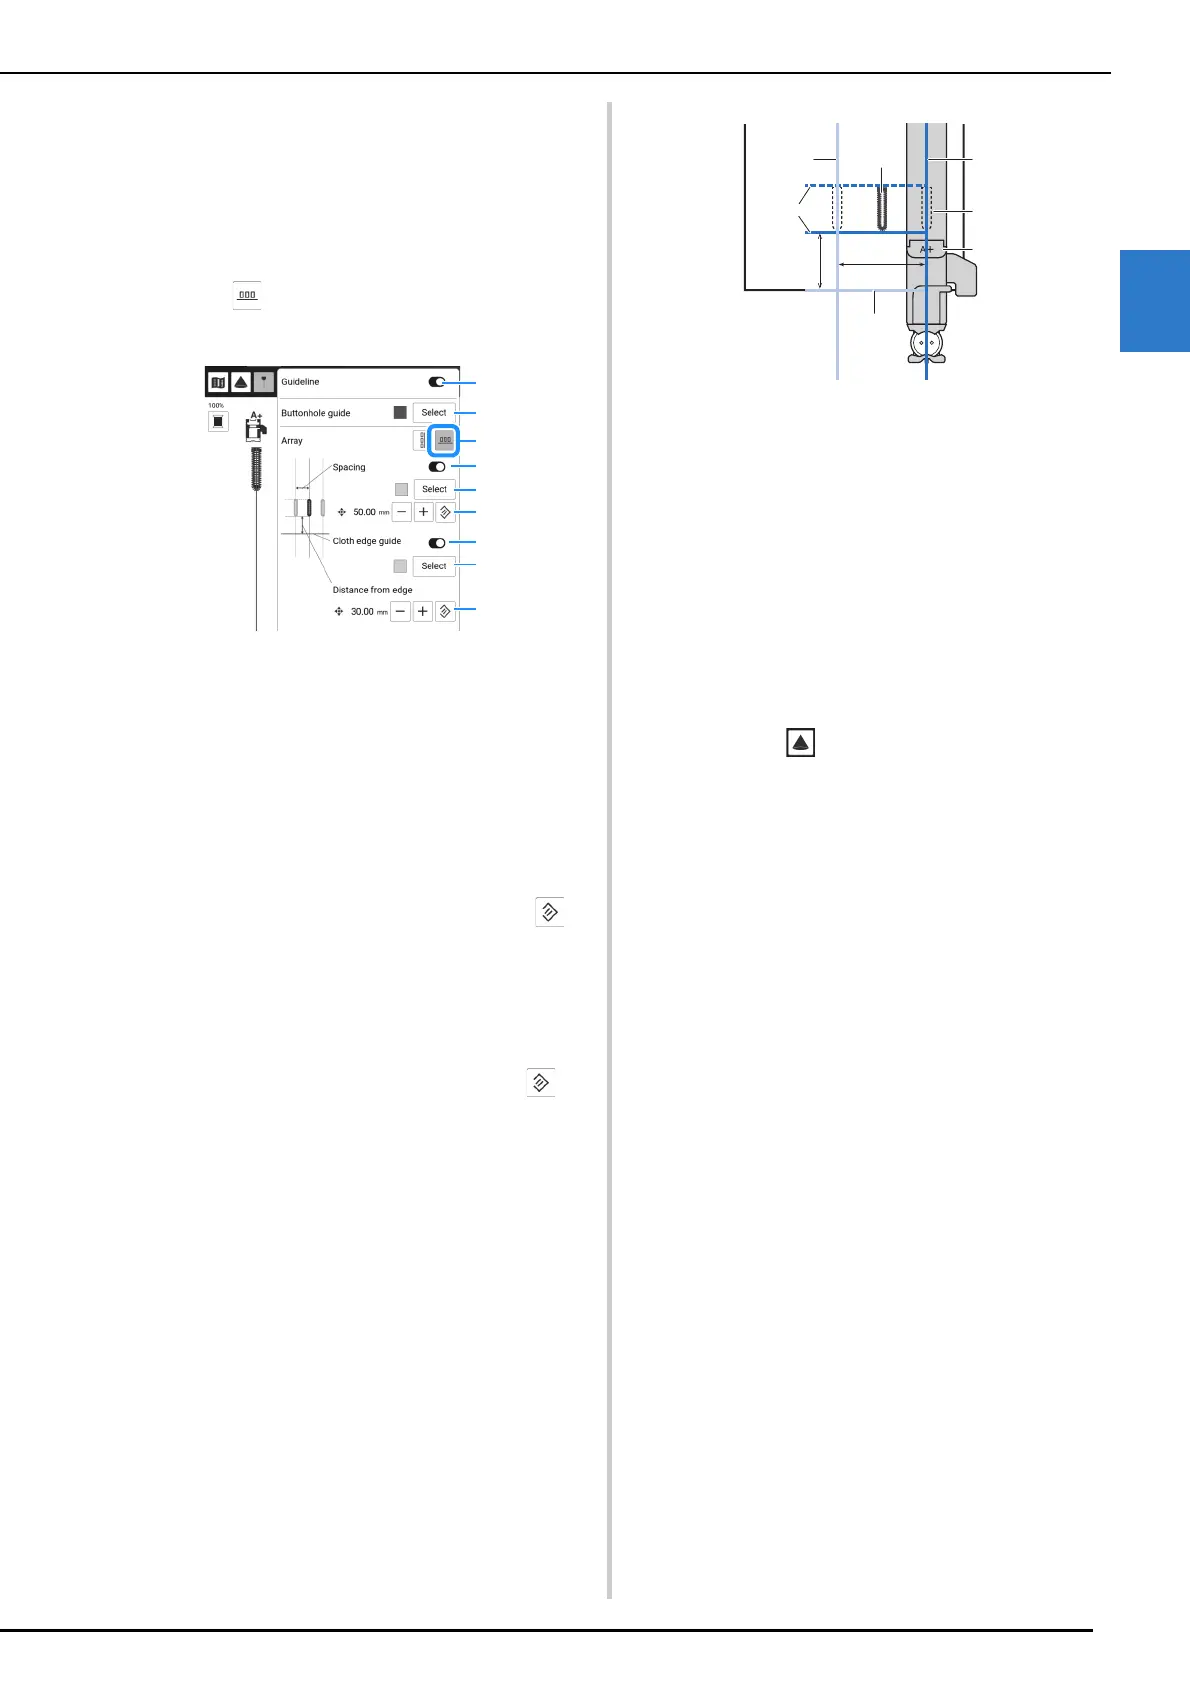
2 Touch and then specify the guideline
settings.
a Turn on or off the guideline function. When this
function is turned on, the main guidelines (*1, *2) in
addition to the sub guidelines (*4, *5) that are
turned on will be projected.
b Select the color of the main guidelines (*1, *2).
c Switches the direction in which buttonholes are
placed.
d Turn on or off the sub guidelines (*4) that show the
spacing of the buttonholes.
e Change the color of the sub guidelines (*4).
f Change the spacing of the buttonholes of the sub
guidelines (*3). To reset the spacing, touch .
g Turn on or off the sub guideline (*5) that shows the
distance from the bottom edge of the buttonholes
to the edge of the fabric.
h Change the color of the sub guideline (*5).
i Change the distance from the bottom edge of the
buttonholes to the edge of the fabric of the sub
guideline (*6). To reset the spacing, touch .
*1
Centerline of the buttonholes (main guideline)
*2
Buttonhole length (main guideline)
*3
Spacing of the buttonholes specified with
[Spacing] (6)
*4
Centerline of next buttonhole to be sewn (sub
guideline)
*5
Edge of fabric (sub guideline)
*6
Distance from the bottom edge of the
buttonholes to the edge of the fabric specified
with [Distance from edge] (9)
*7
Buttonhole foot “A+”
*8
Position of buttonhole to be sewn
*9
Touch to project the selected buttonhole
stitch beside the presser foot. (page 71)
3 Touch [Close].