246 Solution Ultima 844/862/880 Installation Manual
Setting Up and Programming Codepads For Partitioning
Only the CP5 Area Addressable (CP500A) and CP5 Master Partitioned (CP500P) codepads can be
used when partitioning a
Solution Ultima 880 control panel.
Setting Up The Master Partitioned Codepad As The Main Codepad.
If you are using the CP5 Master Partitioned (CP500P) codepad as the main codepad when
partitioning, you need to connect the codepad to the main codepad terminals (CP-, CP+, CLK and
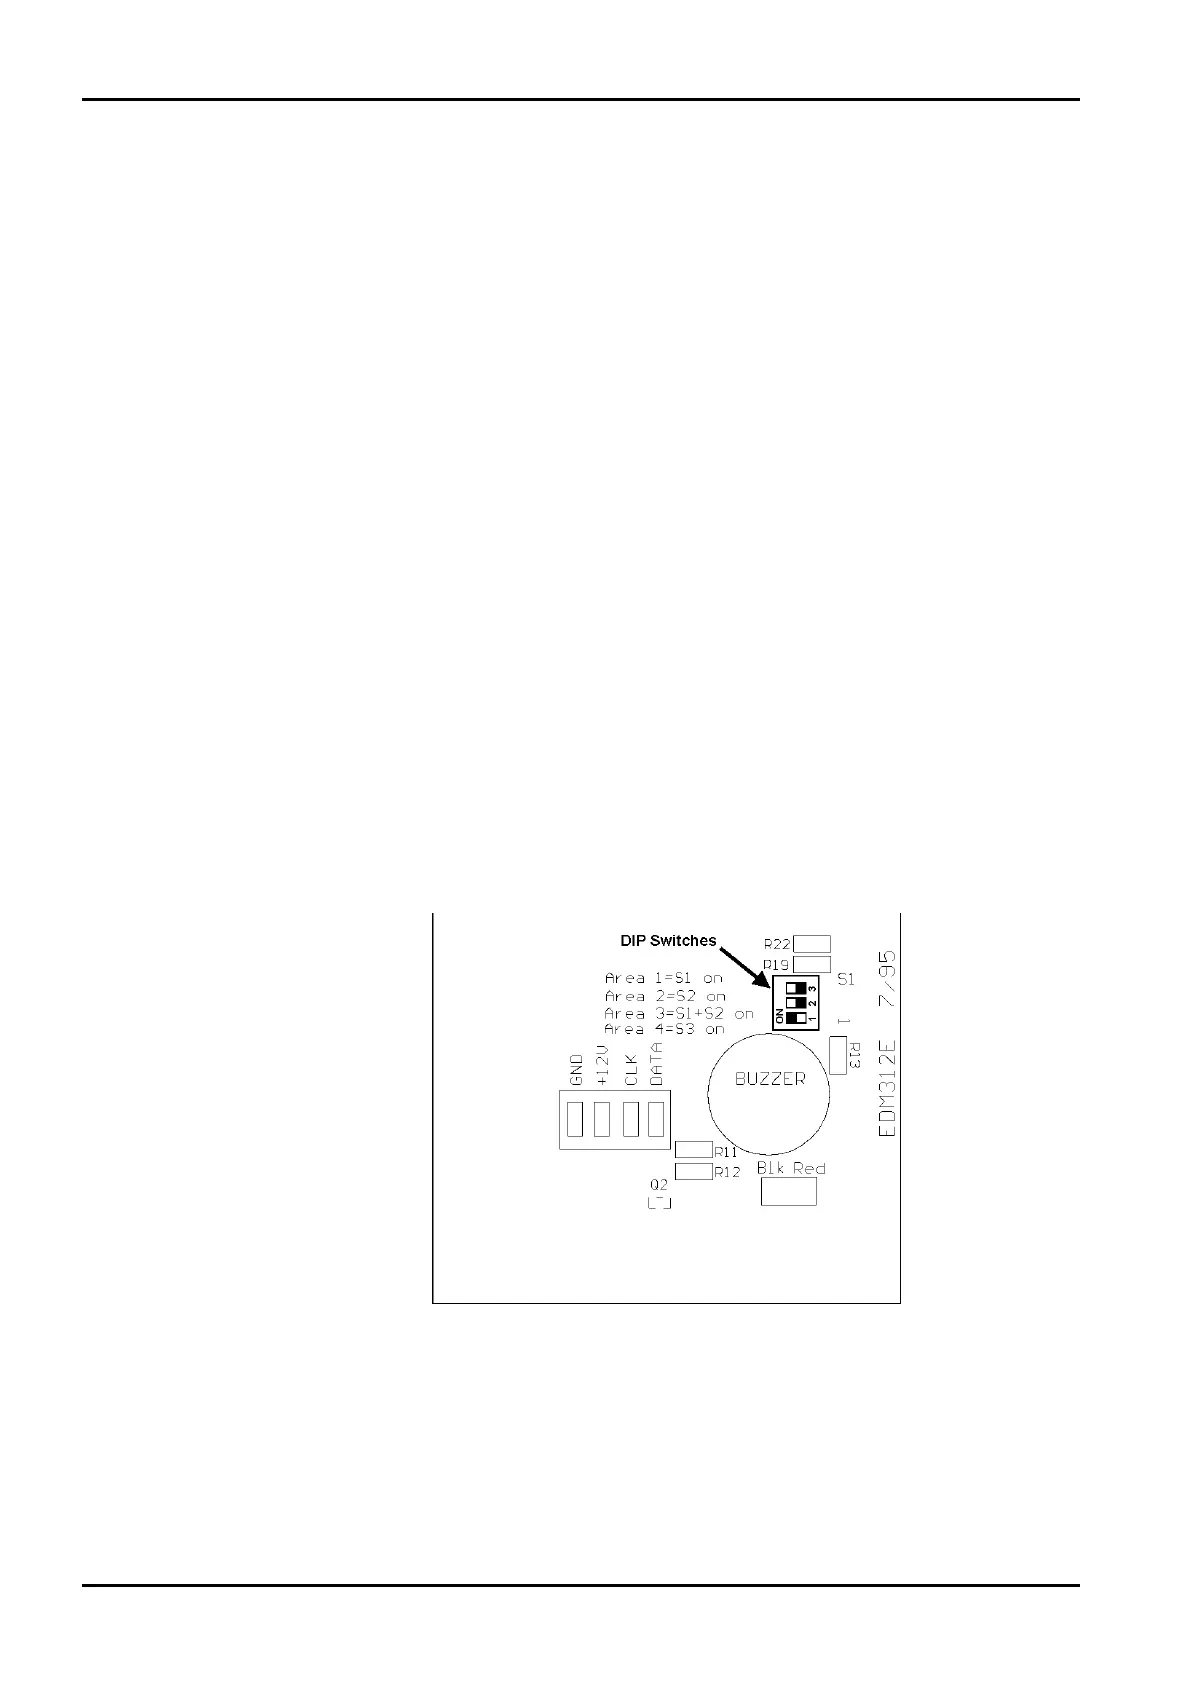
DATA). All DIP switches on the back of the codepad will need to be set to the ON position.
Setting Up An Area 1 Codepad As The Main Codepad
If you are not using the CP5 Master Partitioned codepad as the main codepad of the partitioned
system, you need to connect the Area 1 codepad to the main codepad terminals (CP-, CP+, CLK and
DATA). In addition to setting up the Area 1 Codepad, you will need to set DIP switch 1 on the back
of the codepad into the ON position and enable Option 2 in “LOCATION 444” on page 241.
Setting Up An Area 1 Codepad
If you wish to have a separate area codepad only for Area 1 when using the CP5 Master Partitioned
codepad as the main codepad, you will need to connect the Area 1 codepad to the main codepad
terminals (CP-, CP+ and CLK) with the DATA terminal to be connected to one of the programmable
outputs programmed as “6,0 – Area 1 Codepad Data”. DIP switch 1 on the back of the Area 1
codepad will need to be in the ON position.
Setting Up An Area 2 Codepad
If you wish to have a separate area codepad only for Area 2, you will need to connect the Area 2
Codepad to the main codepad terminals (CP-, CP+ and CLK) with the DATA terminal to be
connected to one of the programmable outputs programmed as “6,1 – Area 2 Codepad Data”. DIP
switch 2 on the back of the Area 2 codepad will need to be in the ON position.
Figure 16: DIP Switch Location On Back Of Codepad PCB
ISSUE162.DOC Electronics Design and Manufacturing Pty Limited