6/7
6. Electrical parts
66006
66006
Description of PCB (printer section)
15. Configure the Time setting in Machine Specification→Functions→Program Timer Setting.
16. Quit the printer maintenance application.
NOTE
• If the IP Address of the PC and the printer differ, the message Communication line was disconnected. Close the
maintenance screen. may be shown. However, the system will normally returns if Step 17 is performed.
• It may take about one minute to quit the printer maintenance application.
17. If IP Address, subnet mask and Default gateway have been changed to replace the printer I/F main
PCB, return the settings as below.
(1) If the environment for connecting the operation PC and printer I/F main PCB have been temporarily changed in
Step 1 of How to change settings if several printers are connected, return the settings as they were.
(2) Return the settings of IP Address, Subnet mask and Default gateway noted in Step (3) of Step 9.
(3) Check if the printer maintenance application starts normally.
18. Confirm if prints are normally made from the EZ Controller or the Noritsu Quick Access.
19. End
!
!!
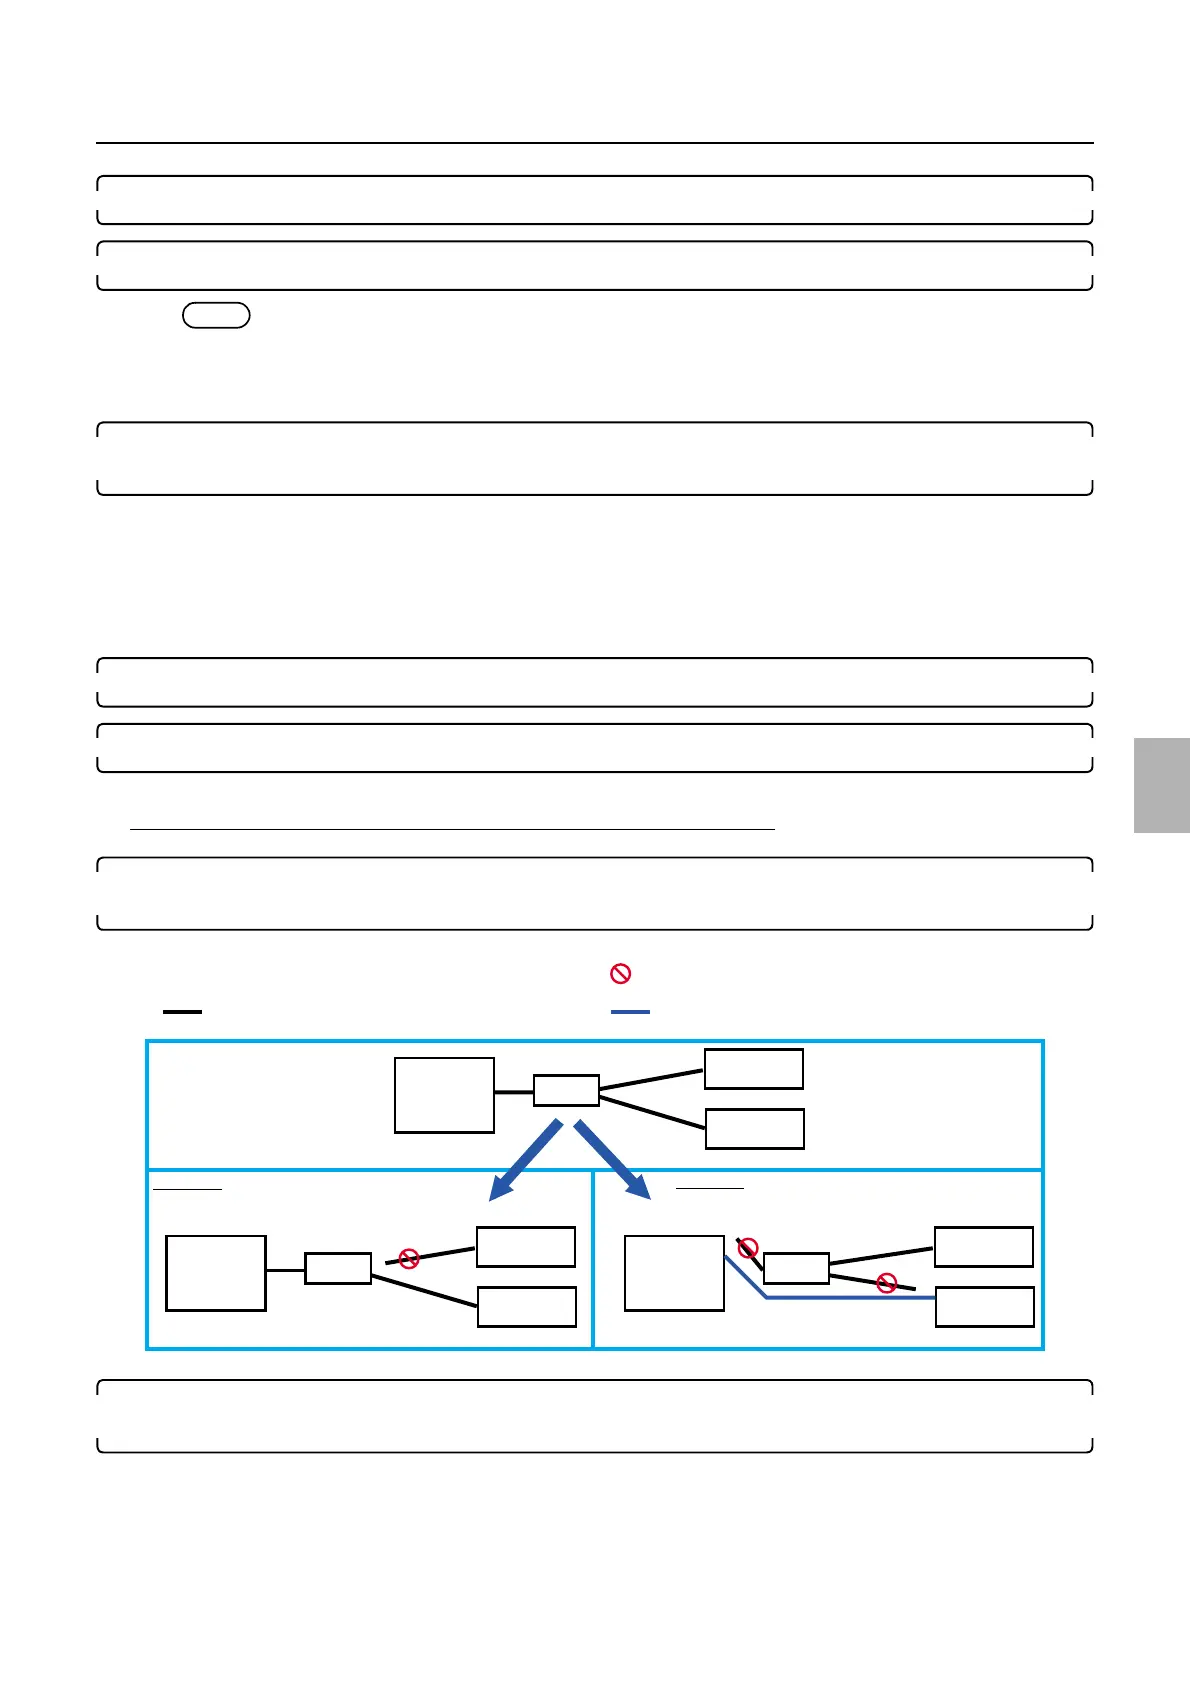
! How to change settings if several printers are connected
1. If several printers are connected, temporarily prepare the environment so that the operation PC can
connect the printer I/F main PCB one on one.
2. If the operation PC and the printer I/F main PCB are directly connected when the network is being
established as an example 2, confirm the Advanced setting in the Computer Management.
Bringing up the display
Start → Right-Click My Computer. → Manage (G) → Click Device Manager. → Double-click Network adapters. →
Right-click Ineel# # #. → Click Properties. → Click Advanced.
PC
HUB
PC
PC
HUB
HUB
Printer
Printer
Printer
Printer
Printer
Printer
Printer
Straight cable
Cross cable
Replacing the printer I/F main PCB
Disconnect the cable.
Example 2
Example 1
G085196
Distributed by: minilablaser.com