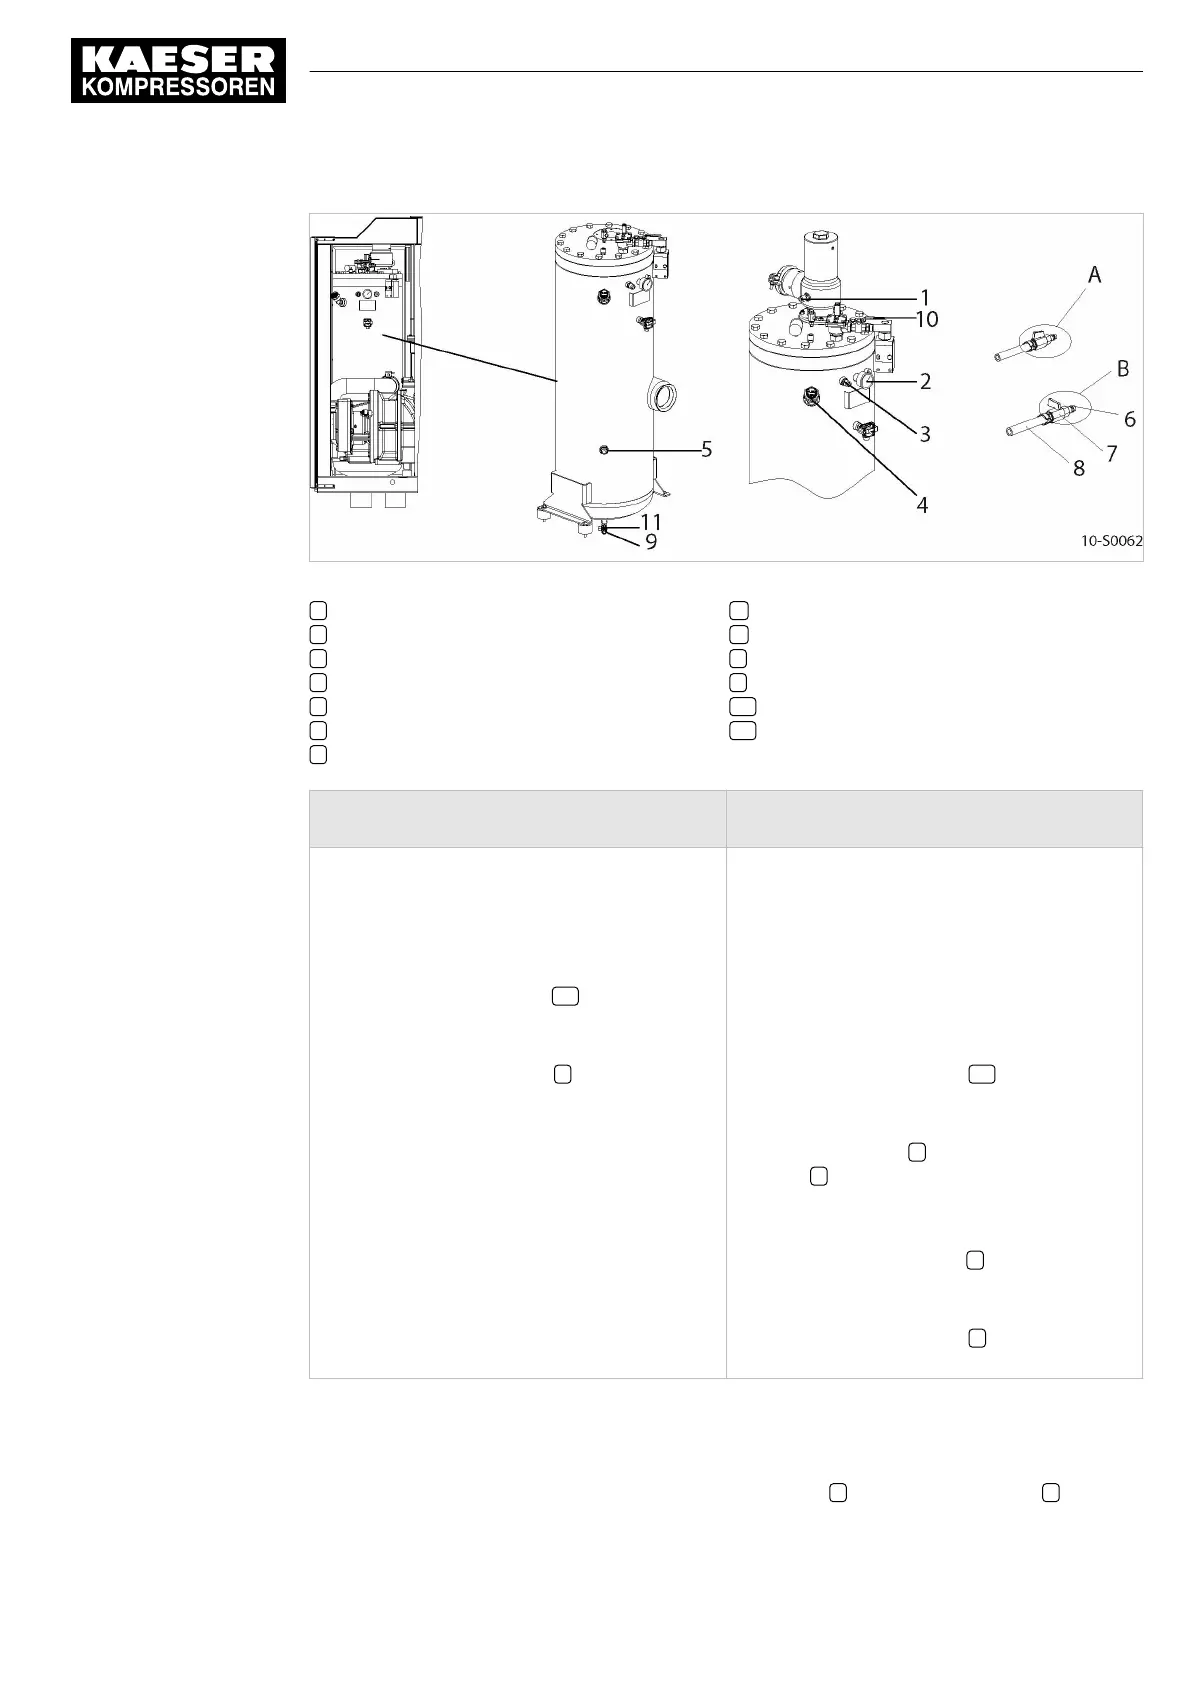
Fig. 30 Changing the cooling oil, oil separator tank
1 Hose coupling (air cooler venting)
2 Pressure gauge
3 Hose coupling (oil separator tank venting)
4 Oil filler port with plug
5 Cooling oil level indicator
6 Plug-in nozzle
7 Shut-off valve
A Shut-off valve open
B Shut-off valve closed
8 Maintenance hose
9 Hose coupling (oil drain)
10 Shut-off valve (venting line)
11 Shut-off valve (oil drain)
Oil change using the internal pressure Changing the cooling oil with the help of exter‐
nal gas
Machine has been running at least 5 minutes
under LOAD.
The machine is fully vented,
the pressure gauge on the oil separator tank
reads 0 bar.
1. Close the shut-off valve 10 in the venting
line.
2. Start the machine and watch the oil separa‐
tor tank pressure gauge 2 until it reads 3–
5 bar.
3. Switch off and lock out the power supply
disconnecting device and verify the absence
of any voltage.
4. Wait at least 2 minutes to allow the oil to
flow back to the separator tank.
The power supply isolating device is switched
off,
the device is locked off,
the absence of any voltage has been verified.
The machine is fully vented,
the pressure gauge on the oil separator tank
reads 0 bar.
External source of gas pressure available.
1. Close the shut-off valve 10 in the venting
line.
2. With the shut-off valve closed, insert the
male hose fitting 6 into the hose cou‐
pling 3 .
3. Connect the maintenance hose to the exter‐
nal gas supply.
4. Open the shut-off valve 7 until the pressure
gauge on the oil separator tank reads 3–
5 bar.
5. Close the shut-off valve 7 and remove the
male hose fitting from the coupling.
Draining the oil from the separator tank
1. Have an oil receptacle ready.
2. With the shut-off valve closed, insert the male hose fitting 6 into the hose coupling 9 .
10 Maintenance
10.16 Changing the cooling oil
ESD_2C_10357405_10–LIN_00 E
Service Manual Screw Compressor
ESD 442/14 bar (abs) SFC SIGMA CONTROL 2
71



 To Next Page