2. Press «Enter» to switch into setting mode.
Input
flashes.
3. Select the relevant input with the «UP» or «DOWN» keys.
4. Press «Enter» to accept the setting.
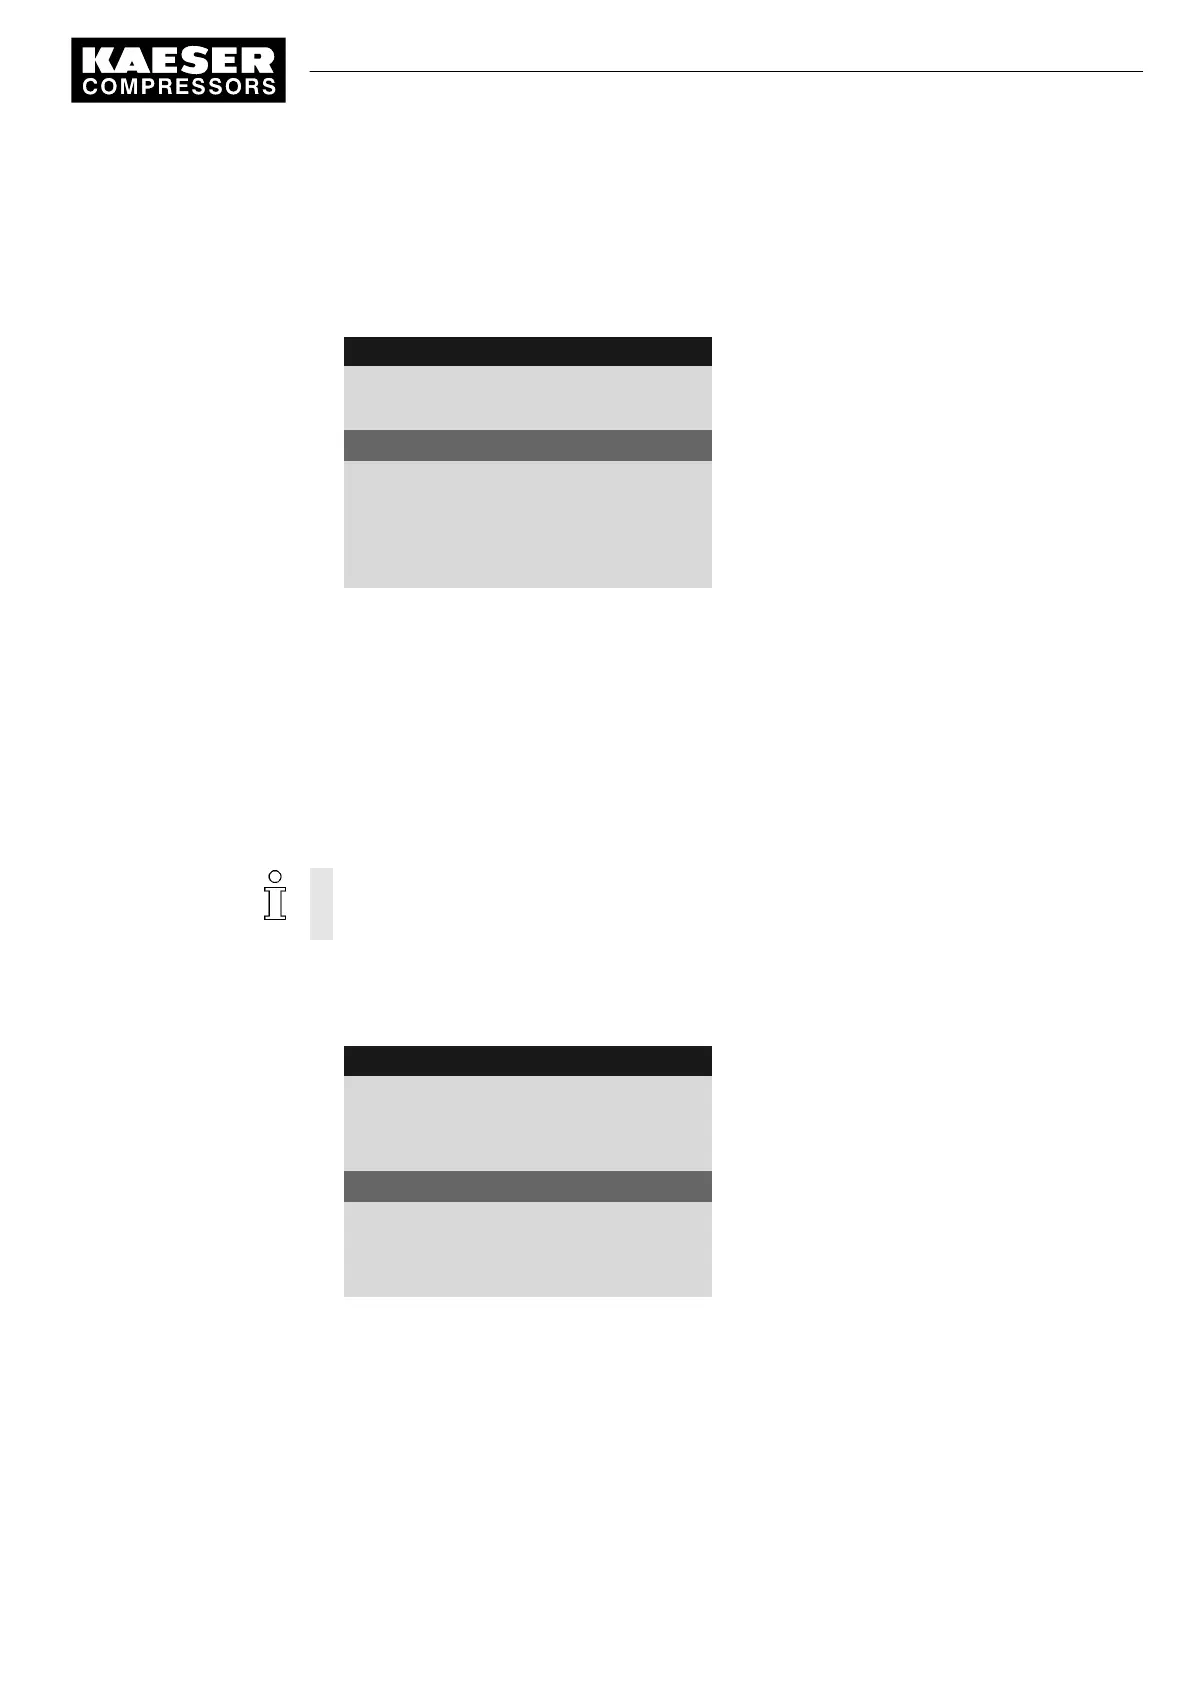
8 9 p s i 0 8 : 1 5 1 7 6 ° F
5.7.3.1 External message 1
Menu
External message 1
Message name
DI 1.11 ok ☑
Input is selected and activated
td : 0 s ¦ Logic +
Logic
DOR 1.04 ☐
Alarm ☑
Example: Fault message type
5. Press the «Right» key.
6. Press «Enter» to switch into setting mode.
The check box will flash.
7. Press «UP» to activate the check box.
8. Press «Enter» to accept the setting.
ok
is displayed.
The input is assigned and activated.
7.11.3.4 Setting the time delay
The delay can be set between 0.01 and 600 seconds. The delay is counted down from 600
with the «DOWN» key and counted upwards from zero in 0.01 second increments with the
«UP» key.
1. Press «DOWN» once.
2. Press «Enter» to switch into the setting mode for the time delay.
The display for the delay time flashes.
8 9 p s i 0 8 : 1 5 1 7 6 ° F
5.7.3.1 External message 1
Menu
External message 1
DI 1.11 ok ☑
td :1 s ¦ Logic +
Active line, set time delay
DOR 1.04 ☐
Alarm ☑
3. Select the required delay time with the «UP» key.
4. Press «Enter» to accept the setting.
Result The delay time is set.
7 Initial Start-up
7.11 Configuring input and output signals
9_9450 03USE
Service manual Controller
SIGMA CONTROL 2 SCREW FLUID 1.1.3
131




 To Next Page