215184 251 Revision A
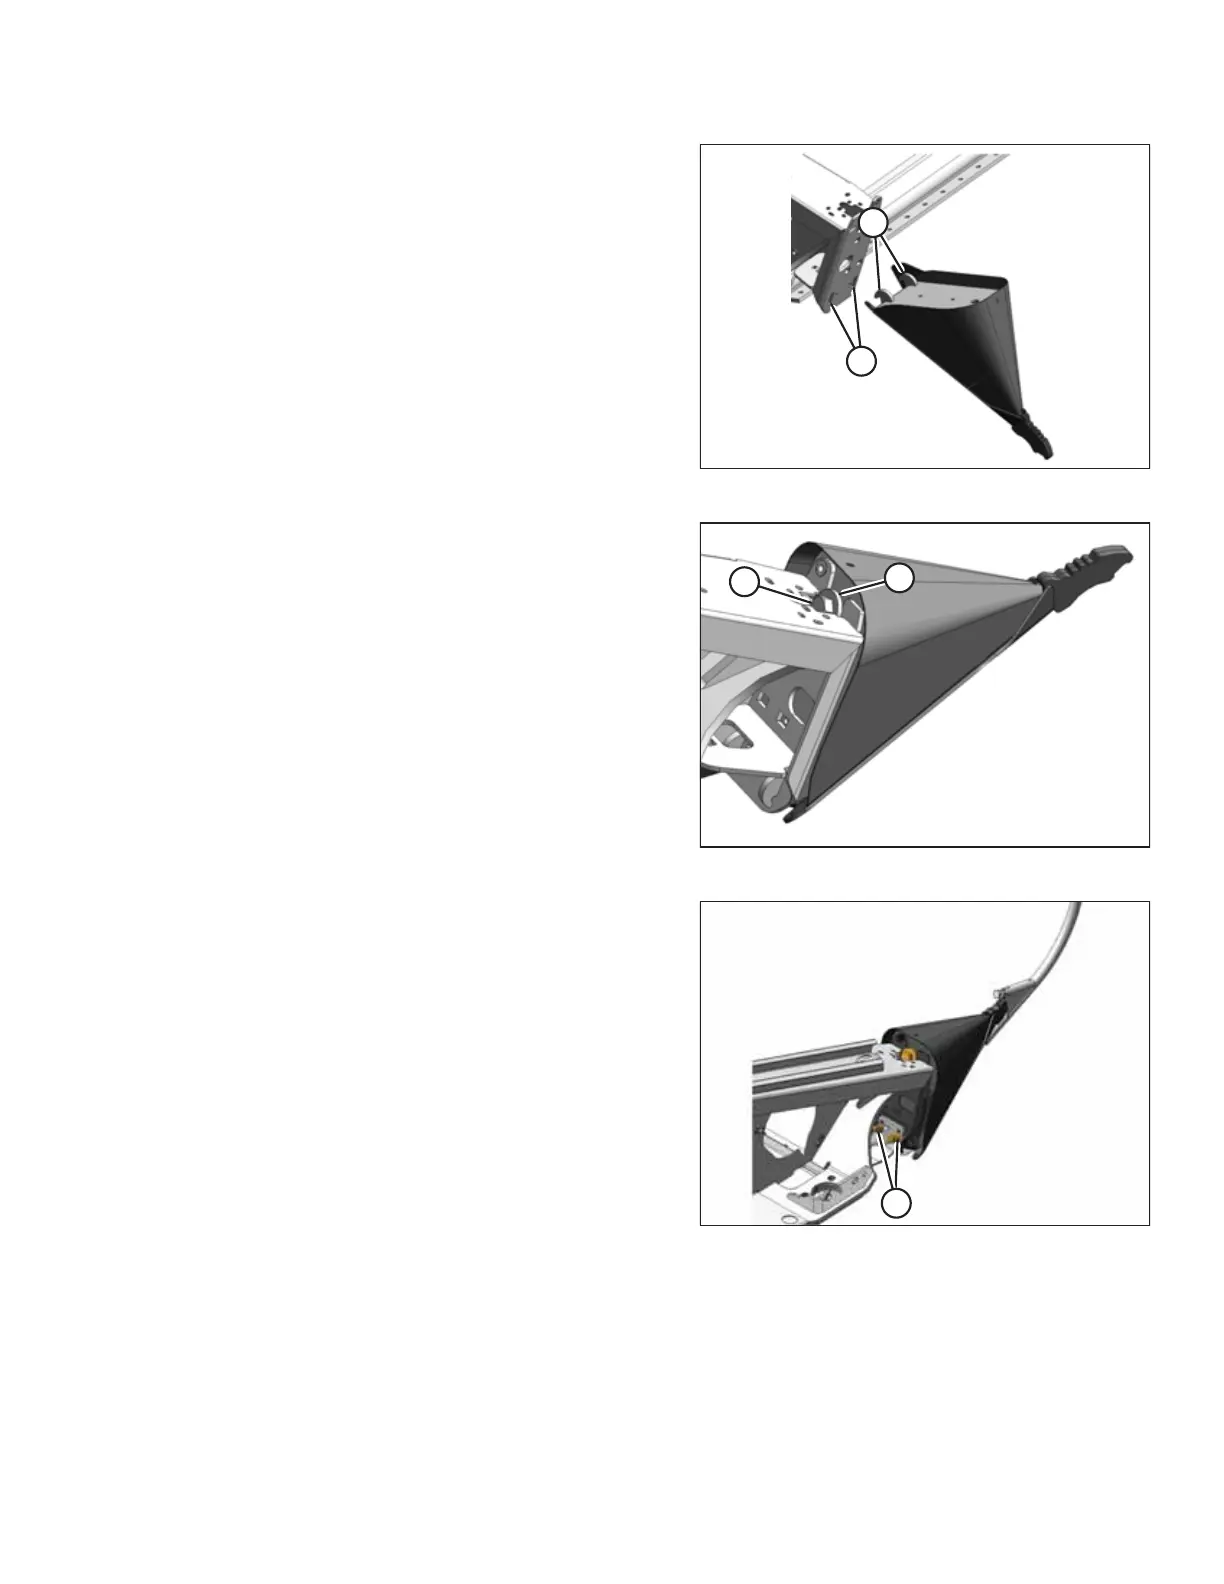
Figure 7.107: Crop Divider without Latch
1. Position crop divider as shown by inserting lugs (A) into
holes (B) in endsheet.
Figure 7.108: Crop Divider without Latch
2. Lift the forward end of the crop divider and install bolt (B)
and special stepped washer (A) (step towards divider).
Tighten bolt.
Figure 7.109: Crop Divider Adjustment
3. Check that divider does NOT move laterally. Adjust bolts (A)
as required to tighten divider, and remove lateral play when
pulling at divider tip.
ATTACHING HEADER TO COMBINE