215184 265 Revision A
Figure 8.11: Knife Drive – Left Side
6. After achieving the proper belt tension, tighten nuts (C) to
73–80 Nm (54–59 lbf·ft).
7. Remove pry bar (A) and piece of wood (B).
8. Readjust the tension of a new belt after a short run-in
period (about 5 hours).
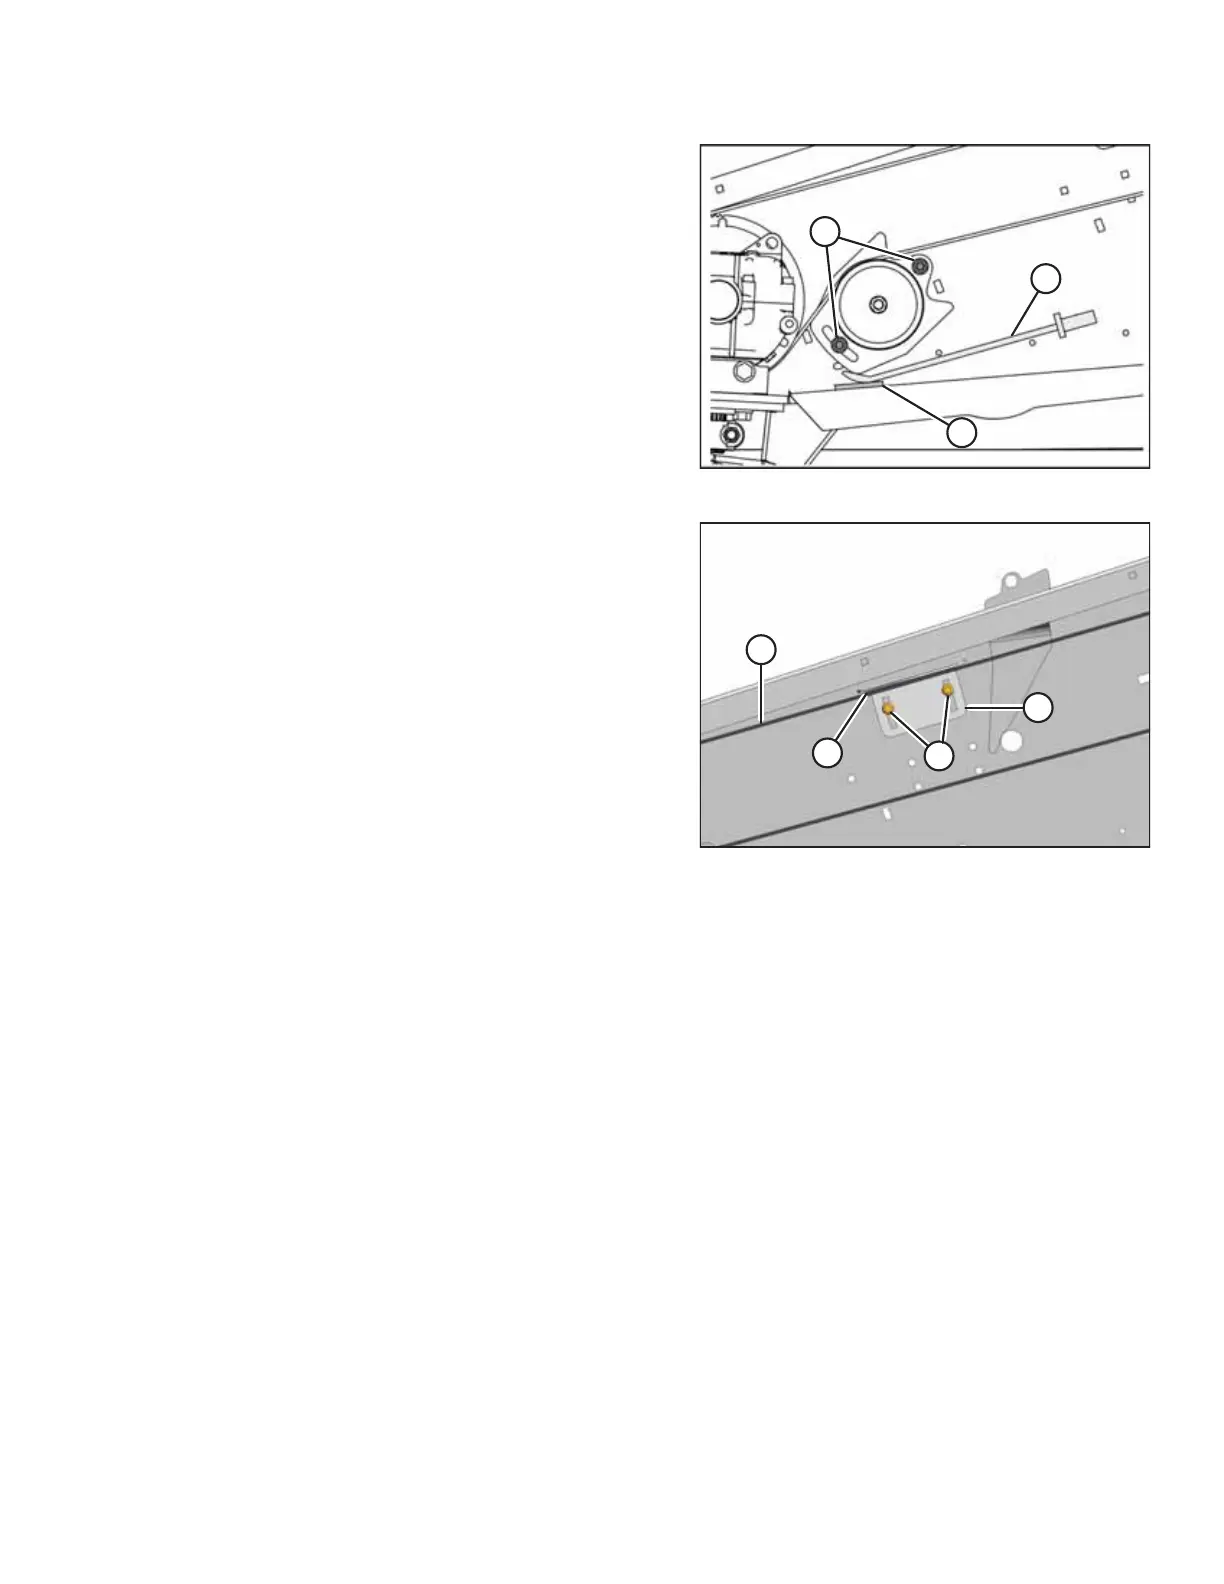
Figure 8.12: Belt Guide – Left Side
9. Ensure clearance (A) between belt (B) and guide (C) is
0.5–1.5 mm (1/32–1/16 in.).
10. Loosen bolts (D) and adjust the guide if necessary.
Tighten bolts.
11. Close the endshield.
12. Repeat procedure for the opposite side of the header.
PERFORMING PREDELIVERY CHECKS