3.
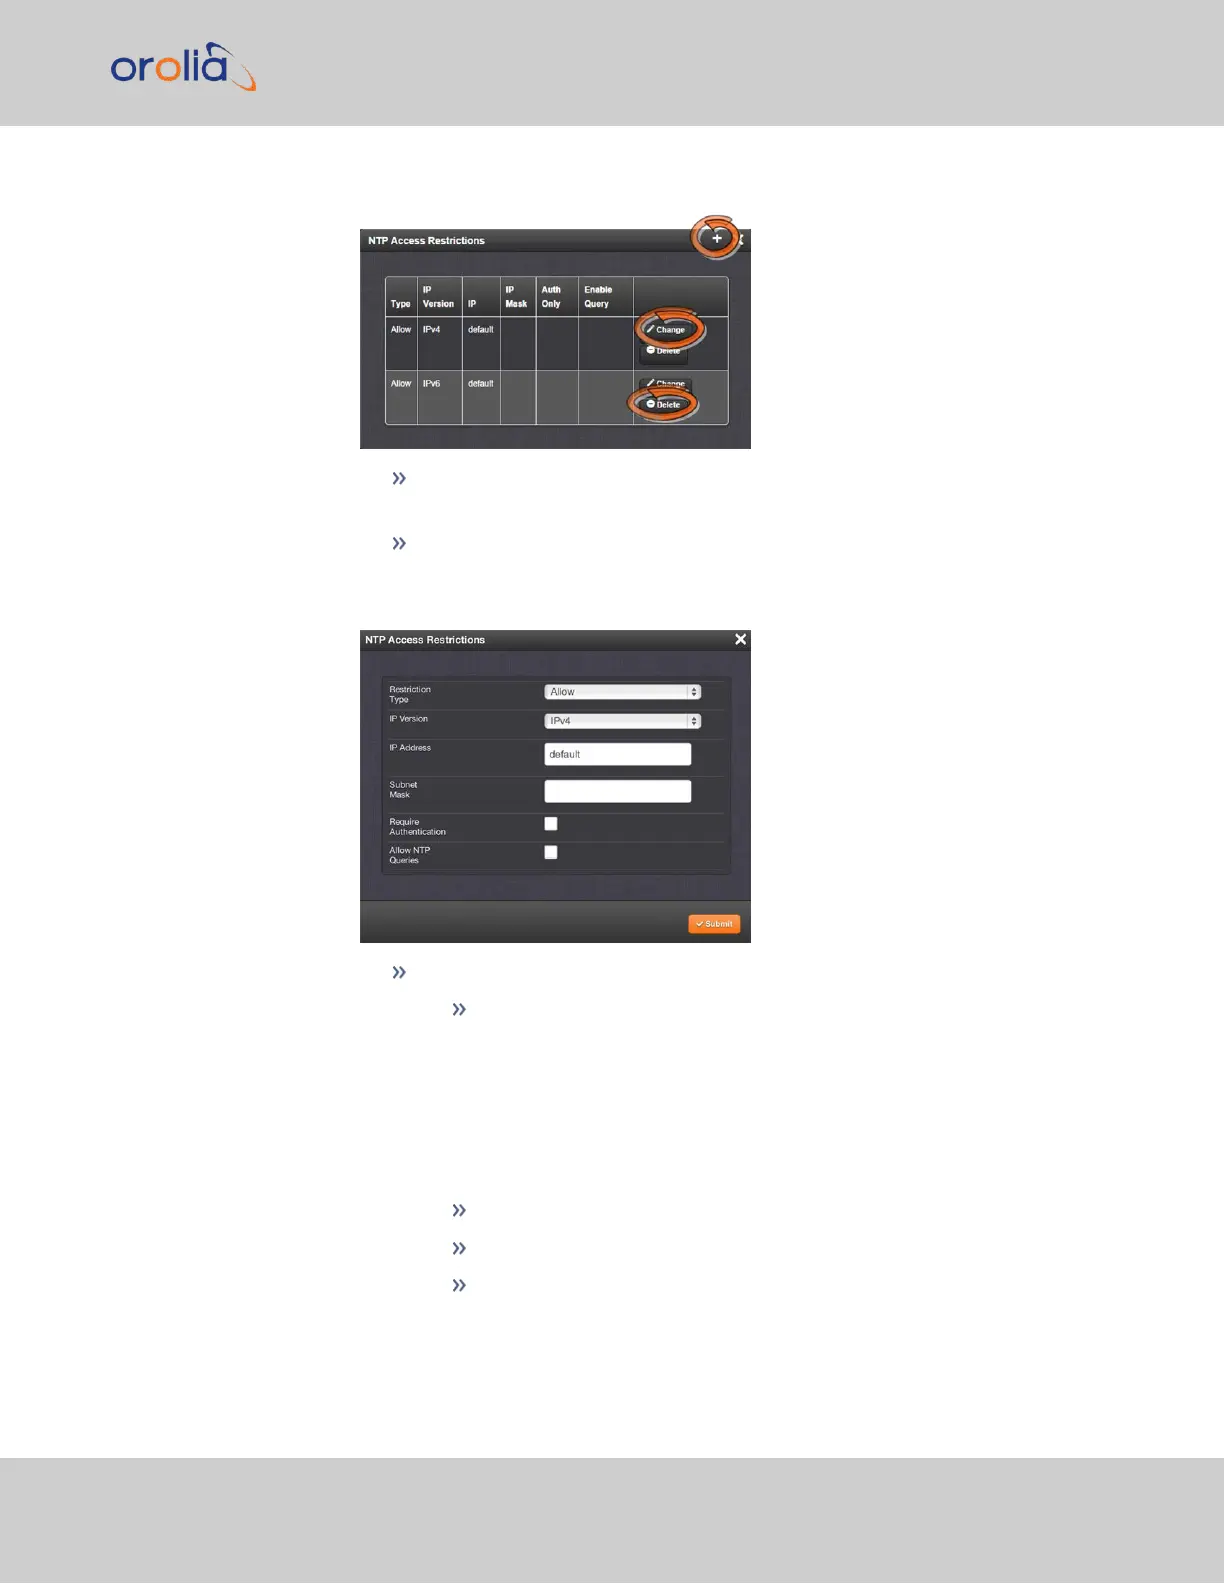
The NTP Access Restrictions Status window will display:
To ADD or EDIT an access restriction, click the PLUS icon or the Change but-
ton, respectively, and proceed to Step4. below.
To DELETE an access restriction, click the corresponding Delete button, and
confirm by clicking OK.
4.
The NTP Access Restrictions window will display:
Fill in the fields:
Restriction Type—Choose either Allow or Deny.
If you select “Deny”, the configured portion of the network will not
have NTP access to SecureSync, but the rest of the network will have
access to SecureSync. If you select “allow”, the configured portion of
the network will have NTP access to SecureSync, but the rest of the
network will not have access to SecureSync. By default, SecureSync
allows all IPv4 and IPv6 connections.
IP Version—Choose IPv4 or IPv6
IP Address—Enter the appropriate hostname.
Subnet Mask—Enter the appropriate IP mask.
2.15 Configure NTP
CHAPTER 2 • SecureSync 2400 User Manual Rev. 2
115