to the right).
B.
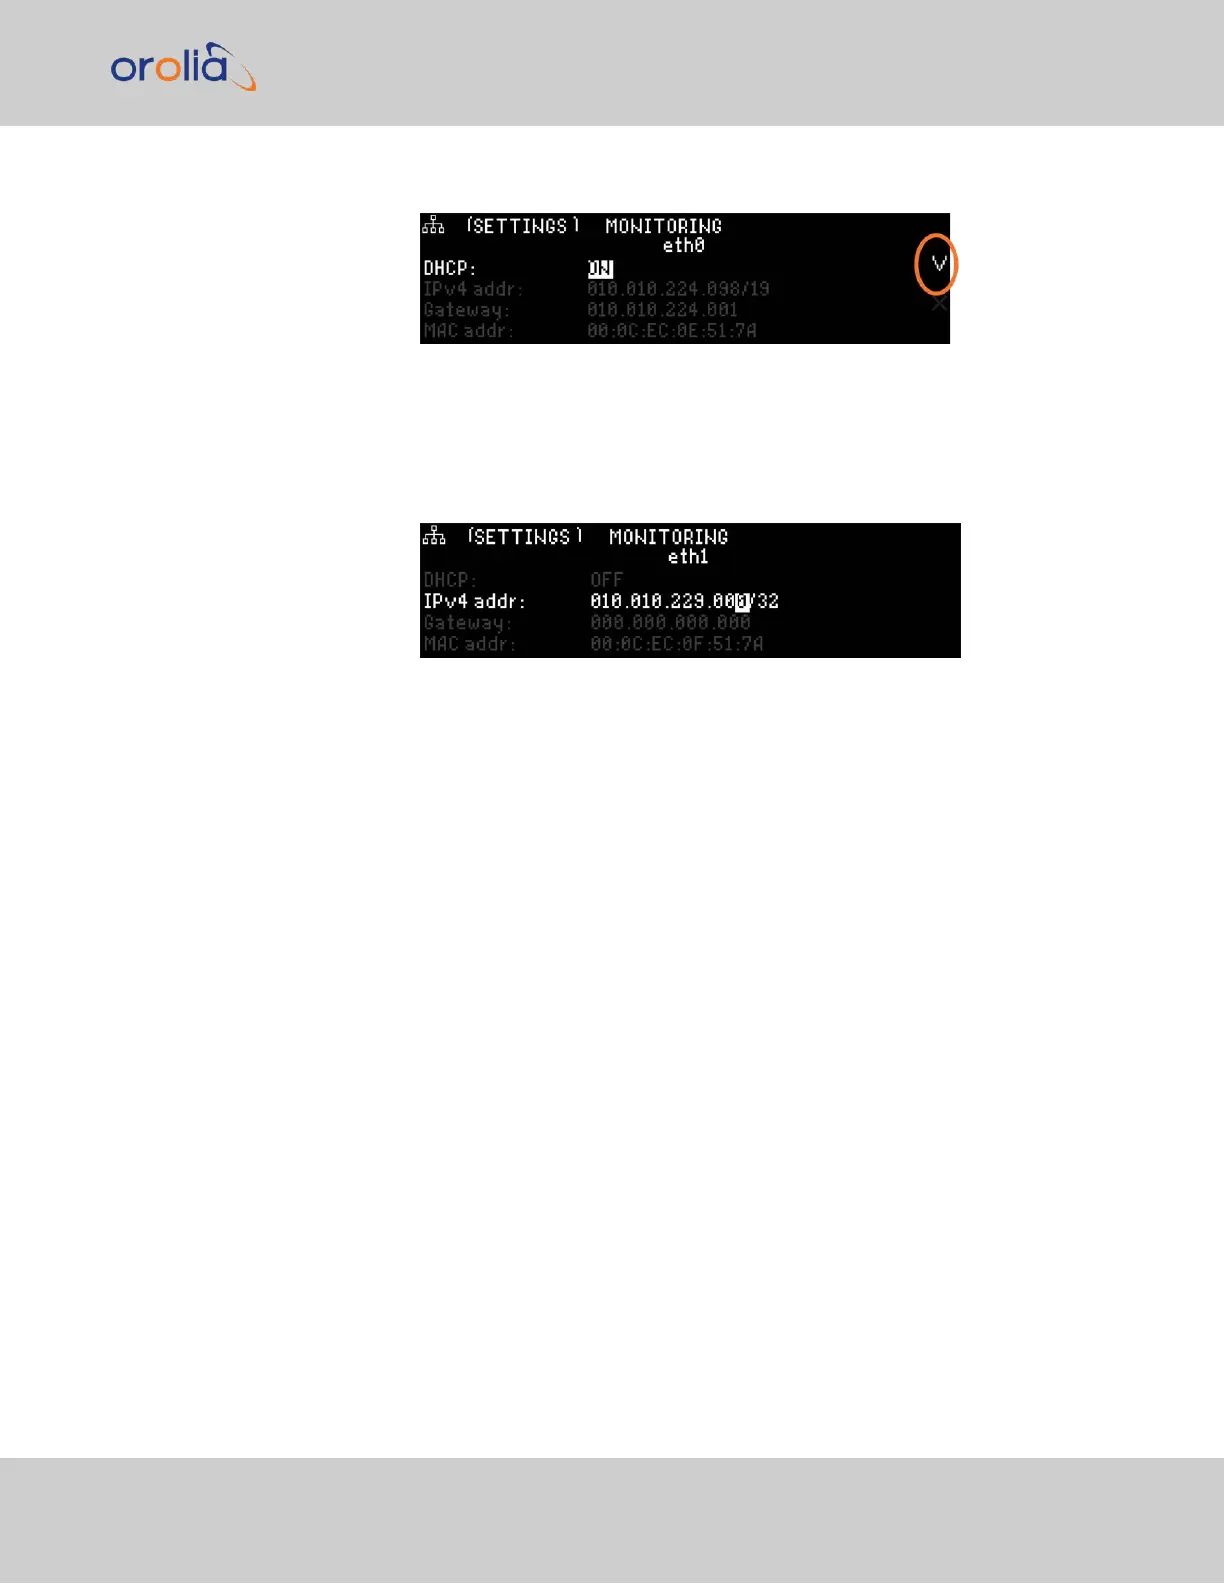
Enter IP Address and Subnet Mask:
1.
Select the IPv4 Address row, press ENTER to allow changes, and use the
up and down arrows to change 000.000.000.000/00 to the value of the
static IP address and subnet mask/network bits to be assigned (for a list of sub-
net mask values refer to the table "Subnet mask values" on page55).
2.
Press the ✓ ENTER key once to enter the setting, then again to confirm the
new setting in the confirmation menu.
C.
Enter the Gateway Address (if required)
1.
Highlight the gateway row. Press the ✓ key once to enter the setting.
2.
The display will change, allowing you to input an address at
000.000.000.000. Enter the gateway address here. The address entered
must correspond to the same network IP address assigned to SecureSync.
The remainder of the configuration settings can be performed via the Web UI (accessed
via an external workstation with a web browser such as Firefox
®
or Chrome
®
). For more
information, see "The Web UI HOME Screen" on page30.
2.12.2.2 Setting Up a Static IP Address via a DHCP Network
To setup a permanent static IP address, after connecting SecureSync to a DHCP network:
1.
Enter the IP address shown on the front panel information display of your
SecureSync unit into the address field of your browser (on a computer connected to
the SecureSync network). If the network supports DNS, the hostname may also be
entered instead (the default hostname is "Spectracom"). The start screen of the
SecureSync Web UI will be displayed.
2.
Log into the Web UI as an administrator. The factory-default user name and pass-
word are:
Username: spadmin
2.12 Setting up an IP Address
CHAPTER 2 • SecureSync 2400 User Manual Rev. 2
53