Note: Important! SecureSync is earth grounded through the AC power con-
nector. Ensure SecureSync is connected to an AC outlet that is connected
to earth ground via the grounding prong (do not use a two prong to three
prong adapter to apply AC power to SecureSync).
2.9.2 Hotswap Power Supply
DANGER! Remove the connected power source BEFORE attempting to
remove a power sled for replacement.
Caution: Only use Orolia-approved replacement parts. Incorrect parts may
cause damage to the product.
The hot swap power supply option consists of two sleds with redundant power systems.
Each sled has identical power ratings. When both power supplies are active, the electrical
draw is shared between the two sleds. If one power supply is damaged or removed, the
other sled will automatically take the entire power load without any necessary con-
figuration.
You can view or the status of the power supplies through the Web UI. The main Power
light indicates whether the unit has at least one active, legitimate power supply.
The Hotswap Status Window for each sled contains a Valid indicator light, the Power
Type, Fan Enabled/Disabled, the Fan PWM and Speed, and the Temperature, Voltage, and
Current statuses for each power supply.
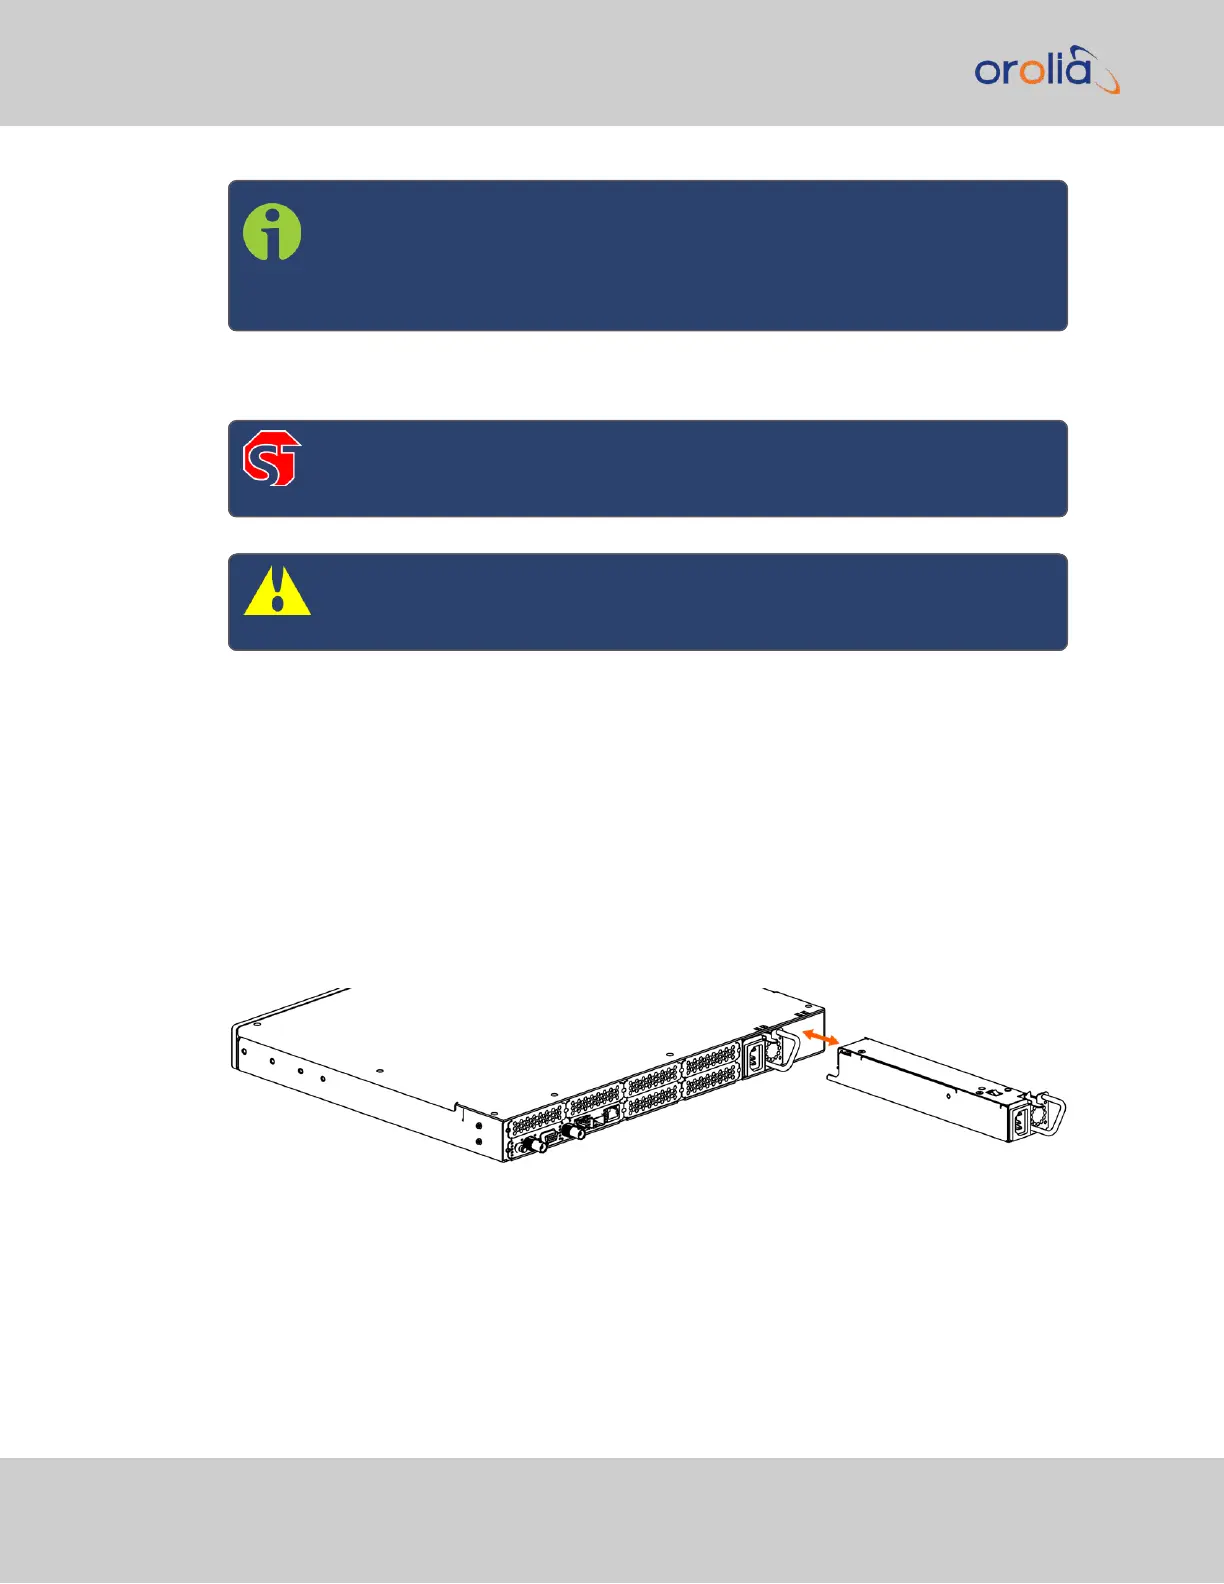
Figure 2-1: Hot Swap Power Supply installation (rear view)
To remove a power supply sled, first unplug the power input to be removed. Then, press
the lever fully down and pull on the handle.
To install a power supply, insert the sled until the latch clicks and the rear panel of the
supply is aligned with the rear panel of the SecureSync.
46
CHAPTER 2 • SecureSync 2400 User Manual Rev. 2
2.9 Connecting Supply Power