7.
Verify that the update was successful: Navigate to Tools > Upgrade/Backup, and
confirm the new SW version in the System Configuration panel.
Note: Should you use DHCP, a new IP address may be assigned to your unit,
and you may have to point your web browser to it.
Note: In the event that the update failed, see "Troubleshooting Software
Update" on page332.
4.6.2 Applying a License File
Software options must be activated by applying a license file (OPT-xyz):
Typically, SecureSync units are shipped with the license file pre-installed, reflecting the sys-
tem configuration as ordered. If, however, a feature is to be activated after delivery of the
SecureSync unit, please contact your local Orolia Sales Office first to have a license file gen-
erated. License files are archive files with a tar.gz extension. One license file may con-
tain multiple licenses for multiple products.
To apply the license file, you need to upload it into your SecureSync unit and install it:
1.
Save the license file license.tar.gz to a location on your PC (which needs to be
connected to the same network SecureSync is.)
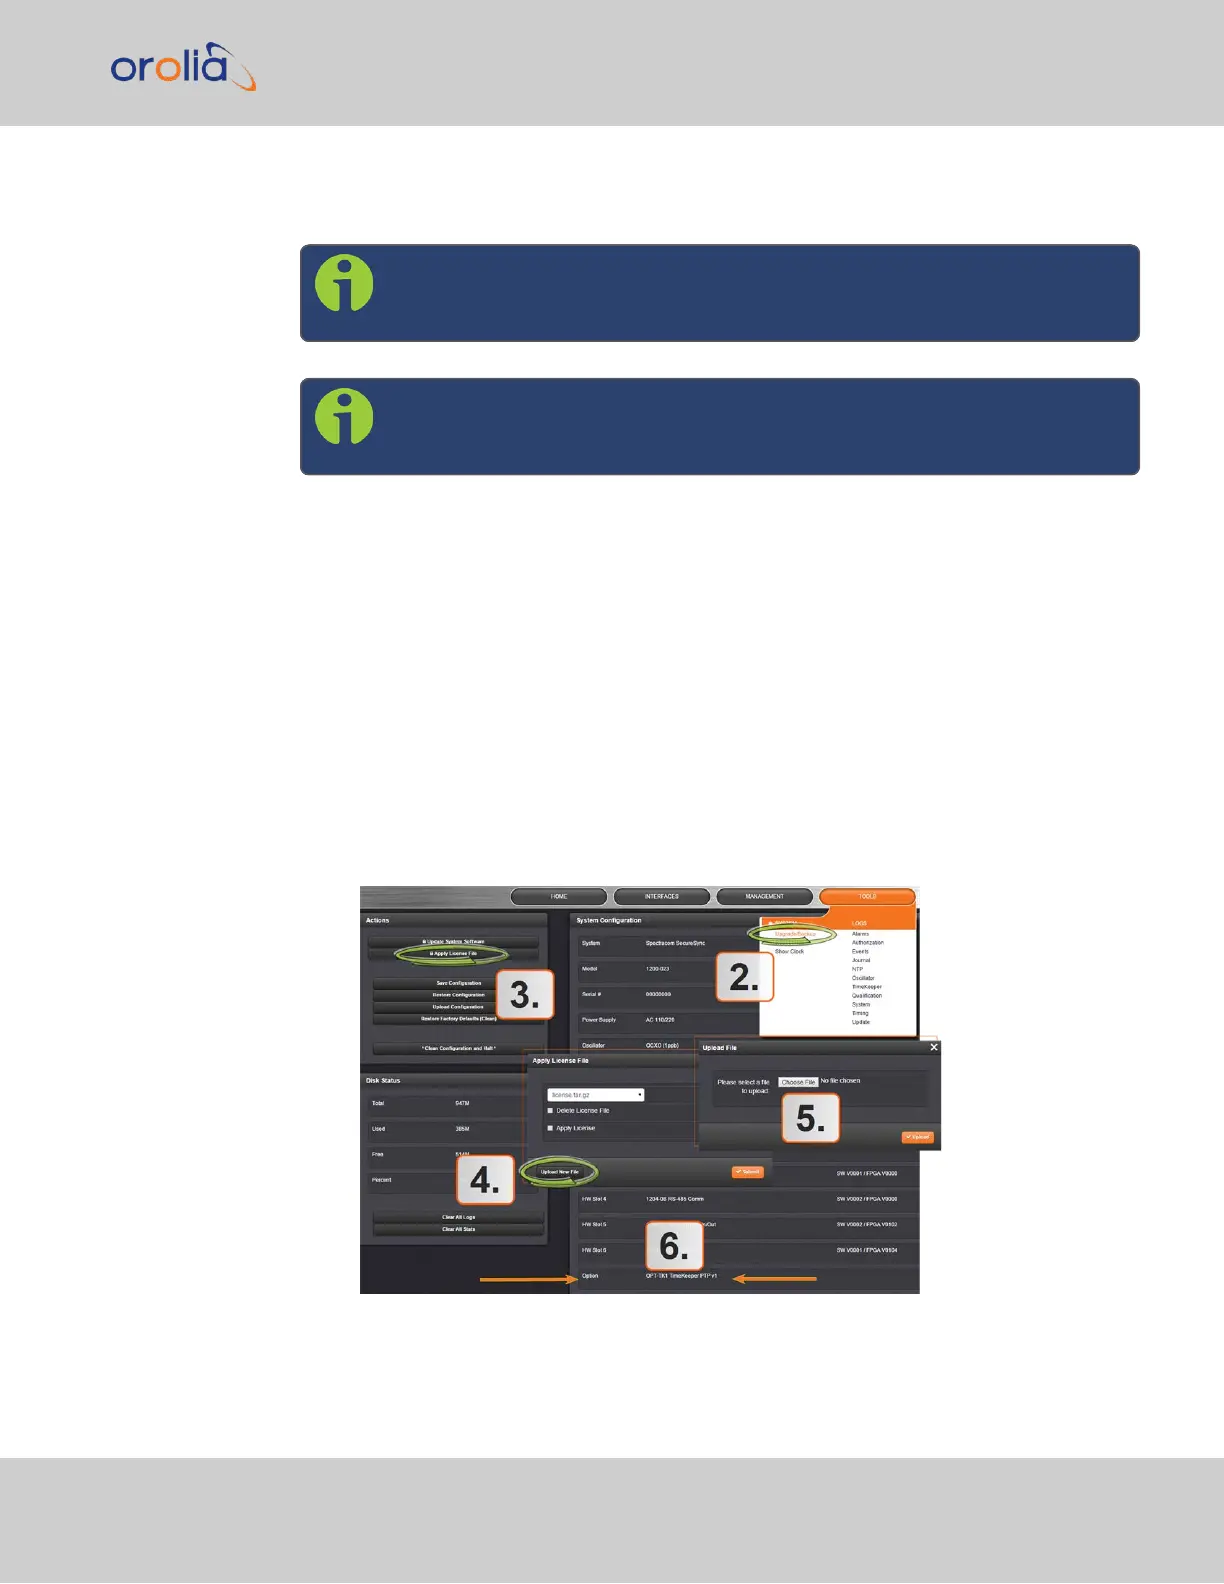
2.
Open the SecureSync WebUI, and navigate to Tools > Upgrade/Backup:
3.
In the Actions panel, click Apply License File.
4.
In the Apply License File window, click Upload New File.
4.6 Updates and Licenses
CHAPTER 4 • SecureSync 2400 User Manual Rev. 2
315