ID 442426.04 81WE KEEP THINGS MOVING
Installation
6
Manual SD6
6.6 Bottom brake resistor
WARNING!
Danger of personal injury and material damage due to electric shock!
Always switch off all power supply voltage before working on the drive
controller! Note that the discharge time of the DC link capacitors is 5
minutes. You can only determine the absence of voltage after this time
period.
Requirements:
• You have tapped holes for threaded bolts on the mounting plate in the
control cabinet at the installation location, taking into consideration the
different device dimensions. The threaded bolts are included with the
submounting braking resistor.
You need:
• The threaded bolts included with the submounting brake resistor.
• The screws and washers included with the submounting brake resistor.
• A PH2 Phillips screwdriver.
• An 8 mm hexagonal socket wrench.
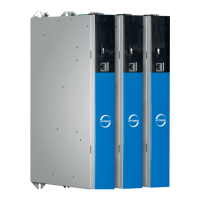
Installation of DL6 modules
1. Fasten the DL6 modules onto the mounting plate with the threaded bolts.
2. Insert the insulation inserts between the modules and on both ends.
3. Clean the copper rails, especially on the contact points.
4. Insert the two copper rails one after the other and fasten them in place with
two holding clamps per module. Make certain the contact points of the
copper rails do not become contaminated.
5. Pull the X30 clamps off the relevant drive controllers.
6. Connect the brown cables D+ to X30 terminals D+ and the black cables
D- to X30 terminals D-.
7. Size 3:
Mount the EM6A3 EMC shrouds as described in section 6.7 EMC shroud.
8. Place the drive controllers on the respective guides.
9. Press the drive controllers down on the respective guides.
10. Sizes 0 – 2:
Mount the EM6A0 EMC shrouds as described in section 6.7 EMC shroud.
11. Attach each drive controller to the corresponding threaded bolt with the
enclosed screws and washers.
12. Fasten the X30 terminals to the bottoms of the corresponding drive
controllers.