Embroidering Quilting
204
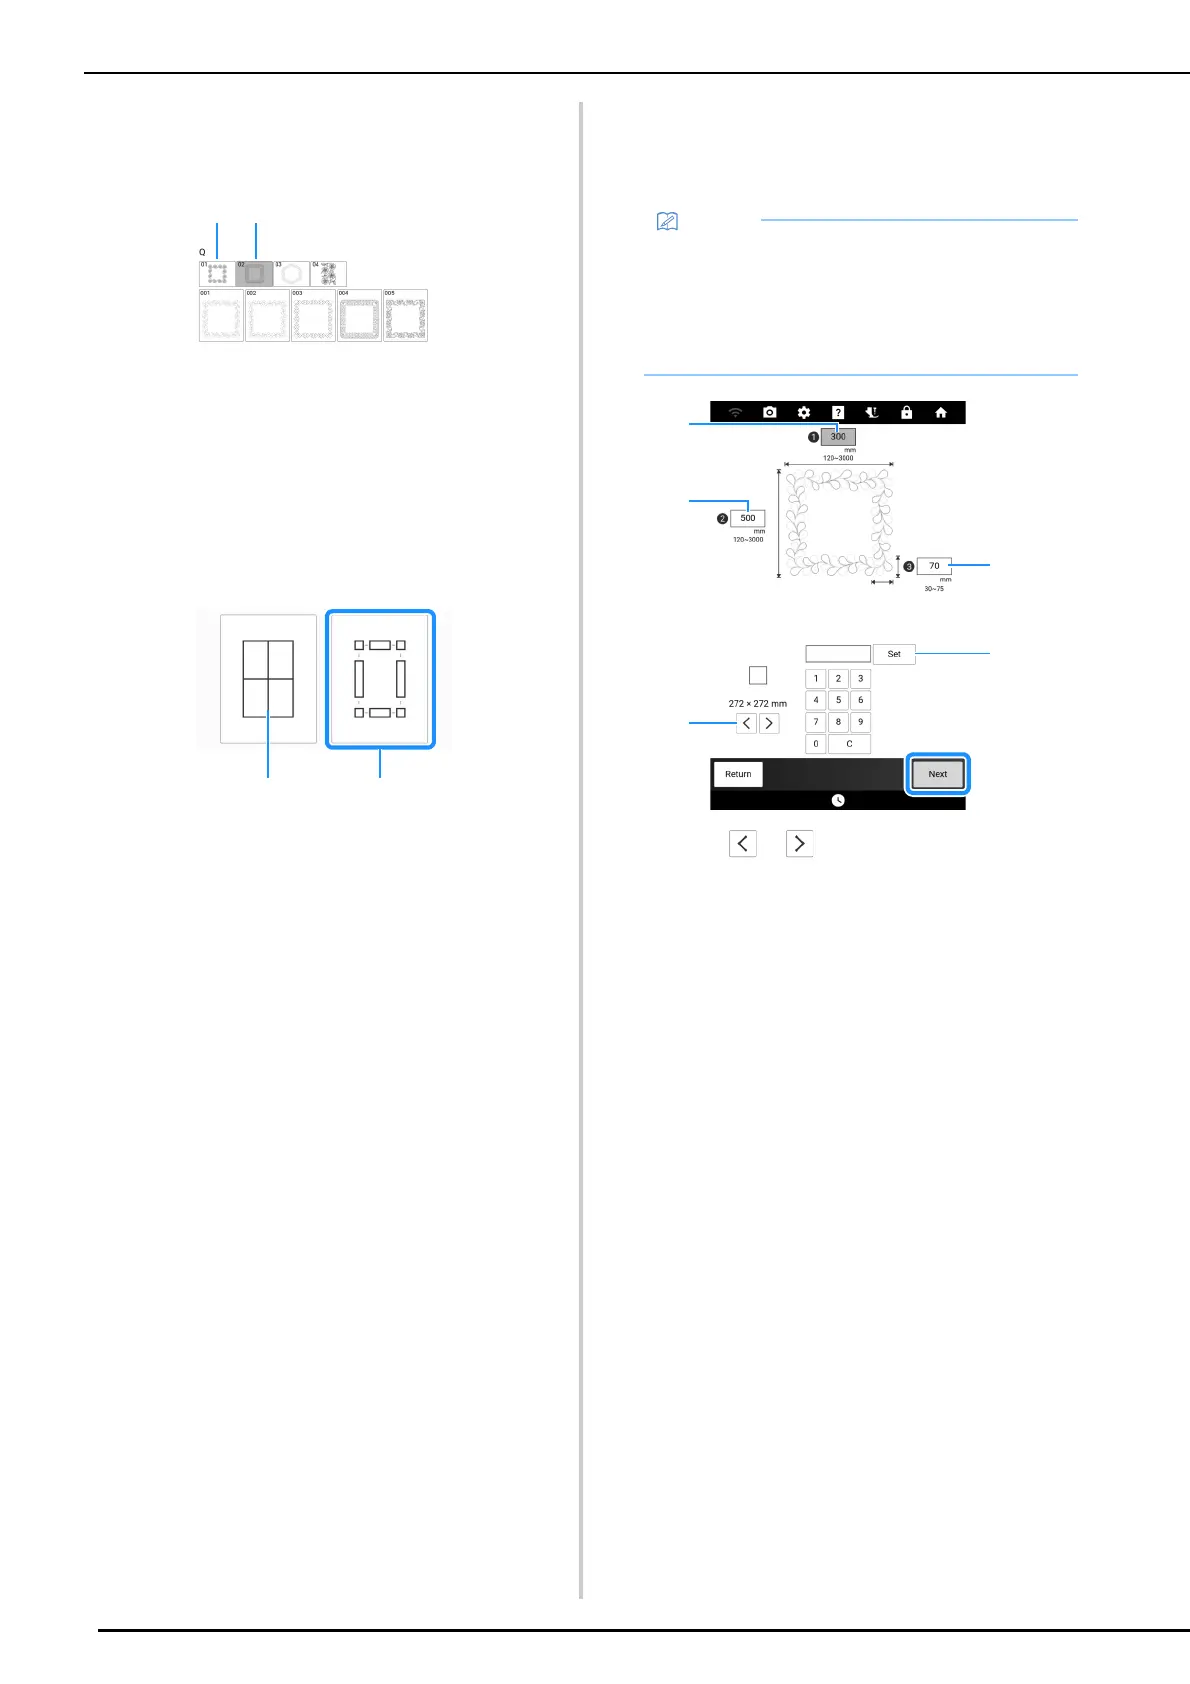
3 Select a sub-category.
For this example, select two-color
rectangular quilting border patterns.
a Single-color rectangular quilting border patterns
b Two-color rectangular quilting border patterns
4 Select the pattern that you want to
embroider, and then touch [Set].
5 Select how to divide the pattern. For this
example, select “Semi-Auto split quilt
sash”.
a Auto split quilt sash
For details, refer to “Embroidering Quilting Border
Patterns (Auto Split Quilt Sash)” on page 201
b Semi-Auto split quilt sash
6 Specify the size of embroidery frame to
be used and the size of the quilting
border, and then touch [Next].
a Touch or to select the embroidery frame
size.
b Specify the width (A), height (B) and quilting border
width (C), and then touch [Set].
• Mark the upper-right corner of the quilt border
with a chalk pencil. On the machine’s screen,
enter the horizontal and vertical
measurements to match the orientation of the
quilt with the marked corner positioned in the
upper right.
 Loading...

