Embroidering Quilting
210
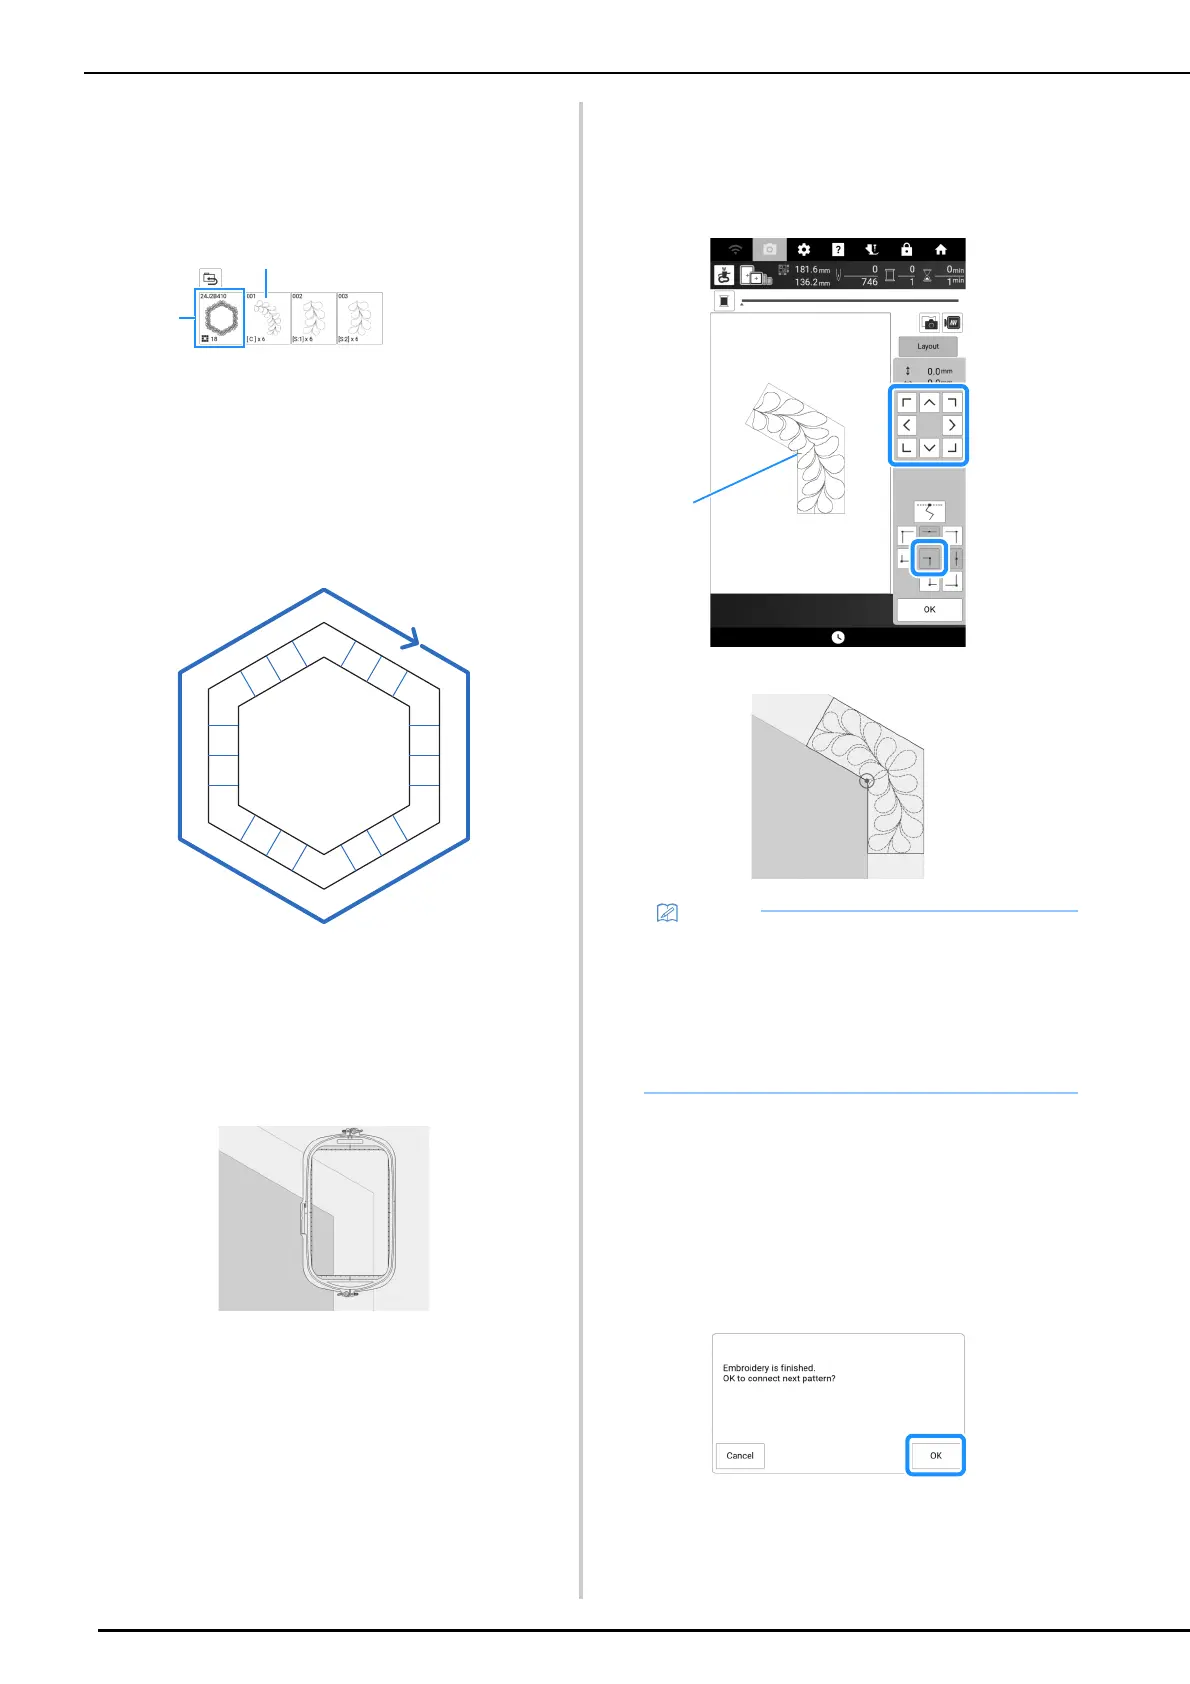
2 For this example, since we will embroider
the quilting border according to the on-
screen instructions, select the thumbnail
for the entire quilting border. And then
touch [Set].
a Touch this key to embroider the quilting border
according to the on-screen instructions. The
number in the lower-left corner indicates the total
number of segments for the quilt border.
b To embroider by visually aligning the pattern
sections, touch each pattern section to be
embroidered.
You can check where and how many times the part
will be embroidered with the codes written on each
key.
C: Corner
S: Side
3 Hoop the quilt in the embroidery frame so
that the one of the corners of the quilting
border is in the embroidering area, and
then attach the embroidery frame.
4 Align the position for the part in the
corner.
Use the move pattern keys to align the inside corner of
the reference lines previously drawn on the quilt with
the inner corner of the part projected by the projector.
a Inner corner
5 Touch [OK] to display the embroidery
screen.
6 Press the “Start/Stop” button to
embroider the first part.
7 When embroidering is finished and the
following message appears, touch [OK].
The next part to be embroidered appears.
C
C
S2
S1
C
S2
S1
S2
S1
C
C
S2
S1
C
S2
S1
S2
S1
• The needle drop point projected by the
projector can be corrected on the settings
screen. For the procedure, refer to “Needle
Calibration for Camera/Projector” on
page 257.
• If necessary, rotate the pattern so that it is
aligned between the chalk reference lines.