LCD Screen
Getting Ready
21
1
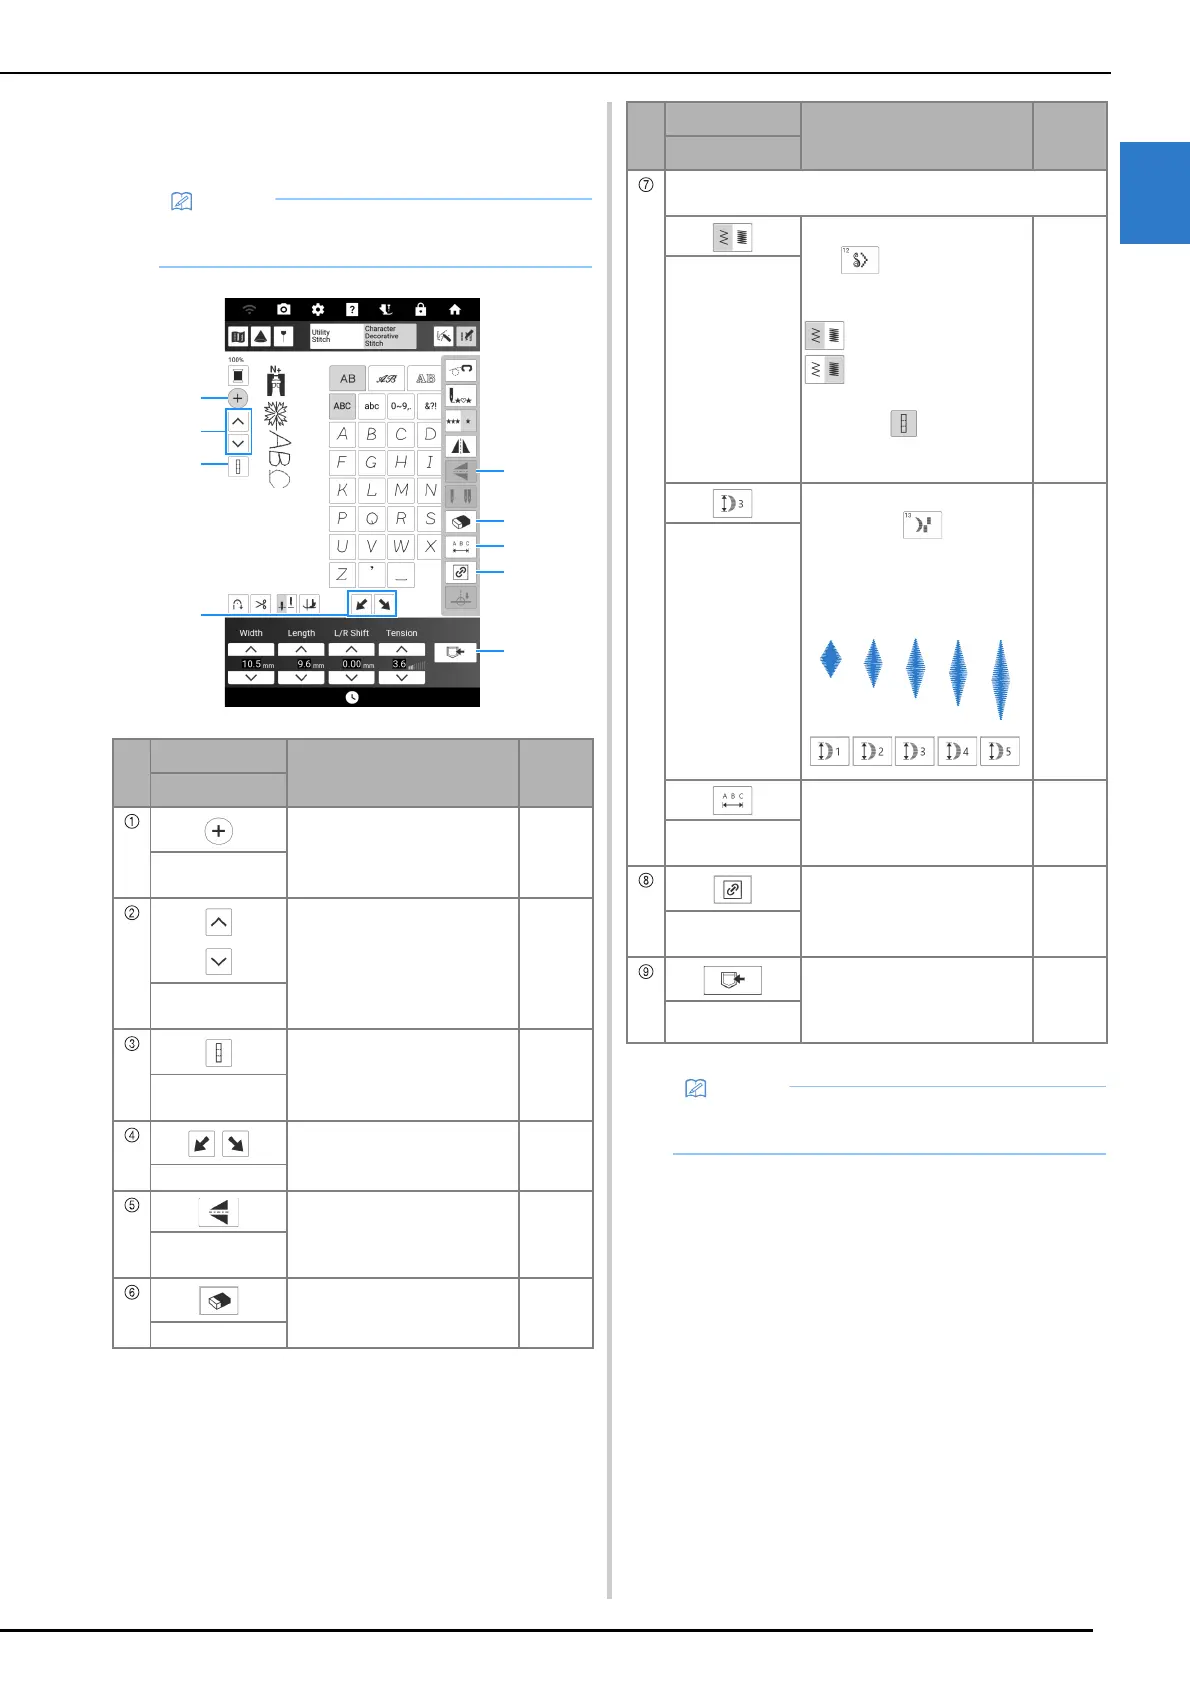
Key Functions (Character/
Decorative Stitch Screen)
• The key displayed in 7 will vary according to
the selected stitch pattern.
No.
Display
Explanation
Reference
Name
Touch this key to add a new
stitch pattern.
59
Add stitch pattern
key
Touch this key to select the
stitch pattern for editing.
60
Stitch pattern
selection key
Touch this key to switch
between selecting only the last
stitch pattern entered or all
combined stitch patterns.
—
Select all on/off
key
Touch this key to make step
stitch patterns.
104
Step effect key
After selecting the stitch
pattern, use this key to create a
vertical mirror image of the
stitch pattern.
—
Vertical mirror
image key
Delete the selected stitch
pattern.
59
Delete key
One of the following three keys will appear, depending on
the selected stitch pattern.
After selecting a stitch pattern
with , use this key to
change the thread density of
the stitch pattern.
: Low density
: High density
When the select all on/off key
appears as , the thread
density of all stitch patterns can
be changed.
—
Thread density
key
When a stitch pattern is
selected with , touch this
key to choose from five
automatic length settings,
without changing the zigzag
width or stitch length settings.
—
Elongation key
Touch this key to change the
spacing of character stitch
patterns. The setting is applied
to all entered characters.
—
Character
spacing key
Touch this key to maintain the
aspect ratio when enlarging or
reducing the stitch pattern.
60
Maintain aspect
ratio key
Touch this key to save stitch
pattern combinations or stitches
with modified/customized
settings.
64
Memory key
• For the other keys, refer to “Key Functions
(Utility Stitch Screen)” on page 19.
No.
Display
Explanation
Reference
Name