121
12-5-1. CG WIPE Operation Example 1
Ex. 1: CG WIPE using STILL1 and KEY1
In this example, it is assumed that a CG (V + K) is stored in STILL1. Set IN/OUT points, and
delay and transition rates, if necessary.
Assign STILL1 and STILL KEY to KEY1 signals, display KEY1 on the screen and play the CG
through KEY1. Then set CG WIPE to ON, and perform a background transition. Adjust delay
and transition rate values according to the CG WIPE sequence.
Setting up KEY
(1) Display PAGE 1 in the [STILL] menu.
(2) Set STILL1 to CLIP.
(3) Double-press KEY1 above the KEY/AUX bus to display the [KEY1 SETUP] menu.
(4) Display the [KEY1 - INS/SRC] menu.
(5) Set TYPE to BUS, INSERT to STL1 (FILL) and SOURCE to STK1 (KEY).
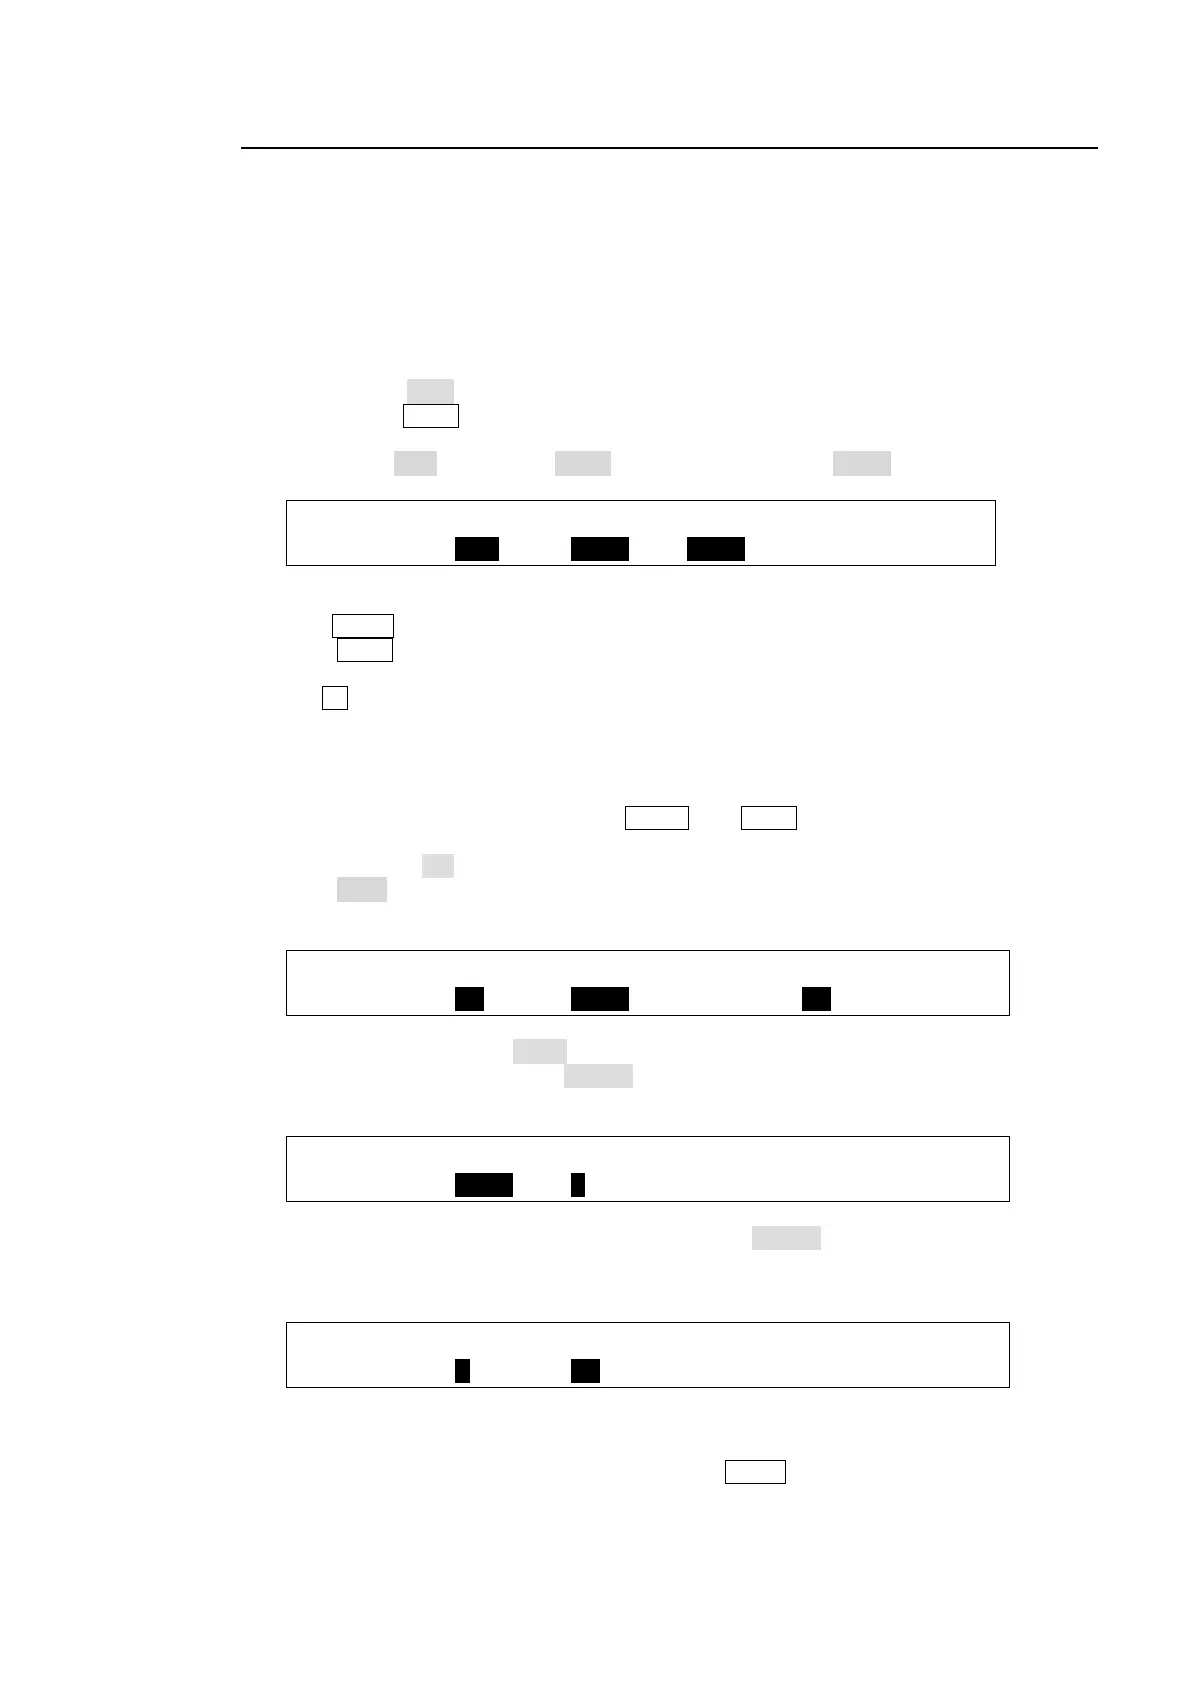
KEY1 : TYPE :INSERT :SOURCE :INVERT : 1/4
INS/SRC : =BUS : =STL1 : =STK1 : =OFF :
Setting up BKGD
(1) Press BKGD in the transition block.
(2) Press WIPE to set the BKGD transition type to WIPE. The [TRANS](1/6) menu is
displayed.
(3) Turn F4 to select a desired pattern number. MIX, FAM and NAM (No. 200, 201 and 202)
can also be used for CG WIPE.
(4) Modify the selected pattern suitable for your CG WIPE sequence.
Setting up CG WIPE
(1) Display the [WIPE] menu by pressing MENU then WIPE in the SELECT/KEYPAD block.
(2) Display the [WIPE - CG WIPE] (1/3) submenu.
(3) Set ENABLE to ON.
Select STL1 under CG. (See A in Fig. 1, p. 120)
Set the CG playback time in frames under DUR. (See C in Fig. 1)
WIPE :ENABLE : CG : : DUR : 1/3
CG WIPE : =ON : =STL1 : :=30 :
(4) Go to PAGE 2 and select KEY1 under SELECT. (See D in Fig. 1)
(5) Set delay time in frames under DELAY, which indicates the duration from the start of CG
playback (IN point) to the time when KEY1 is displayed on screen. (See E in Fig. 1)
WIPE :SELECT : DELAY : : 2/3
(6) Go to PAGE 3. Set the delay time in frames under DELAY, which indicates the duration
from the start of CG playback to the transition start time. (See F in Fig. 1)
Set the background transition time under RATE. (See G in Fig. 1)
WIPE : DELAY : RATE :FDRLINK: : 3/3
CG WIPE : =0 : =30 : =OFF : :
Performing CG WIPE
(1) Verify that the background transition type is set to WIPE and the modified WIPE pattern is
properly selected. Use the fader lever or the AUTO button to perform a CG WIPE
sequence.
(2) Adjust time or position using the related menu items, as needed.