144
16-2-2. Operation Example 2
Recording Actions as Macro 10
Let's perform the following actions and record them as Macro 10 (PAGE 1, Number Button 0).
-Select Button 11 on the PST bus.
-Set the background transition type to MIX.
-Perform background transitions using the fader lever.
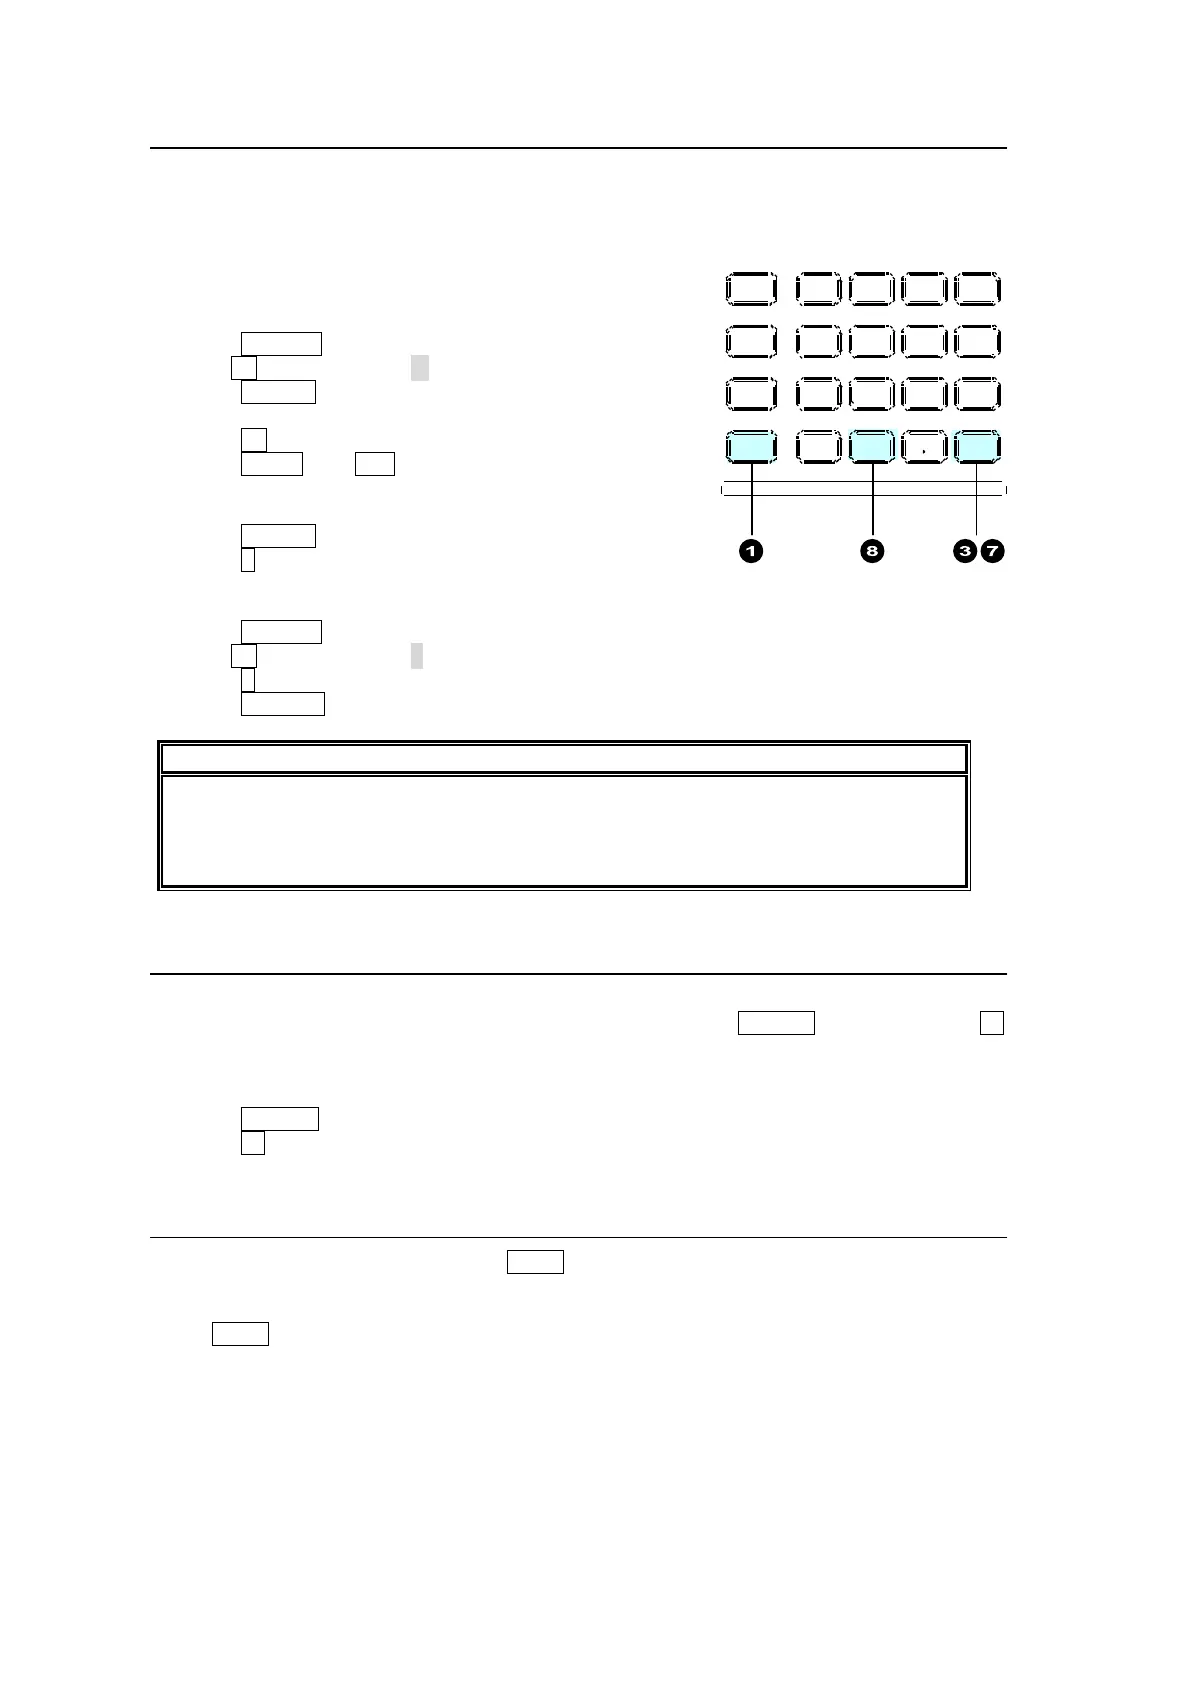
(1) Press MACRO.
(2) Turn F1 to select PAGE 1 in the menu.
(3) Press STORE on the keypad to start recording.
(4) Press 11 on the PST bus.
(5) Press BKGD then MIX in the transition block
(6) Press the fader lever from end to end.
(7) Press STORE to stop recording.
(8) Press 0. The actions are saved as Macro 10.
Executing Macro 10
(1) Press MACRO.
(2) Turn F1 to select PAGE 1 in the [MACRO MEMORY] menu.
(3) Press 0 on the keypad. (The macro is executed if DIRECT is set to ON.)
(4) Press RECALL to execute Macro 10.
Note that macros hold only values that change during recording. For fader
movements, which are successively changed, macros memorize the last stopped
position. Therefore, to perform the same actions as those recorded with a fader, return
the fader to its previous position before a macro is executed.
16-2-3. Operation Example 3 (Using KEY/AUX Bus Buttons)
Let's execute Macro 10 on the KEY/AUX bus.
Assume that the MACRO BUS SELECT function is assigned to USER 3.and Macro 10 to 11
on the KEY/AUX bus. (Any macros can be assigned to KEY/AUX bus buttons.)
See section 16-4-1. "Changing KEY/AUX Bus Buttons to Macro EXE Buttons."
(1) Press USER 3. (The KEY/AUX bus changes to Macro mode.)
(2) Press 11 on the KEY/AUX bus to execute Macro 10.
16-2-4. Operation Example 4 (Using Macro Attach Buttons)
Assume that Macro 10 is assigned to DSK1 in the transition block.
See section 16-4-2. "Macro Attach and Macro Detach" for details.
Press DSK1 in the transition block. The DSK1 appears in or disappears from the screen and
Macro 10 is performed.
MENU AT TACH
DIRECT
PAT T
DETACH
SET UP
KEY1
8 9
4 5 6
STILL MATT F ILE
KEY2 DSK1 DSK2
EVENT
MACRO
1 2 3
0
CLEAR
RECALL STORE
ENTER
CK EF F ECT
TRANS RAT E WIPE
SELECT /KEYPAD
±
7