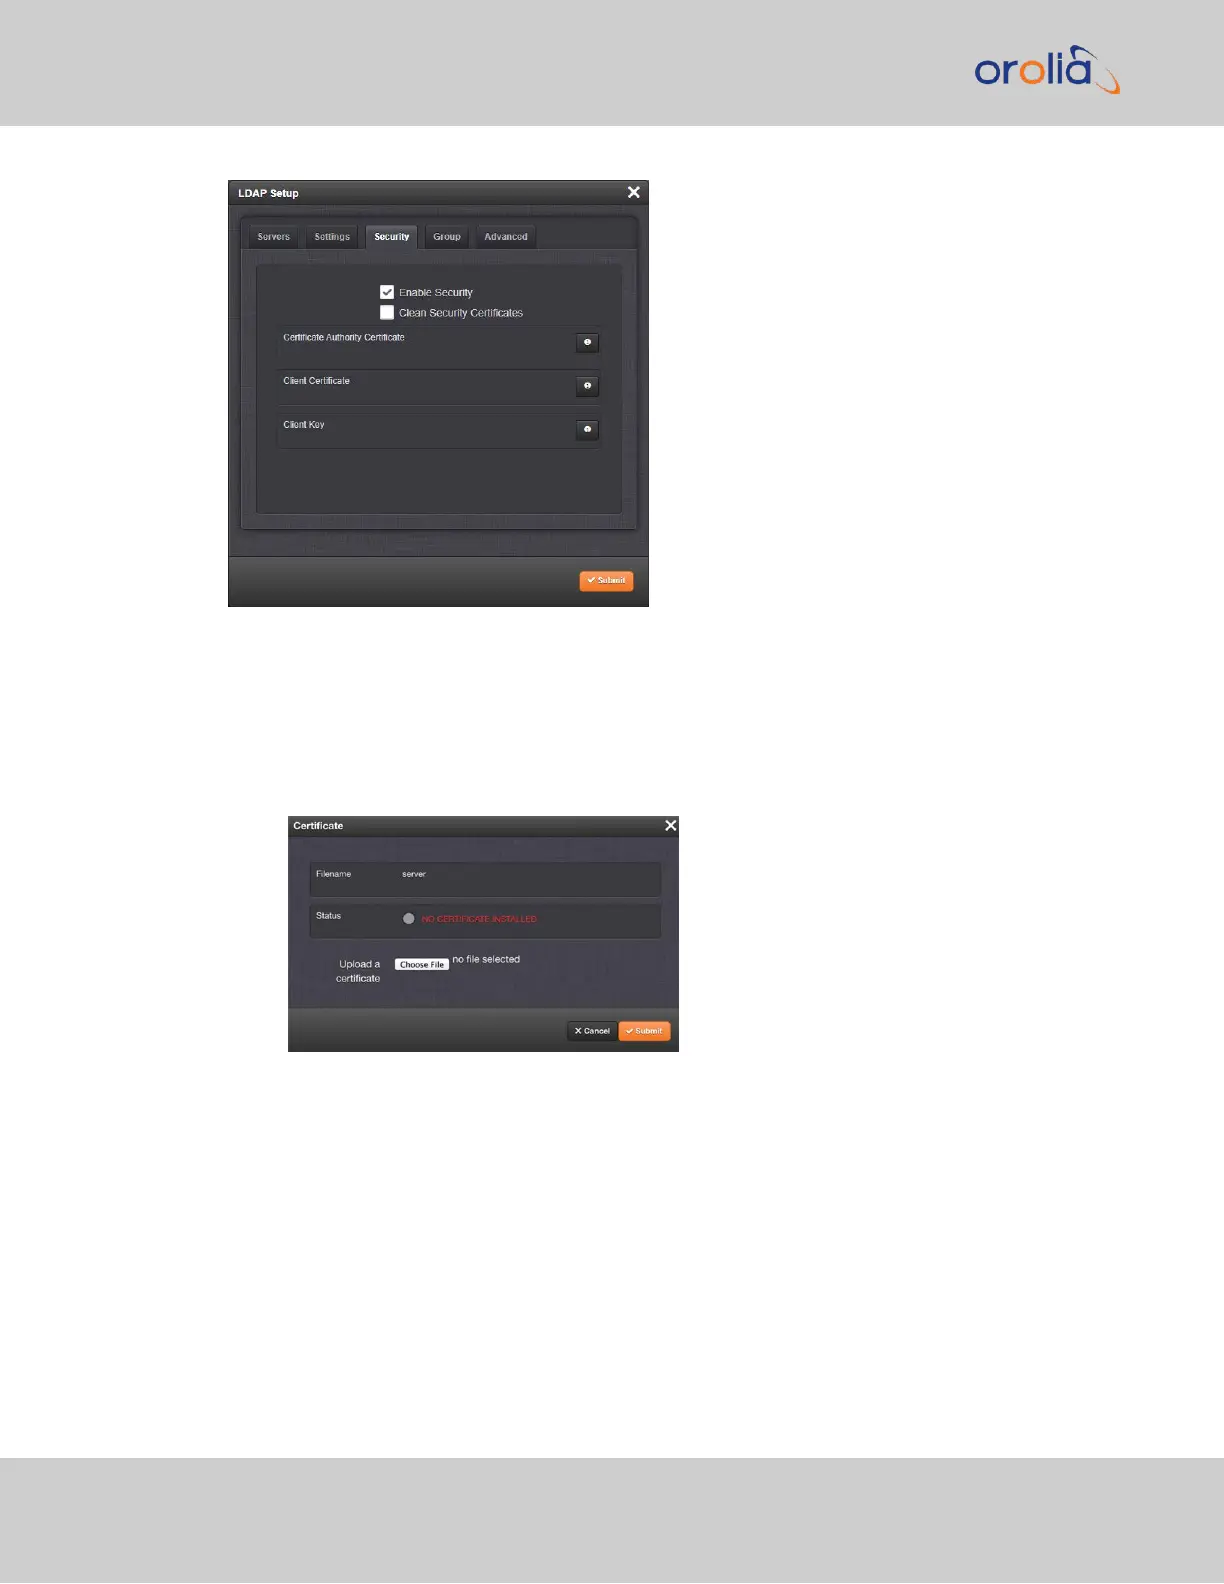
You may upload a server certificate, a client certificate, or a client key.
For each:
a.
If necessary, create the desired certificate or client key.
b.
Click the INFO icon for the certificate you wish to upload.
c.
In the Certificate window, click the Choose File button.
d.
Locate and upload the certificate or client key file.
e.
Click Submit.
The SSL certificates and/or client key you upload will be installed in the /home/spec-
tracom/xfer/cert/ directory.
Use the checkbox Enable Security if you want to enable SSL security, i.e. use Secure
LDAP.
Use the checkbox Clean Security Certificates to remove all certificates currently stored
on SecureSync (e.g., to eliminate expired certificates).
264
CHAPTER 4 • SecureSync 2400 User Manual Rev. 2
4.3 Managing Users and Security