DOB 1300-1556 | X3-45 Commuter PA-1648 Maintenance Manual First release Oct 2020
91
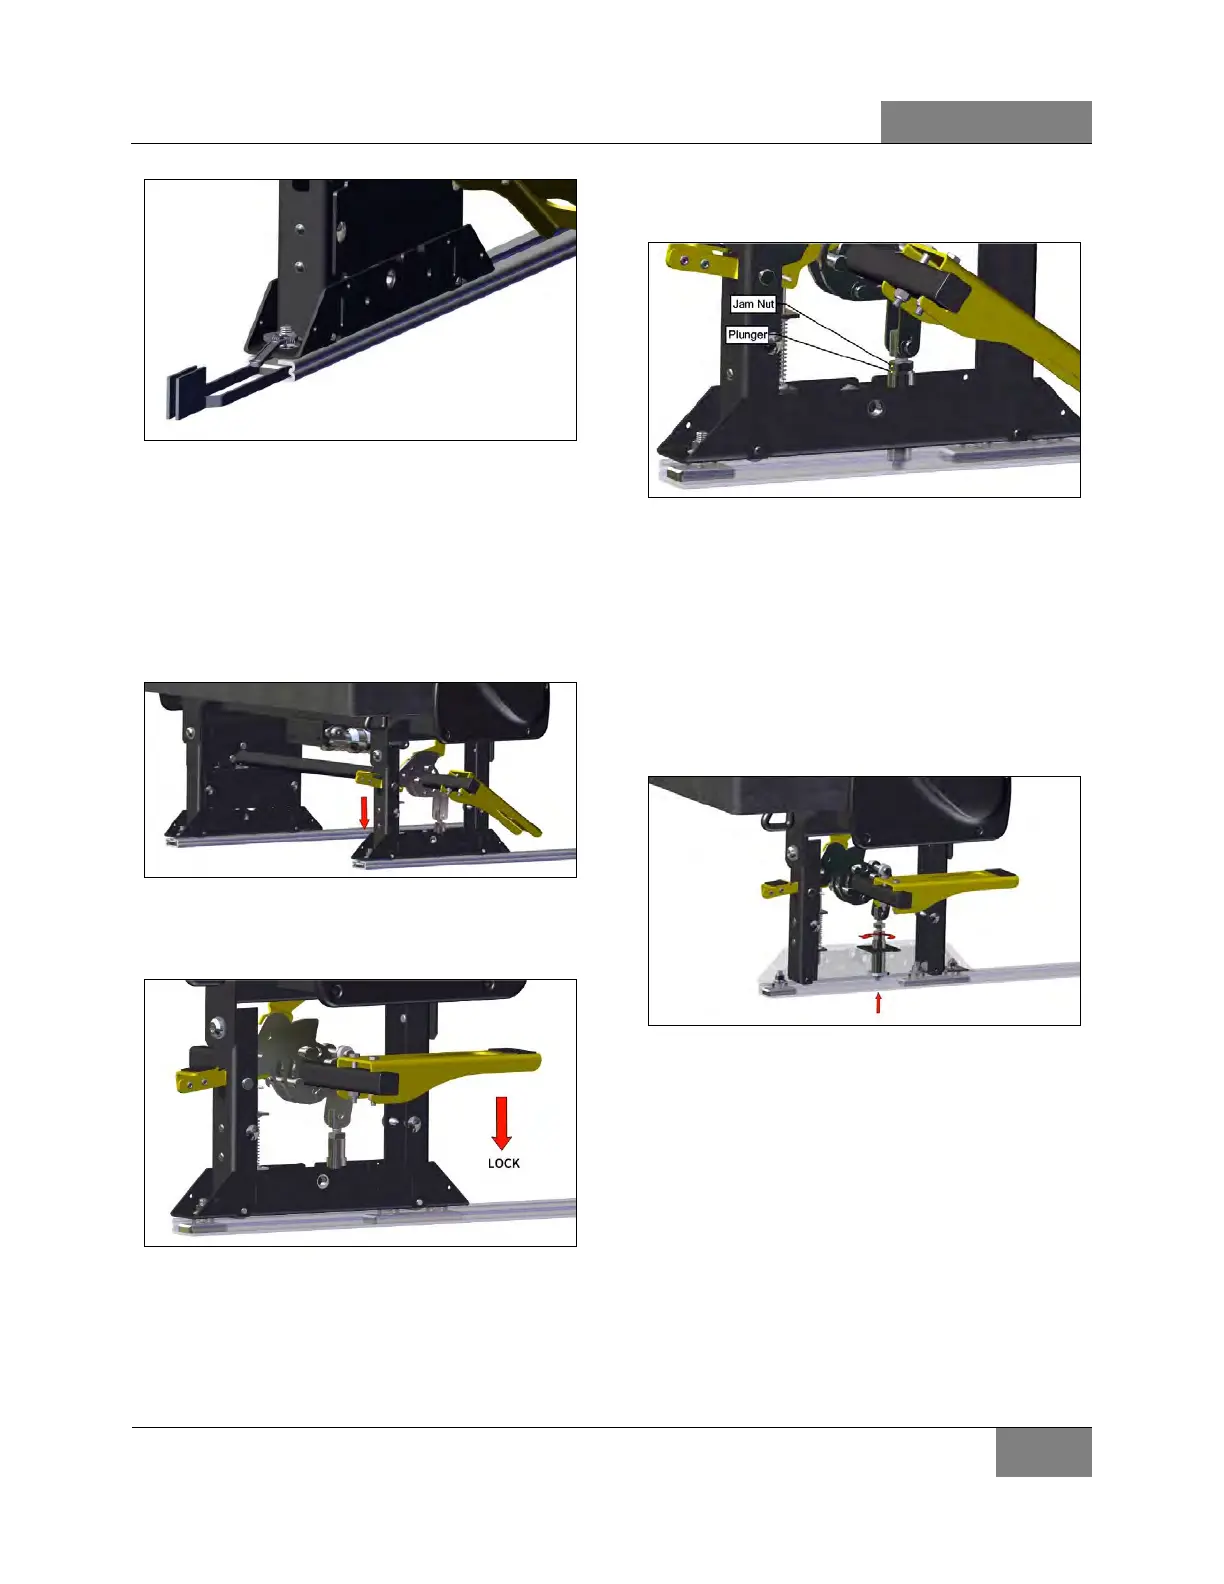
FIGURE 161: CENTERING SHIMS
7. Remove the shims after tightening all the
bolts.
Pedestal locking plunger adjustment
8. Slide the pedestal until both plungers locate
existing holes in track.
FIGURE 162: LOCATE HOLES IN TRACK
9. Once there, try locking by pressing the lock
lever down.
FIGURE 163: SLIDING SEAT LOCK LEVER
10. If too easy or too hard, make plunger
adjustments as required.
11. If the pedestal is too loose or too tight, you
can adjust as the following steps.
12. Unlock the pedestals to expose the jam nut
on the plungers.
FIGURE 164: SEAT PLUNGER ADJUSTMENT
13. Loosen the jam nut from plunger using a
5/8” end wrench for the plunger and a 11/16”
end wrench for the jam nut. This allows
space to move the plunger in either direction
up or down.
14. If the plunger is too tight, looking from the
top, turn the plunger counterclockwise to
raise the plunger and to decrease the
locking force.
FIGURE 165: PLUNGER HEIGHT ADJUSTMENT
15. If the plunger is too loose and doesn’t lock
into place, turn the plungers clockwise to
extend the plunger down and increase the
locking force.
16. Lock the pedestal into place to check the
tightness. Once adjusted, unlock the
pedestals and retighten jam nuts to plunger
without turning the plunger so you don’t lose
your newly adjusted location.
17. Repeat previous steps for the other
pedestal.
 Loading...


