SECTION 05: COOLING SYSTEM
DOB 1300-1556 | X3-45 Commuter PA-1648 Maintenance Manual First release Oct 2020
32. Slide back the cooling assembly into position
and reverse removal procedure to reinstall in
vehicle.
33. Make sure that there is no conductivity
between the CAC/radiator units and the
cooling pack frame (see note at the
beginning of paragraph 11.4).
34. Fill the vehicle cooling system.
35. Set engine stop button to the ON position
(depressed), start the engine and check for
coolant leaks.
11.5 CHARGE AIR COOLER (CAC) IN
VEHICLE REMOVAL
In the event that the charge air cooler (CAC)
would require replacement or in cases where
access to the engine hot side and/or
turbocharger would be required. It is possible to
remove the CAC from the vehicle without
removing the complete cooling pack thereby
eliminating the need to drain and refill the vehicle
cooling system.
Spec for CAC acceptable leakage:
The CAC is considered acceptable if it can
hold
30 psi (206 kPa) gauge pressure with
less than 1 psi (6.9 kPa) loss in 60 seconds.
This spec does not apply if there is any
evidence that the leak was caused by a
foreign object impact.
1. Open rear engine compartment door.
2. Set engine stop button to the OFF position
(push).
3. Proceed to the cooling fan shroud removal
following paragraph 11.3 of this section.
4. Disconnect the lower CAC pipe (directly at
the CAC connection or at the turbo
connection).
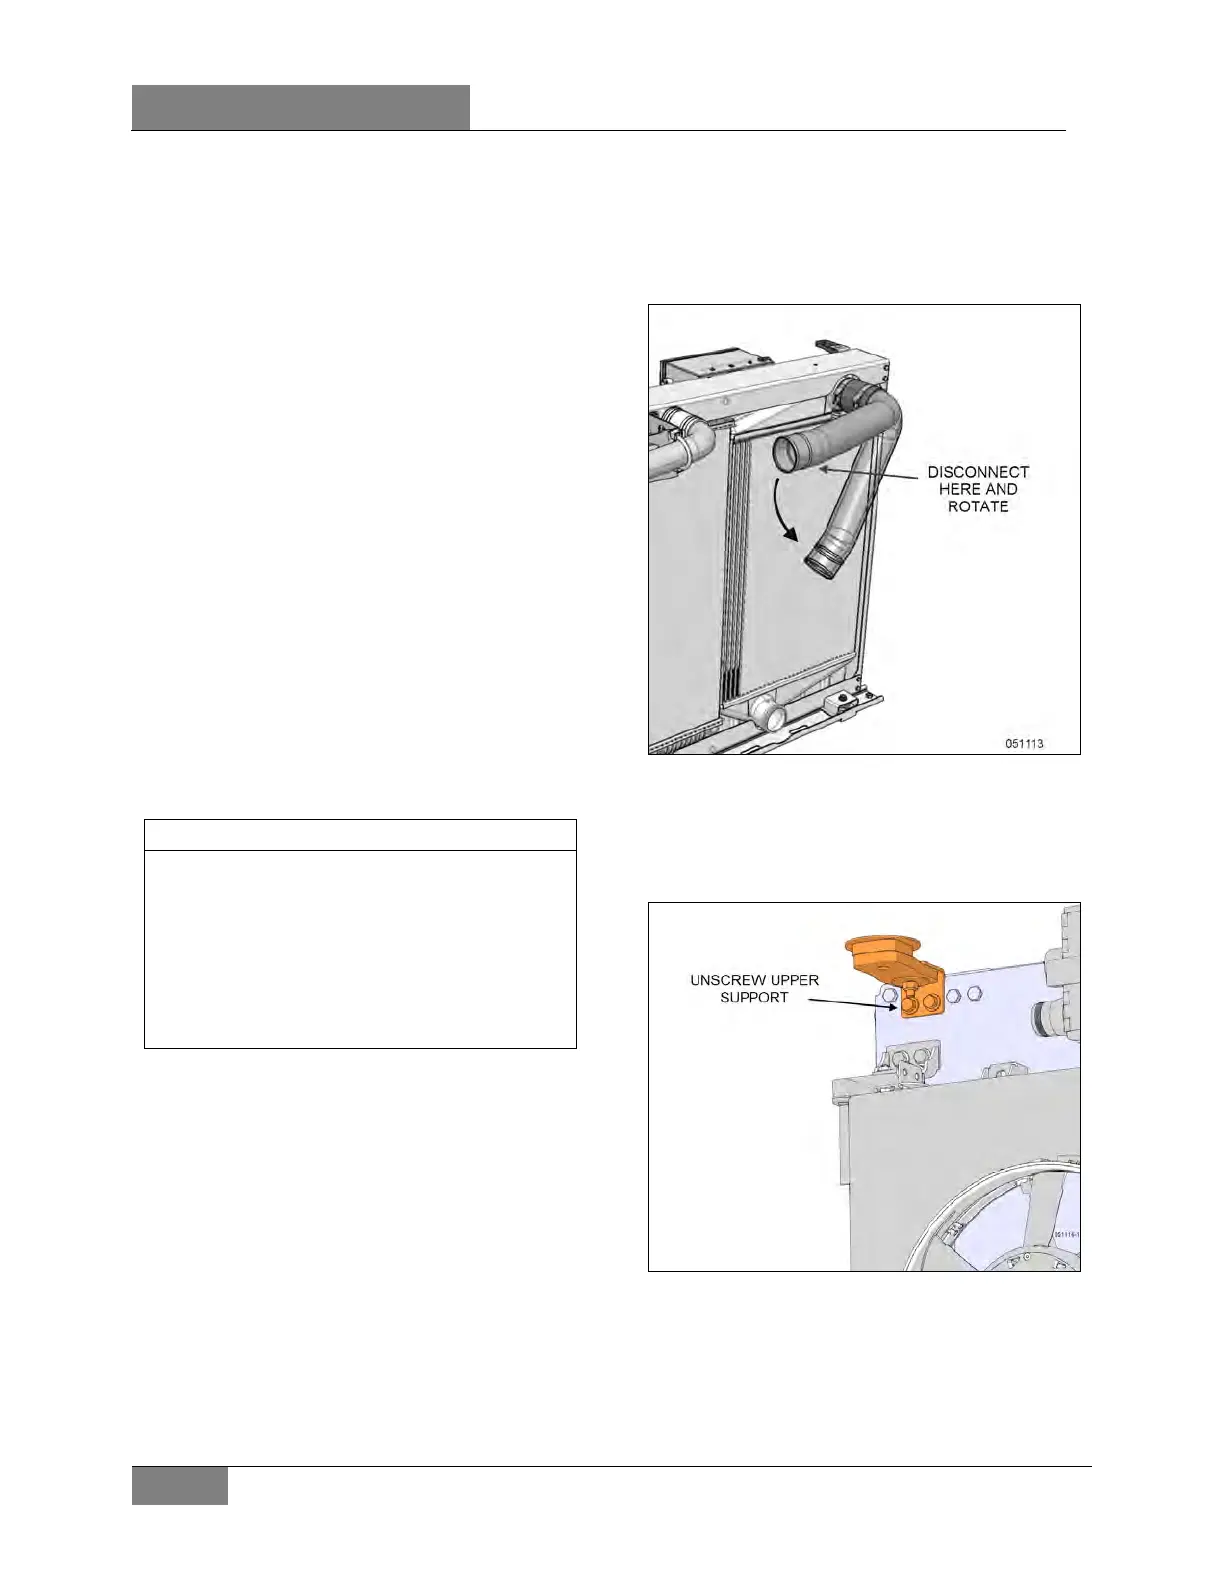
5. Disconnect the upper CAC pipe: It is
possible to disconnect the pipe middle
section junction and loosen the hose clamps
at the CAC connection to pivot down the
pipe and clear the radiator (Figure 44).
FIGURE 44: ROTATE CAC UPPER PIPE
6. Unscrew the upper cooling pack support
from the vehicle structure (CAC side support
only Figure 45).
FIGURE 45: UPPER SUPPORT (CAC SIDE)
 Loading...


