SECTION 12: BRAKE AND AIR SYSTEM
DOB 1300-1556 | X3-45 Commuter PA-1648 Maintenance Manual Section 12 revised Jan 2021
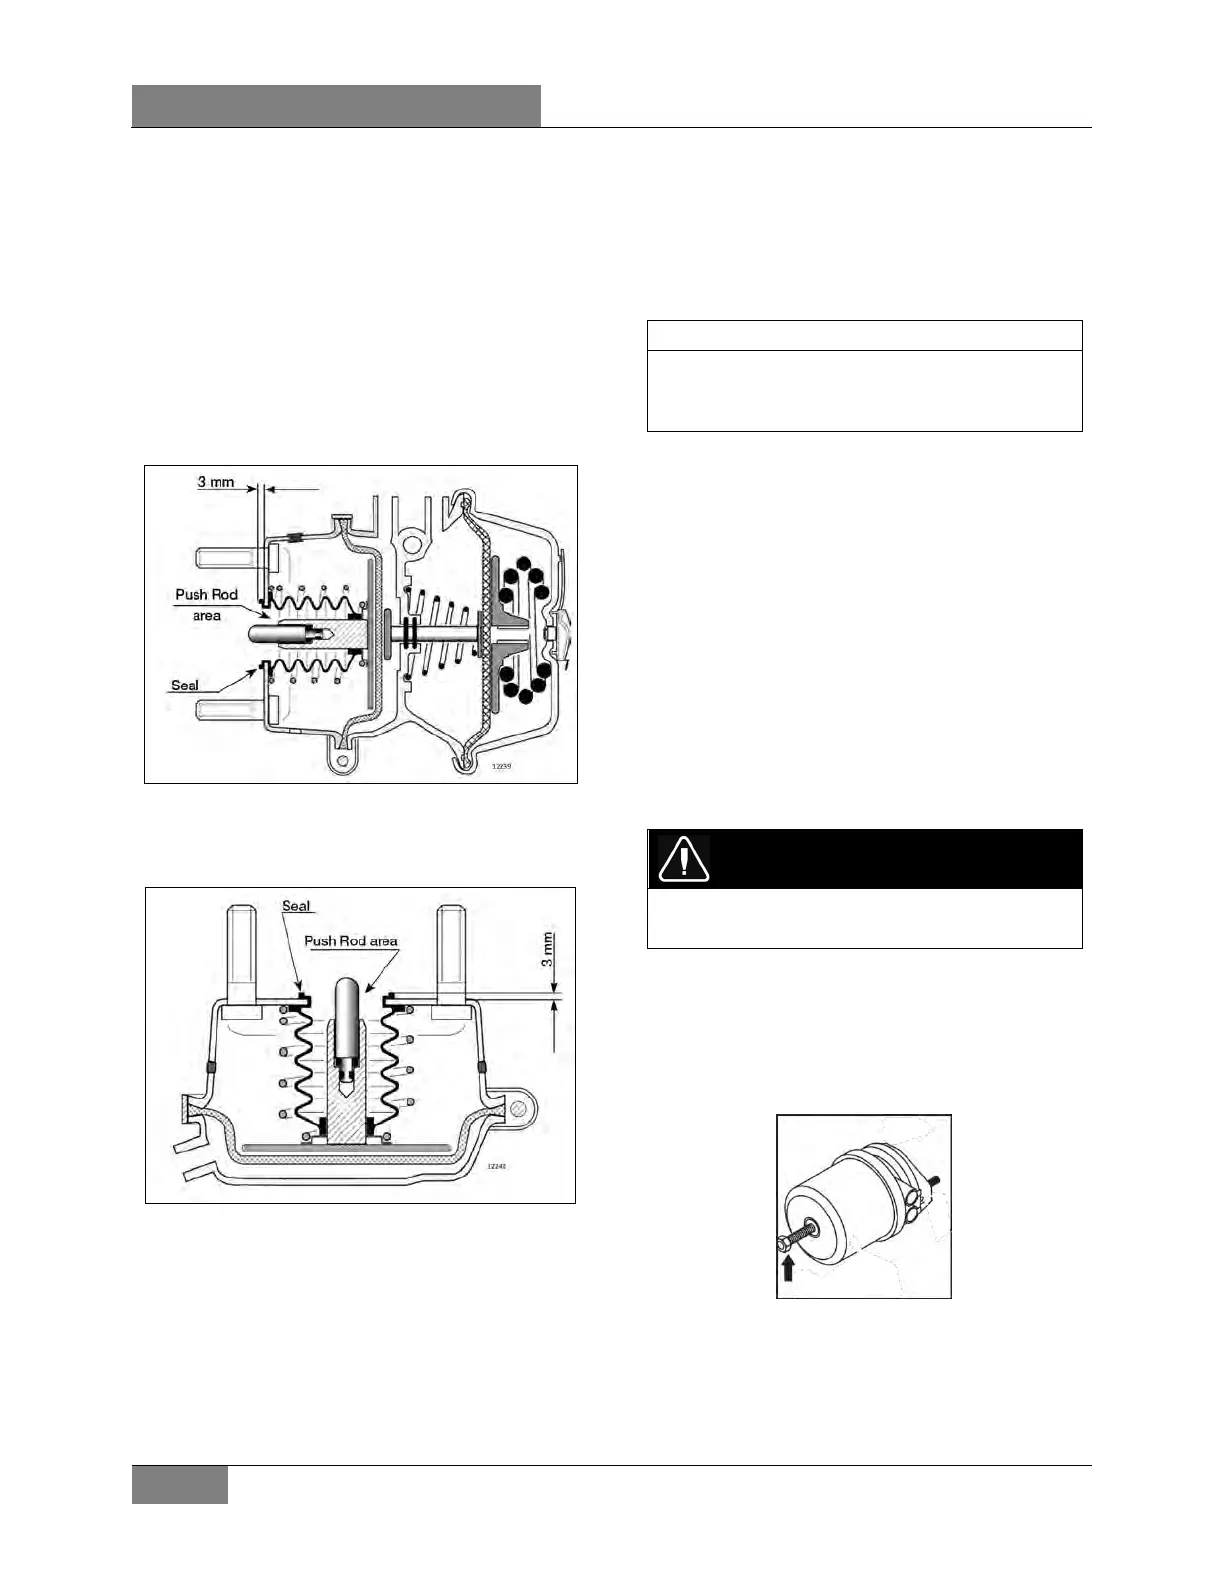
19. BRAKE CHAM BER
This vehicle uses Knorr-Bremse brake
chambers on all axles. The drive axle chambers
consist of two separate air chambers, each
having its own diaphragm and push rod. They
are used as a service brake chamber, an
emergency brake in case of air pressure loss
and a spring-applied parking brake. Refer to
FIGURE 55.
FIGURE 55: DRIVE AXLE BRAKE CHAMBER
The front and tag axle brake chambers are used
only for service brake duty (FIGURE 56).
FIGURE 56: FRONT AND TAG AXLE BRAKE CHAMBER
19.1 MAINTENANCE
Every 6,250 Miles or twice a year, whichever
comes first depending on type of operation:
Check all hoses and lines. They should be
secure and in good condition.
Every 100,000 Miles or once a year, whichever
comes first depending on type of operation:
1. Disassemble and clean all parts.
2. Install new diaphragm or any other part if
worn or deteriorated.
When the diaphragm, spring, or both are
replaced, they should be replaced in the
corresponding chamber on the same axle.
3. Perform an airtightness test:
a) Make and hold a full brake application.
b) Coat clamping ring(s) with a soapy solution.
If leakage is detected, tighten clamping ring
only enough to stop leakage. Do not
overtighten as this can distort sealing
surface or clamping ring. Coat area around
push rod hole (loosen boot if necessary).
No leakage is permitted. If leakage is
detected, the diaphragm must be replaced.
19.2 EMERGENCY/PARKING BRAKE
MANUAL RELEASE
DANGER
Never stand in the axis line of the spring brake
actuators, especially when caging the spring.
Drive Axle
1. Block the wheels to prevent the vehicle from
moving.
2. Remove the release stud tool from its
storage place on drive axle brake chamber.
3. Remove the access plug from the end of the
spring chamber, and then insert the release
stud through the opening. Turn the release
stud 1/4 turn (clockwise) to anchor it into the
spring plate. Install the flat washer and nut,
 Loading...


