10 Starting and Stopping Analysis
10.1 Making an Injecting and Starting an Analysis
102
GC-2010 Plus
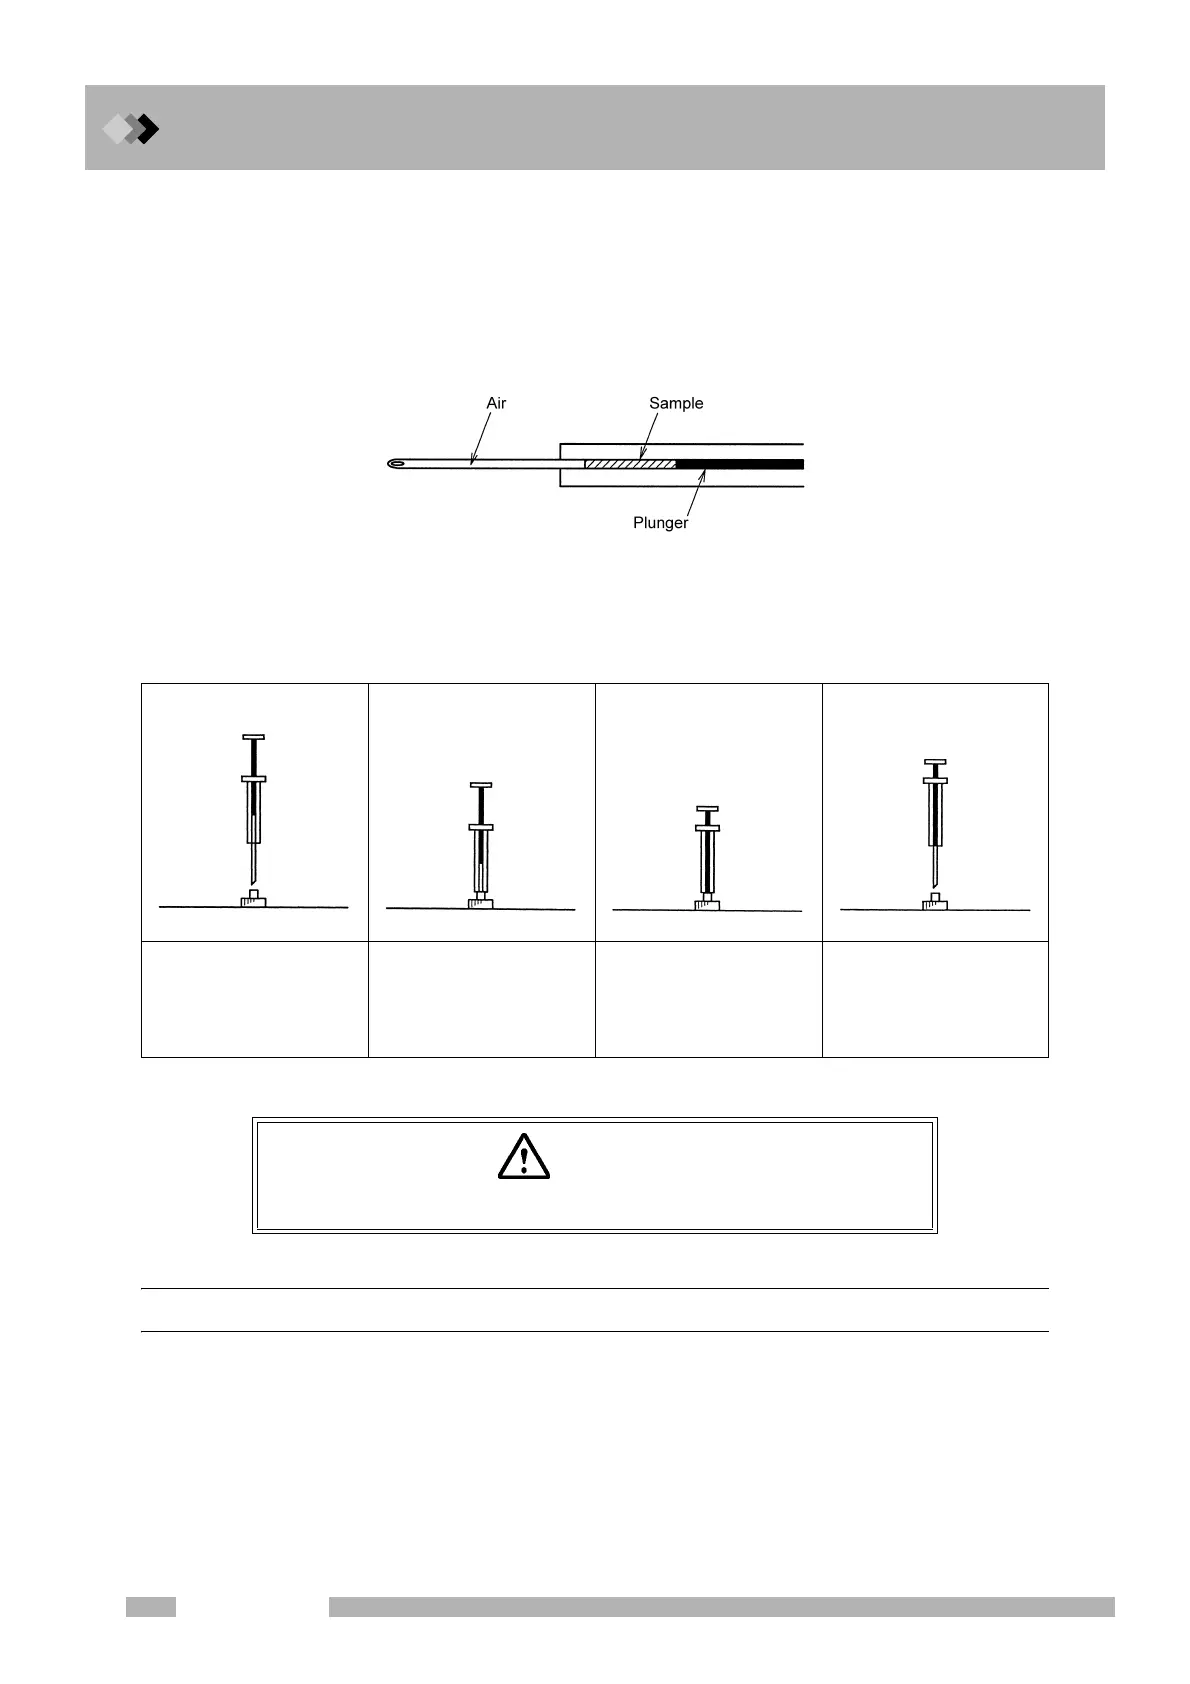
5. Preparing to inject
(1) With the needle in the sample vial, pump the plunger to eliminate air bubbles inside
the syringe. Aspirate slowly and discharge quickly for higher effectiveness.
(2) After air bubbles are eliminated, aspirate an exact amount of necessary sample (e.g. 1 µl).
(3) Wipe off the sample on the needle with a clean lint-free paper.
(4) Lift the plunger and aspirate the air so that no sample will remain in the needle.
Fig. 10.1.2
Q Injection
10.1.3 Starting the analysis
A green STATUS light indicates that the GC is ready for analysis.
Press the [START] key to start the temperature program, the time program, the pressure
program and the flow rate program. The start signal is sent to the data processing unit
simultaneously when the program starts.
Any pre-set programs execute prior to the start of the analysis programs.
Any pre-run programs execute prior to the start of the analysis programs or transmission of
the start signal to the data processing unit.
After the sample is aspi-
rated, insert the syringe
into the injection port.
Insert syringe until it
touches needle guide.
Push plunger to inject
sample.
At same time, press
[START] key of gas
chromatograph.
Promptly pull out
syringe.
WARNING
Wear protective goggles when handling samples.

 Loading...