Quilting
116
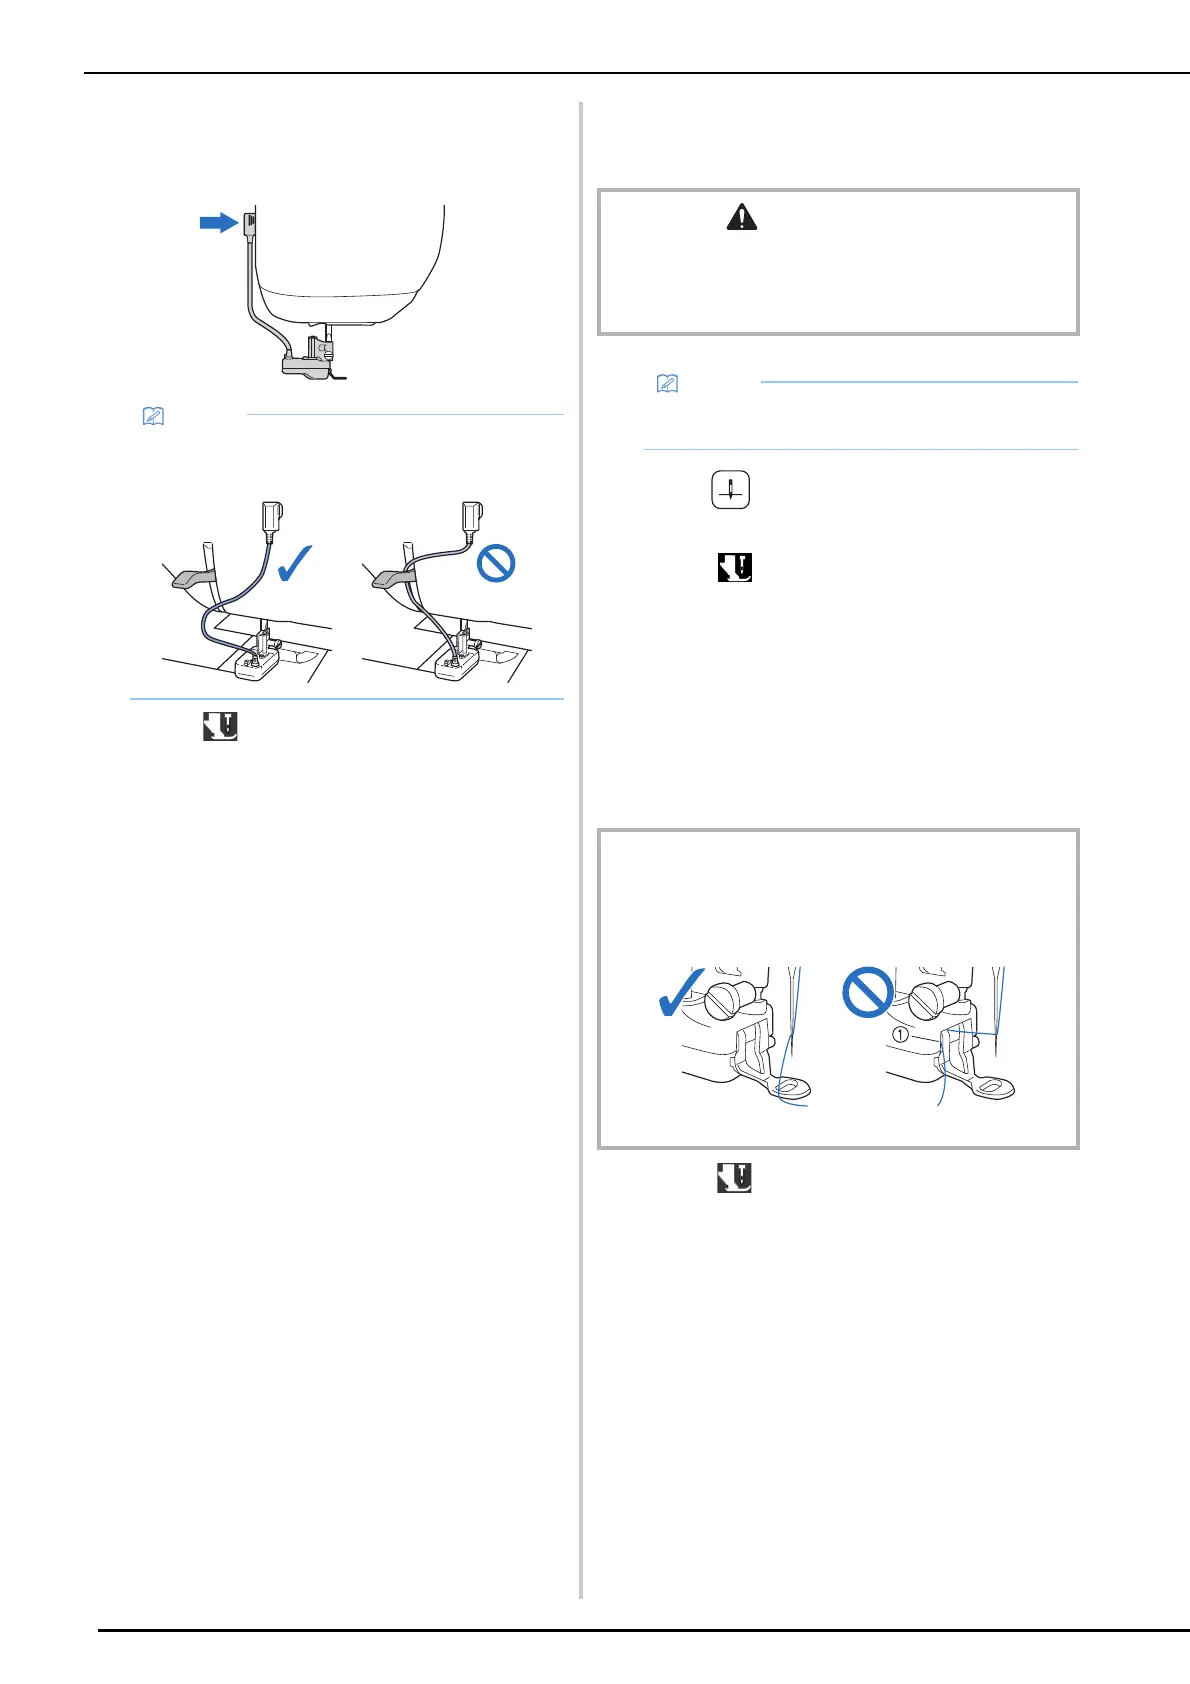
10 Plug the connector of the stitch regulator
into the jack on the back of your
machine.
11 Touch to unlock all keys and buttons.
Replacing the Presser Foot with
the Stitch Regulator Installed
1
Press (Needle position button) to
raise the needle.
2 Touch to lock all keys and buttons.
3 To replace the presser foot, refer to steps
6 through 8 of “Attaching the Stitch
Regulator and Presser Foot” on
page 115. After replacing the presser
foot, make sure that the thread is not
caught in the stitch regulator.
* If the presser foot has been raised, lowering it will
make it easier to replace it.
4 Touch to unlock all keys and buttons.
• Make sure that the stitch regulator harness
does not catch on the presser foot lever.
CAUTION
• When replacing the presser foot, make sure that the
needle does not strike your fingers or the presser foot.
Otherwise, injuries may result, or the needle or presser
foot may become damaged.
• We recommend removing the fabric from the
machine before replacing the presser foot.
IMPORTANT
• If the thread has been caught in the stitch regulator,
remove the presser foot, and then reattach it, making
sure to avoid the thread.
a The machine cannot sew if the thread is caught.



 To Next Page