Embroidering Quilting
206
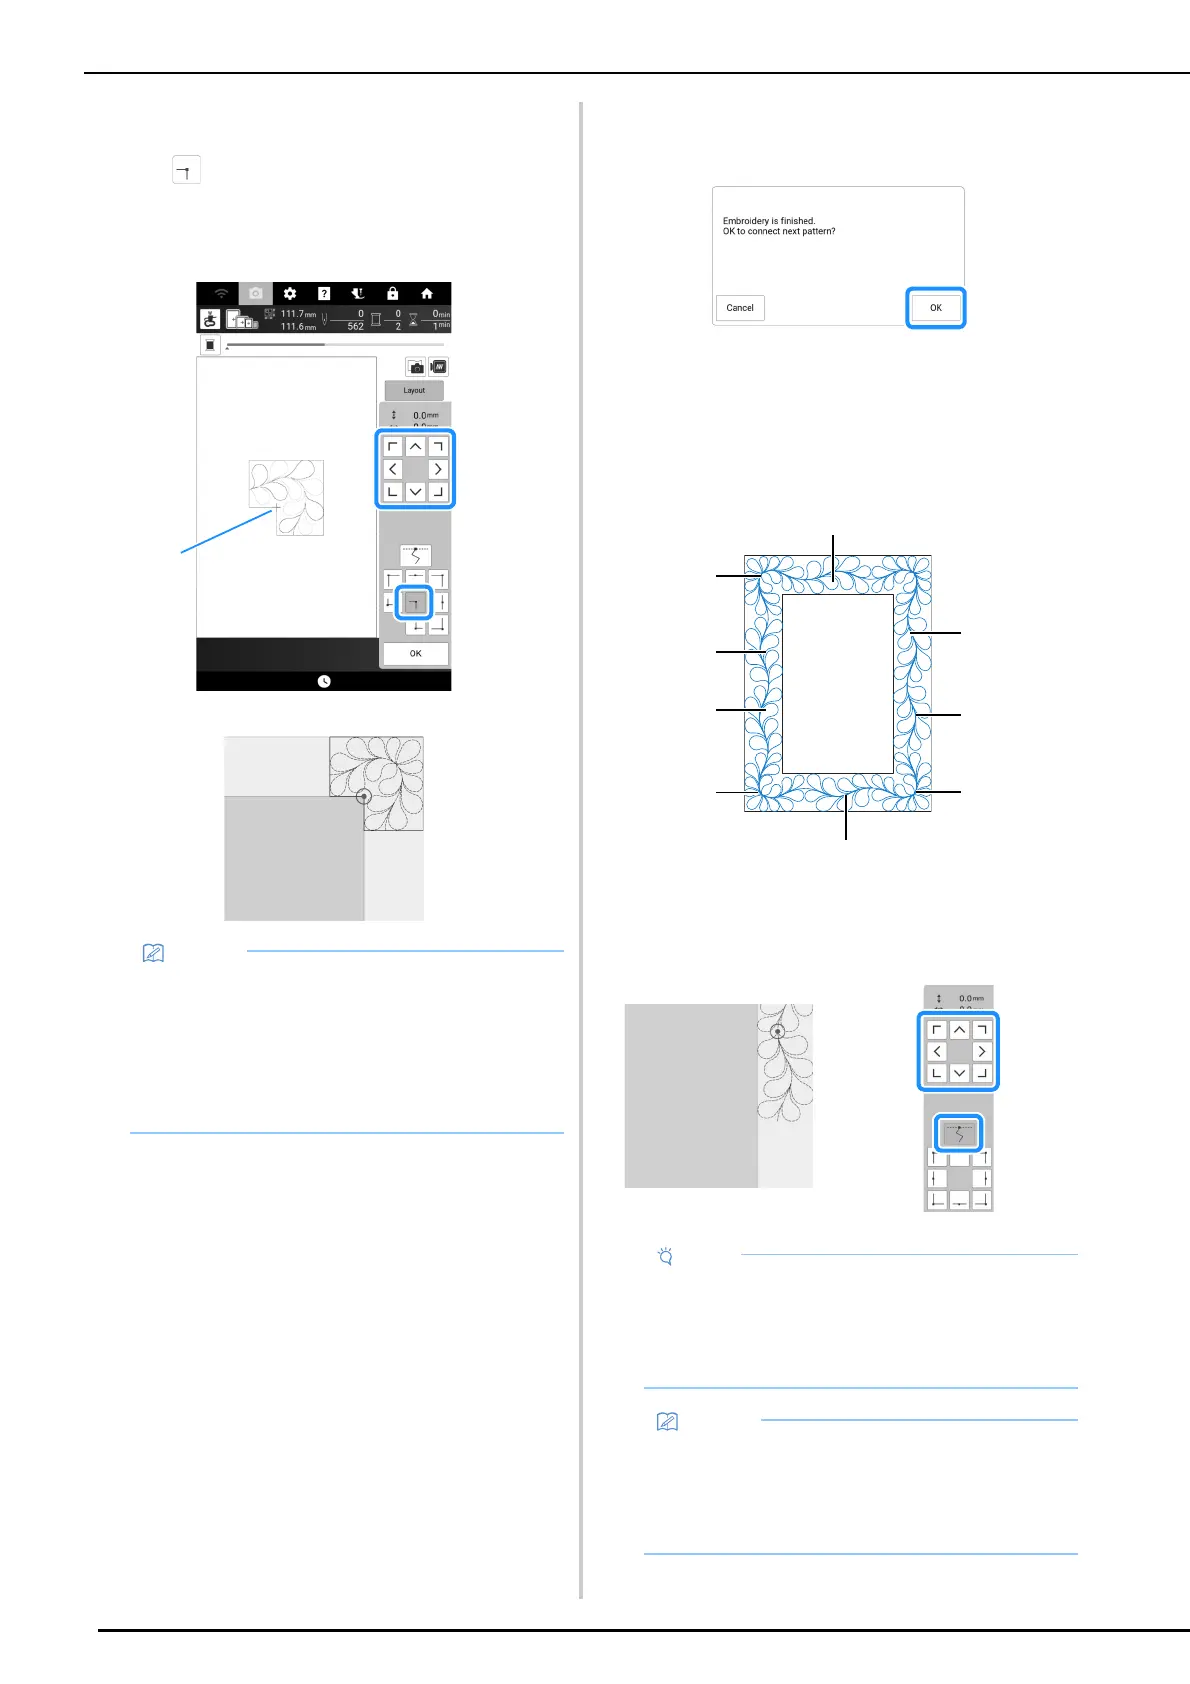
4 Align the position for the part in the
upper-right corner.
With selected, move the needle to the inner
corner. Use the move pattern keys to align the inside
upper-right corner of the reference lines previously
drawn on the quilt with the inner corner of the part
projected by the projector.
a Inner corner
5 Touch [OK] to display the embroidery
screen.
6 Press the “Start/Stop” button to
embroider the first part.
7 When embroidering is finished and the
following message appears, touch [OK].
The next part to be embroidered appears.
8 Position each part and embroider it
according to the on-screen instructions.
You will be prompted to align the starting point, rotate
the design, and to rehoop the quilt when necessary.
a When embroidering the edge part
Use the move pattern keys to align the start point projected by
the projector with the end point of the previous pattern, and then
touch [OK].
• The needle drop point projected by the
projector can be corrected on the settings
screen. For the procedure, refer to “Needle
Calibration for Camera/Projector” on
page 257.
• If necessary, rotate the pattern so that it is
aligned between the chalk reference lines.
• For precise positioning of the start point, rotate
the handwheel toward you to check the needle
drop point. After checking the needle position,
be sure to use the needle up/down key to
return the needle to its highest position.
• If the next pattern can be embroidered without
rehooping the project, the on-screen
instructions to align the start point of the
pattern will not be displayed as the pattern will
automatically be aligned with the start point.
 Loading...

