Using the Camera to Connect Patterns
214
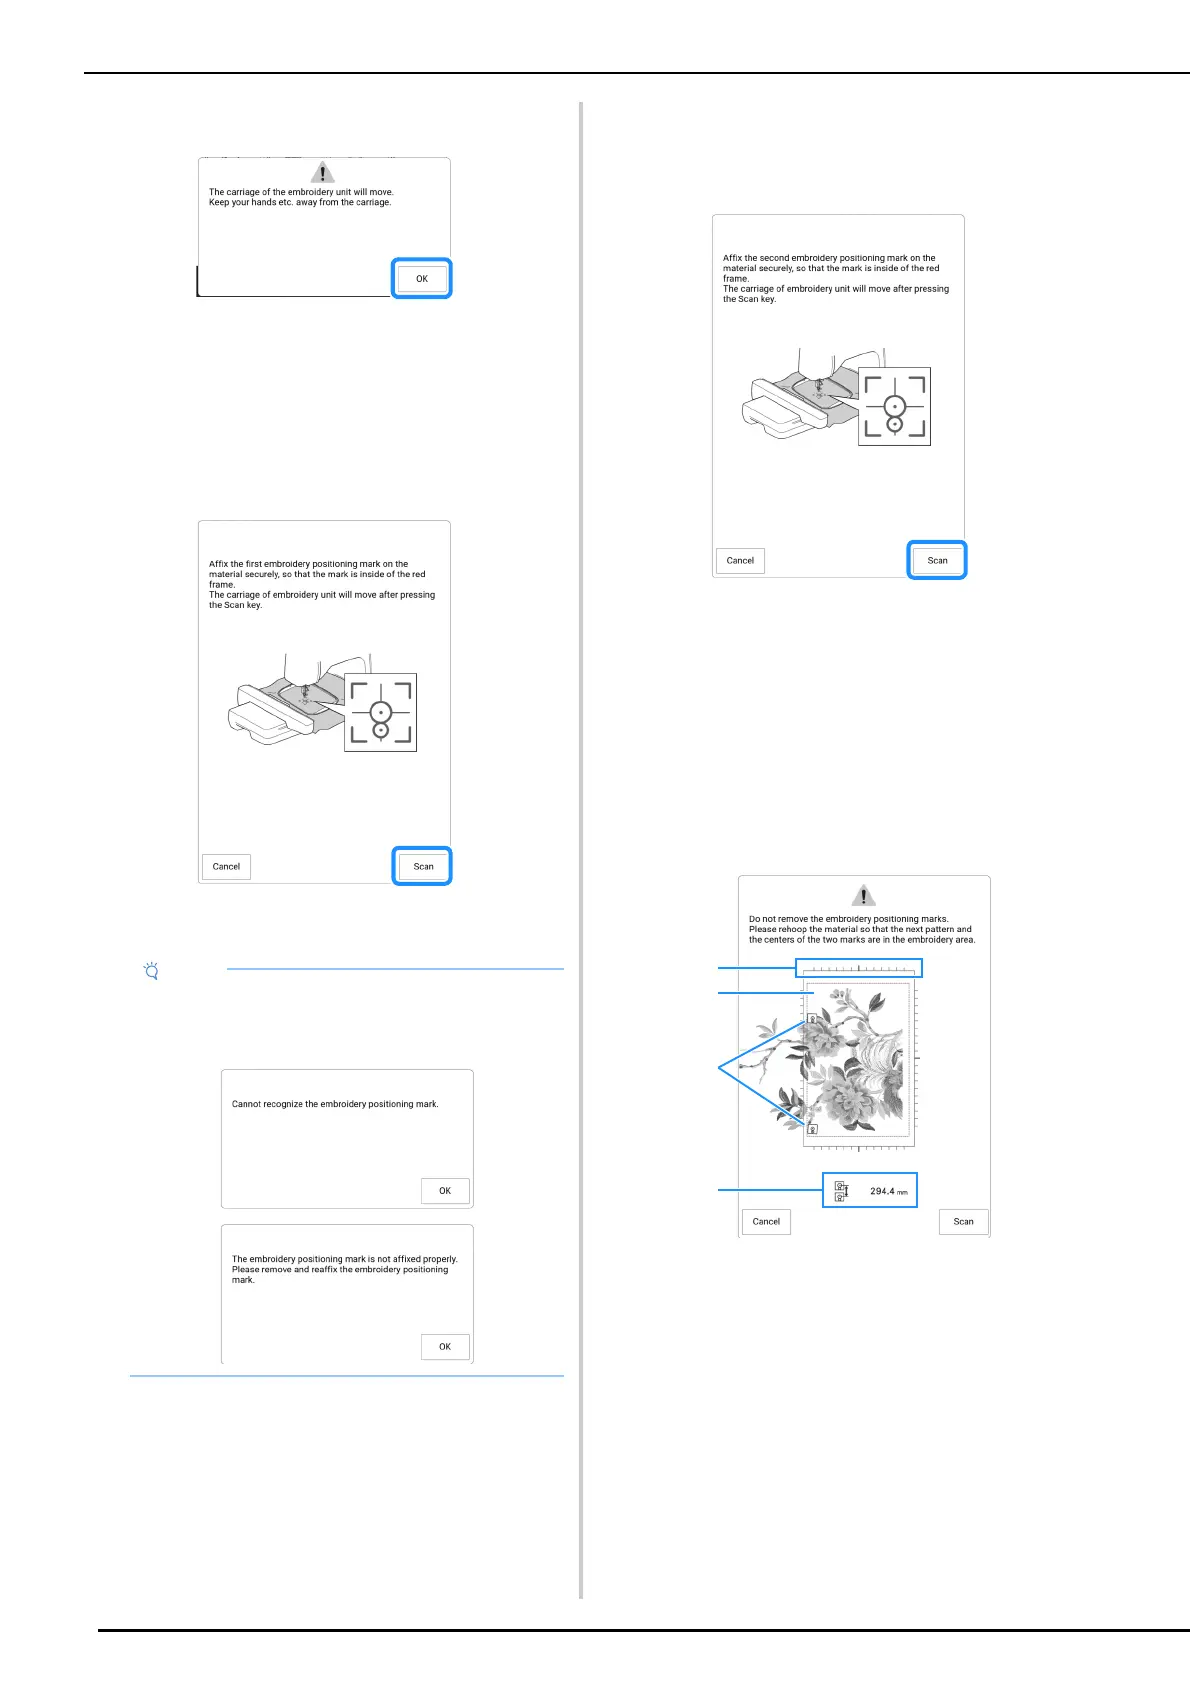
7 Touch [OK].
8 Affix the first embroidery positioning
sticker onto the fabric within the red lines
by using both hands to press down on
each corner of the sticker. Affix the
sticker with the large circle to the top as
shown on machine. Then, touch [Scan].
The camera detects the first embroidery
positioning sticker.
9 Affix the second embroidery positioning
sticker to the fabric as described in step
8, and then touch [Scan].
The camera detects the second embroidery
positioning sticker.
10 While making sure that the two
embroidery positioning stickers do not
peel off, remove the embroidery frame
from the machine, and then rehoop the
fabric.
* Be sure to hoop the fabric so the next pattern and
both the embroidery positioning stickers are within
the embroidery area.
a Embroidery area
b If a built-in large-size split embroidery pattern is
selected, and depending on the embroidery frame
size being used, a scale may appear on the
screen.
c Embroidery positioning stickers
d Distance between the embroidery positioning
stickers
• If any of the following messages appear,
reattach the embroidery positioning sticker
firmly in the correct position.
 Loading...

