4.14
Install Plug-In Unit
The following links lead to related informaon:
Remove Plug-In Unit
Each PIU has a locking lever that has the following three funcons:
■ Acts as a stopper to prevent damage to the PIU or blade connector if the PIU is inserted using too much force
Note: This funcon only works when the locking lever is in the locked posion.
■ Helps to properly align the PIU and blade connectors during inseron
■ Locks the PIU in place aer complete inseron
Step 1
Ensure that ESD handling precauons are observed and remove the PIU from its ESD protecve packaging.
Warning: Ensure that an appropriate ESD wrist strap is worn and is properly grounded.
Step 2
Inspect the PIU for any damage or debris. Carefully remove any debris. If the PIU is damaged, follow local
pracces/procedures for repair or replacement of a damaged PIU, as applicable. Do not proceed unless the PIU
to be installed is of the correct type and is undamaged.
Warning:
When installing the unit, use both hands to avoid dropping the unit.
Step 3
Verify the locking lever is in the locked posion.
Step 4
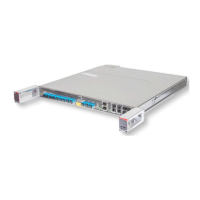
Carefully align and insert the PIU into the appropriate slot unl it stops, as shown in the following gure.
Note: The PIU should be slowly and carefully inserted into the blade to prevent damage to the PIU and/or
blade. When the connector pins of the PIU engage the backplane, the PIU must be fully seated within 10
seconds. If it takes longer than 10 seconds to install the PIU, an equipment fault alarm is raised. Return to the
rst step and repeat the procedure to clear the alarm. Damage to the PIU and/or blade is more likely if the
locking lever is in the released posion.
Equipment Installation
Install Plug-In Unit
148
Release 19.1.1 · Issue 1.1, May 2021
Fujitsu and Fujitsu Customer Use Only