GE HEALTHCARE
DIRECTION 2307224-100, REVISION 6DISCOVERY LS SYSTEM SERVICE MANUAL
Chapter 6 - Table Page 167
2.) Locate and remove following hardware from the upgrade kit:
3.) Refer to Figure 6-79. Insert the bolts and washers into the assembly before setting the
assembly on the bearing block/mounting plate.
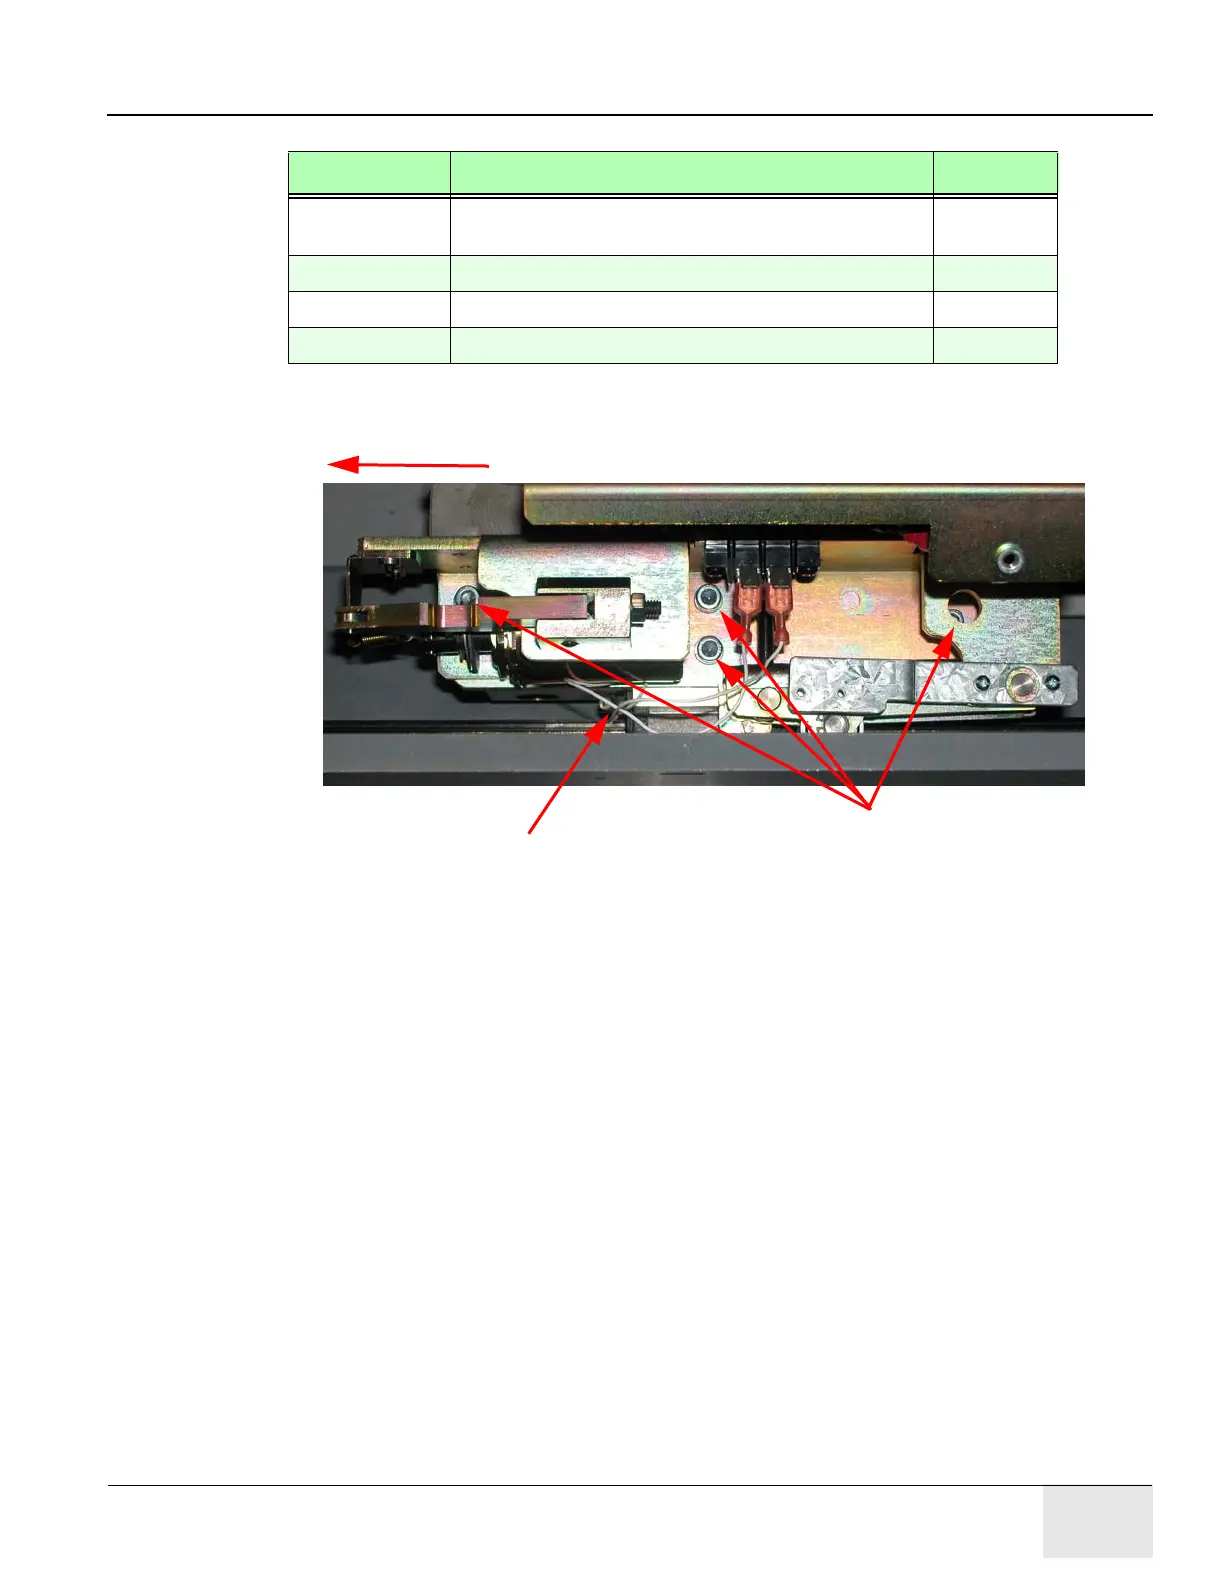
Figure 6-79: CT-PET Latch in Position
4.) Use a 5 mm Allen wrench to fasten the latch assembly to the mounting plate with four sets of
M6 bolts, lock and flat washers.
5.) Refer to Figure 6-78. Fasten the terminal ends of Cable P/N 2338086 to the terminal block.
• Cable P/N 2338086 provides AC power to the solenoid. It does not matter which terminal
the wires are fastened to, even though they are labeled.
• If necessary, terminate the two white wires, and fasten them to the terminal strip as shown
in Figure 6-78.
Part Number Description Quantity
2340721 GS Positioning Unit (CT-PET Position Latch
Assembly)
1
46-328417P13 M6 x 16 mm Hexagon Socket Screw 4
2315373-4 M6 Lock Washer 4
2109878-3 M6 Flat Washer 4
Bolts and washers inserted into the latch.
Twist and tuck these wires to prevent catching.
To Clutch Motor Assembly