GE HEALTHCARE
DIRECTION 2307224-100, REVISION 6DISCOVERY LS SYSTEM SERVICE MANUAL
Chapter 6 - Table Page 183
3.) If the 3 mm clearance cannot be obtained between the bottom of the Table latch and the
CT-PET Position Latch Arm, reposition the solenoid.
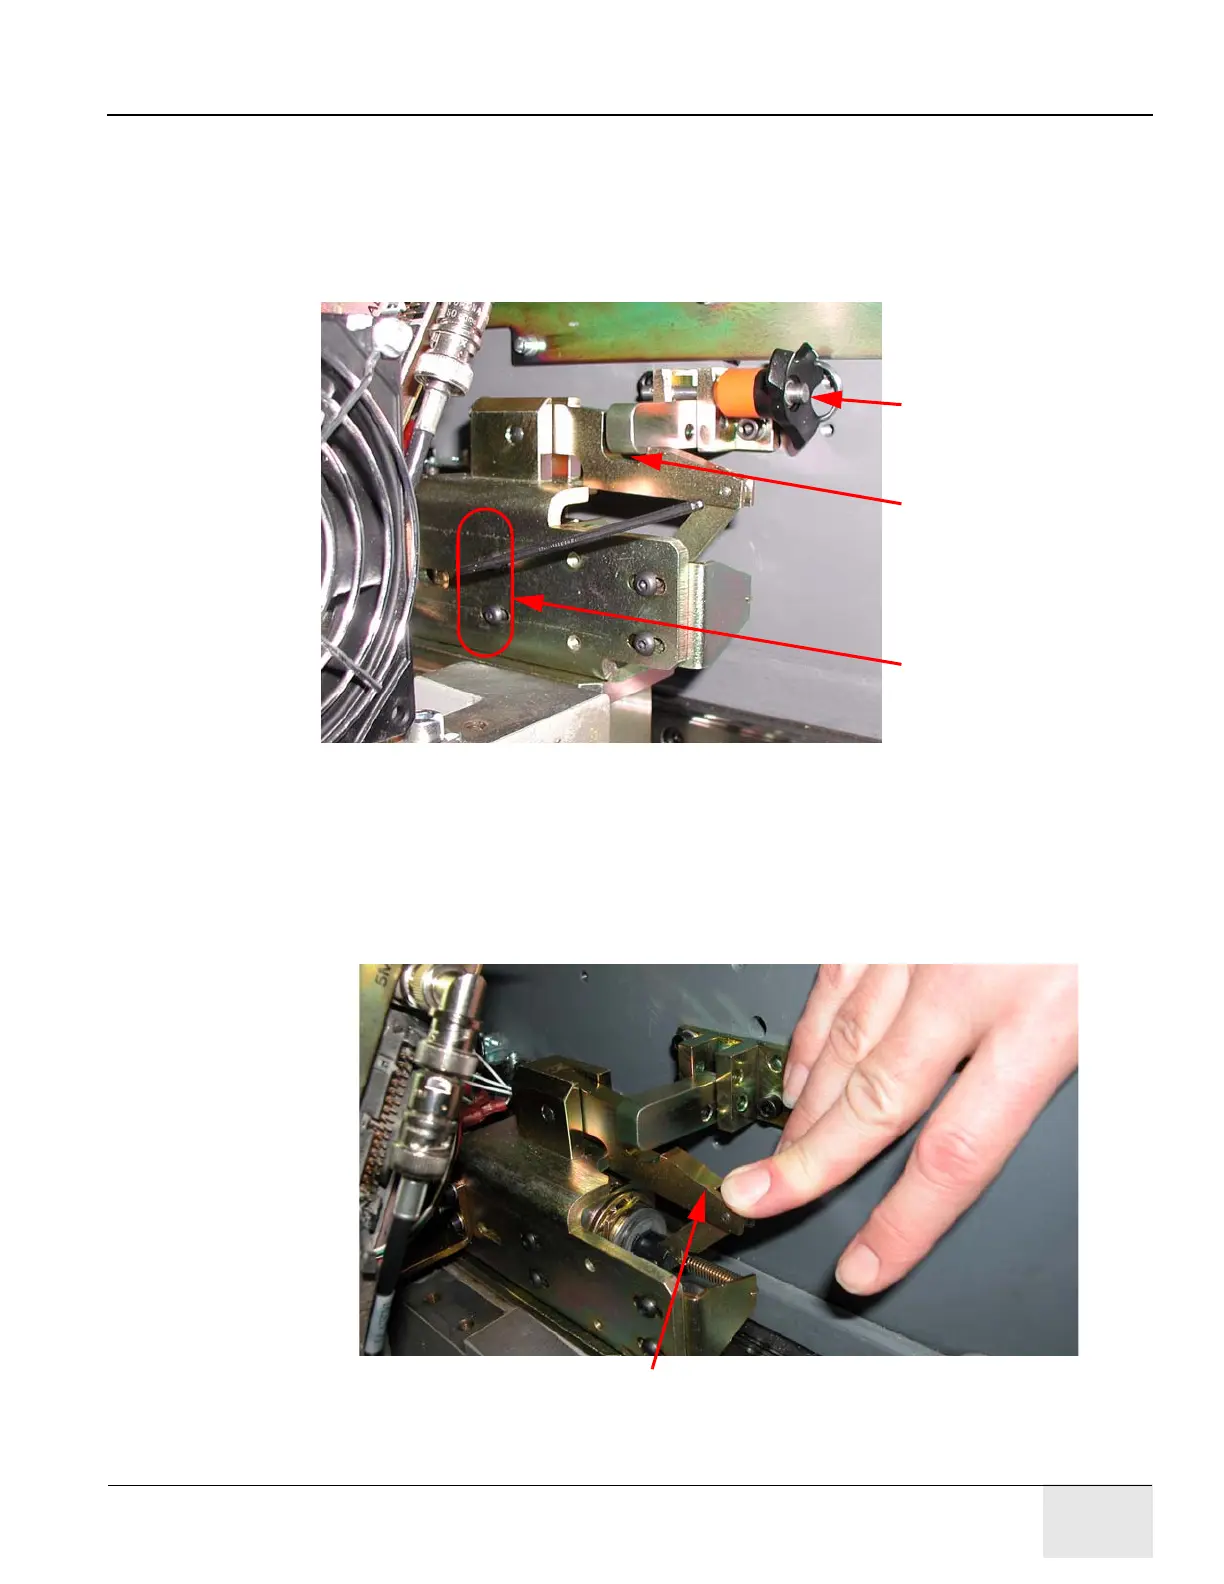
a.) Refer to Figure 6-103. Use a 2.5 mm Allen wrench to loosen two solenoid screws.
b.) Slide the solenoid all the way toward the front of the table, until it clears the bottom of the
service latch by 3 to 3.5 mm.
c.) Using a 2.5 mm Allen wrench, tighten the solenoid hardware.
Figure 6-103: Reposition the Solenoid
4.) Check the latch clearances in the Solenoid Energized position.
a.) Refer to Figure 6-104. Manually depress the solenoid latch arm.
b.) Slide the table forward and check the clearance.
c.) Use a 1.5 mm Allen wrench to ensure the edge of the latch arm now clears the Table Latch
Bar by 1.5 mm.
Figure 6-104: Check Latch Clearance in "Energized" Position
Adjust for 3 to 3.5 mm
Adjust Solenoid Latch
with Table Latch Pin in
place.
Solenoid Screws
clearance.
Leading edge of solenoid latch arm detent should clear service latch by 1.5 mm.