Intel® Server D50DNP Family Integration and Service Guide
113
7.2 Air Duct Removal / Installation
To maintain system thermals, the air duct must always be in place when the system is operational. Removal
of the air duct is necessary when installing or replacing any system component within the module.
Air duct construction and attachment method are similar for all half-width air-cooled modules
D50DNP1MHCPAC, D50DNP1MHEVAC, and D50DNP2MHSVAC. The D50DNP2MFALAC module is slightly
different and the changes in construction are reflected in the corresponding illustrations.
Note: Air ducts are not used with liquid-c
ooled modules.
Required Tools and Supplies
• Anti-static wrist strap and conductive workbench pad (recommended)
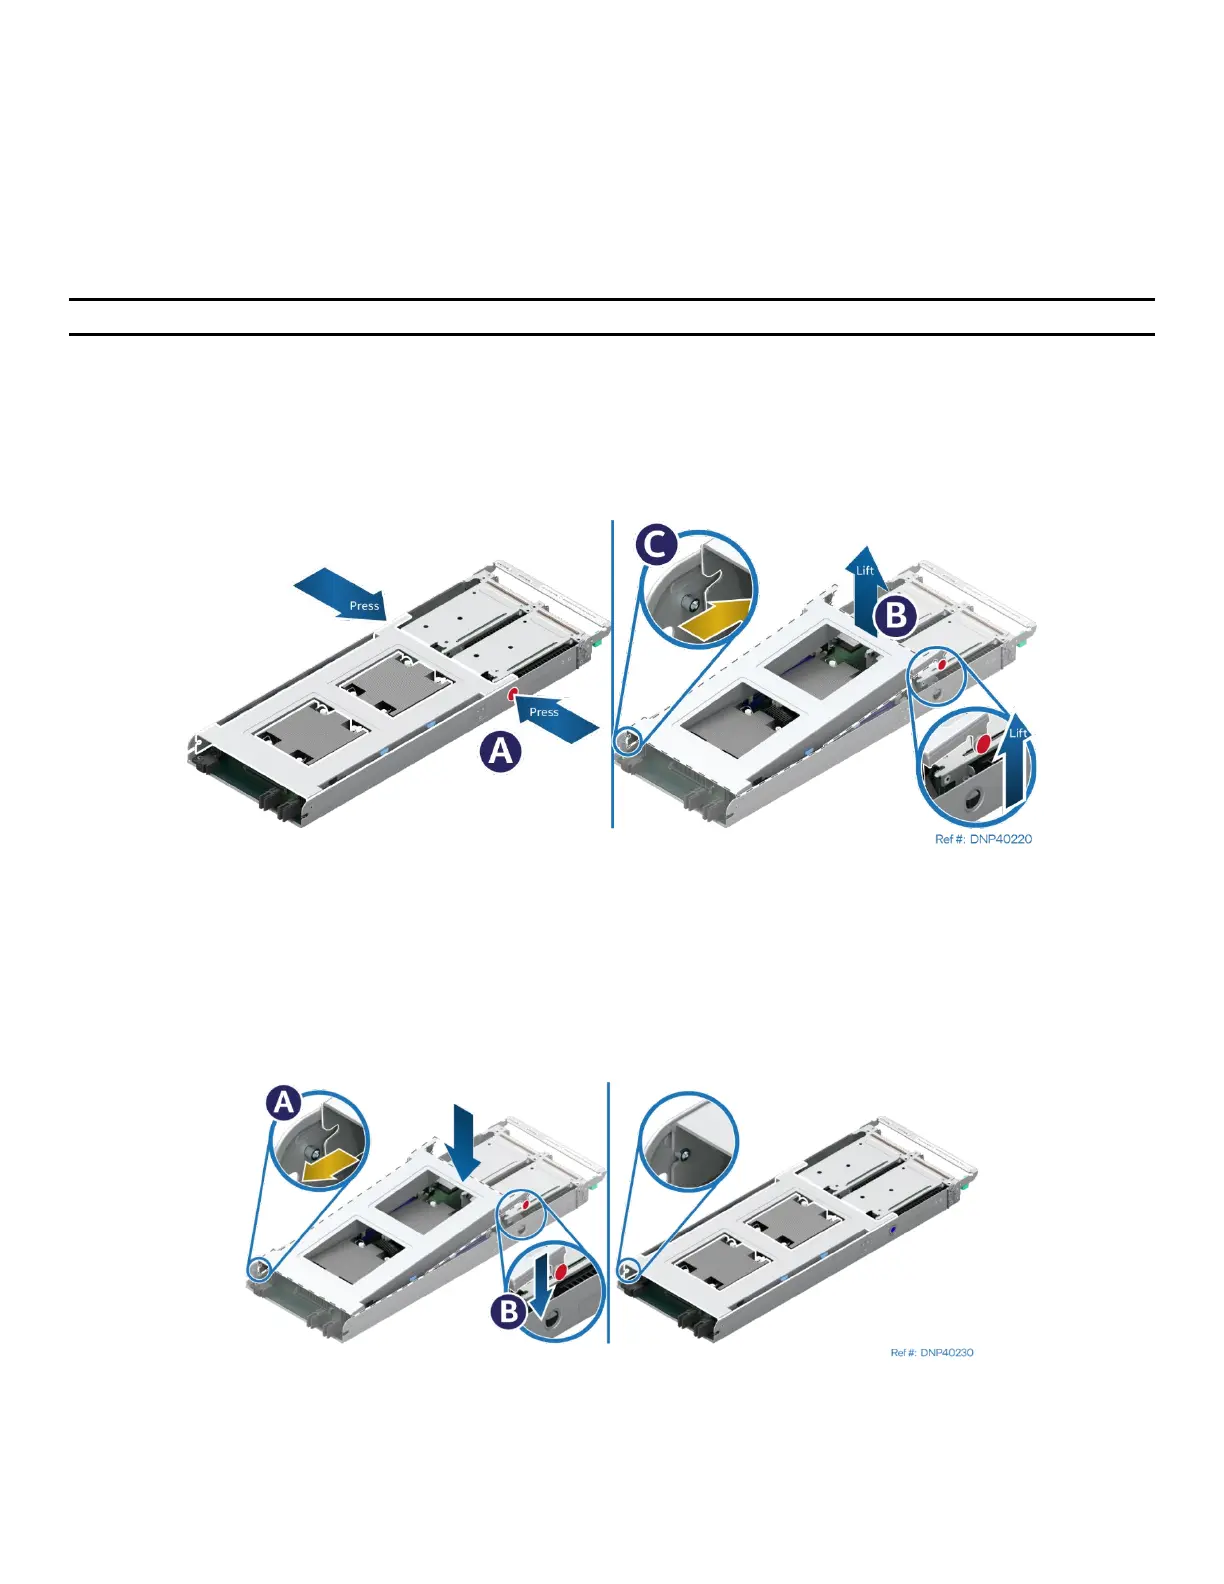
7.2.1 Air Duct Removal (Half Width Modules)
Figure 127. Removing the Air Duct
1. Press the latches on both sides of the module inwards (see Letter A).
2. Carefully lift the front edge of the air duct (see Letter B).
3. Pull the air duct away from the module (see Letter C).
7.2.2 Air Duct Installation (Half Width Modules)
Figure 128. Installing the Air Duct
1. Align and attach the hinge slots on the back end of the air duct with the hinge posts on both sides of
the module (see Letter A).
2. Lower the air duct until both latches snap into place (see Letter B).