Intel® Server D50DNP Family Integration and Service Guide
131
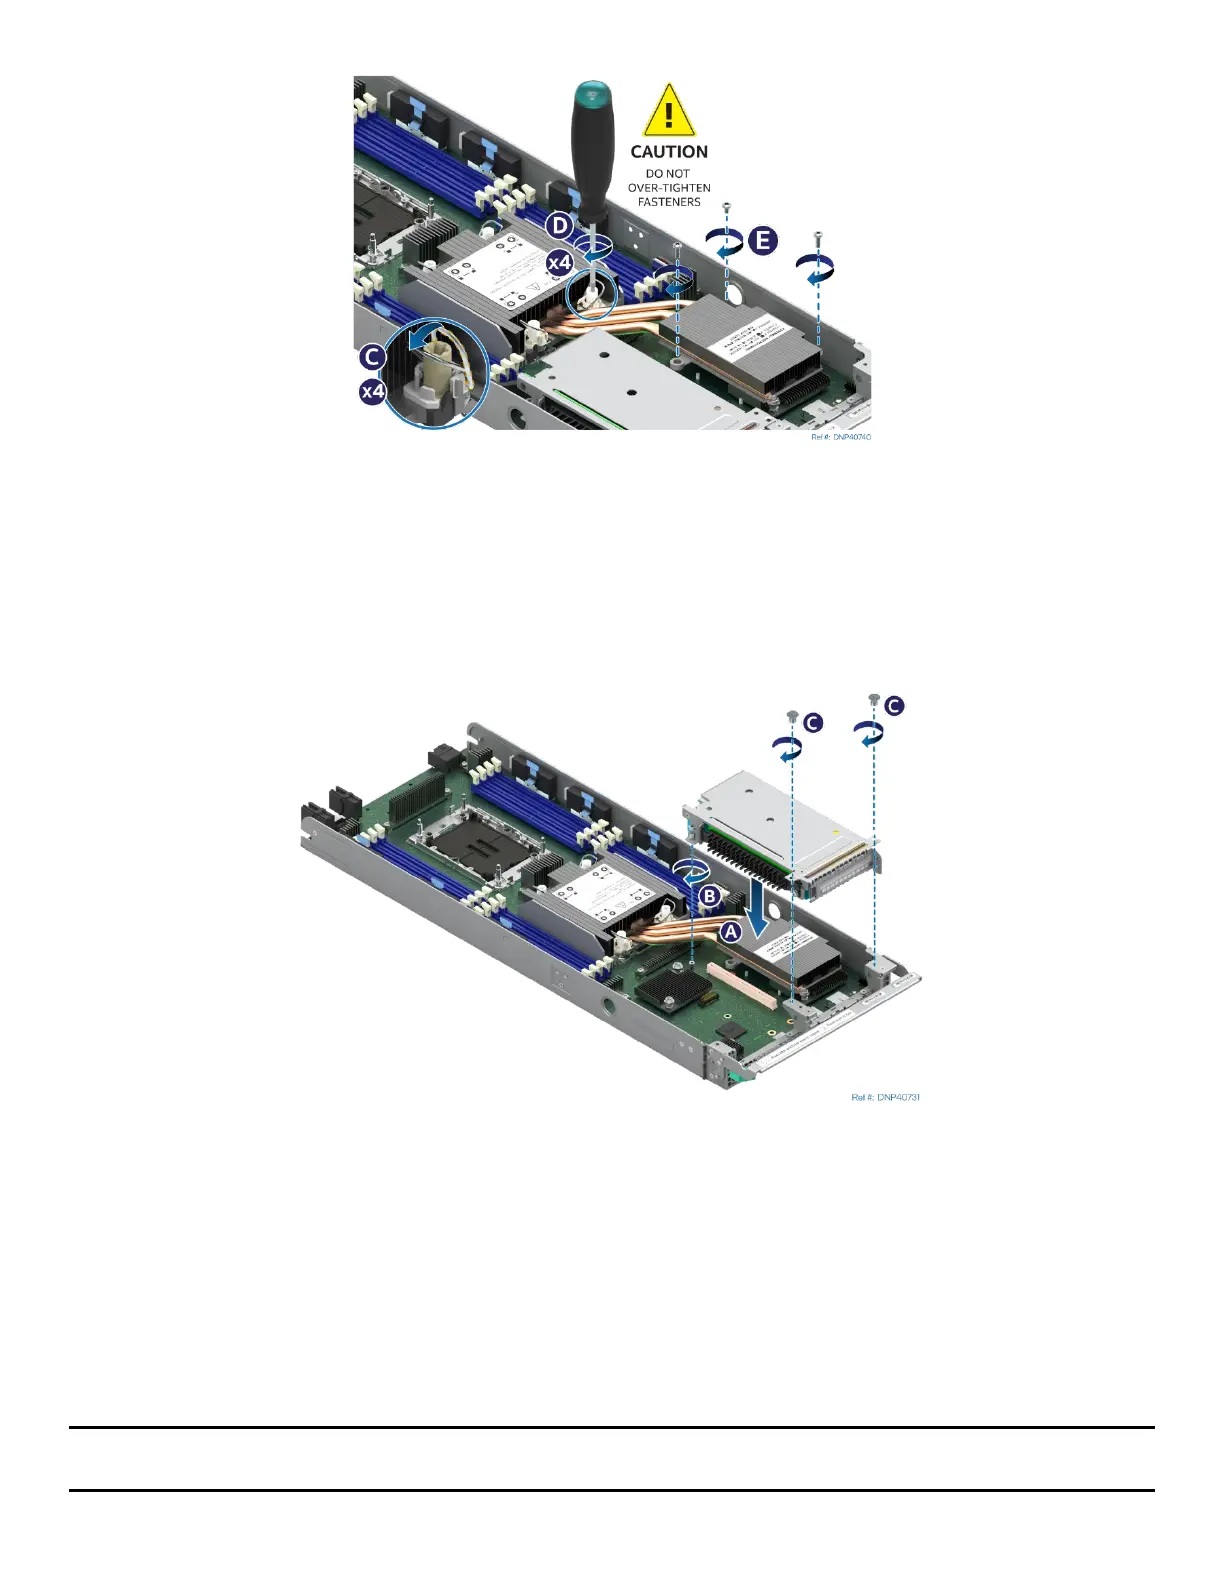
Figure 160. Tighten EVAC Heat Sink Extension
7. Ensure that the PHM is sitting flat and even on the bolster plate.
8. Set all four anti-tilt wires on the heat sink to the outward position (see Letter C).
9. Using a T30 Torx* screwdriver, tighten the heat sink fasteners to 8 in-lb (see Letter D). No specific
sequence is needed for tightening. General diagonal bolt tightening order can be used.
10. Using a Phillips* screwdriver, tighten the three heat sink extension screws to 5 in-lb (see Letter E).
Figure 161.Installing a Riser Assembly
11. Align the riser card to the riser slot on the server board (see Letter A).
12. Carefully push down on the riser assembly until the riser card is securely seated in the riser slot.
13. Ensure that the screw holes of the riser assembly are aligned with the mounting holes of the module.
14. Using Phillips screwdriver #2 tighten the captive screw at the back of the riser assembly to 5 in-lb.
(see Letter B)
15. Using Phillips screwdriver #1 install two screws to secure the riser assembly to the front of the
module. Tighten to 5 in-lb. (see Letter C).
16. Reinstall the air duct and module (see Section 7.2.2 and Section 7.1.2).
Note: Intel strongly recommends installing both processors. If only one processor is installed, do not install a
processor heat sink on an empty socket.