Intel® Server D50DNP Family Integration and Service Guide
154
6. Grasp the M.2 SSD by its edges and remove it from the connector in the direction shown (see Letter C).
7. Carefully peel off the thermal pad from the rear side of the SSD and assess if it can be reused with the
new SSD.
If no SSD is being installed, follow step 8 and step 9. If the SSD is being replaced, skip step 8 and step 9:
8. Return the previously removed screw to the M.2 mounting standoff.
9. Reinstall the M.2 SSD heat sink onto the riser assembly.
Figure 200. Installing Air-Cooled M.2 SSD
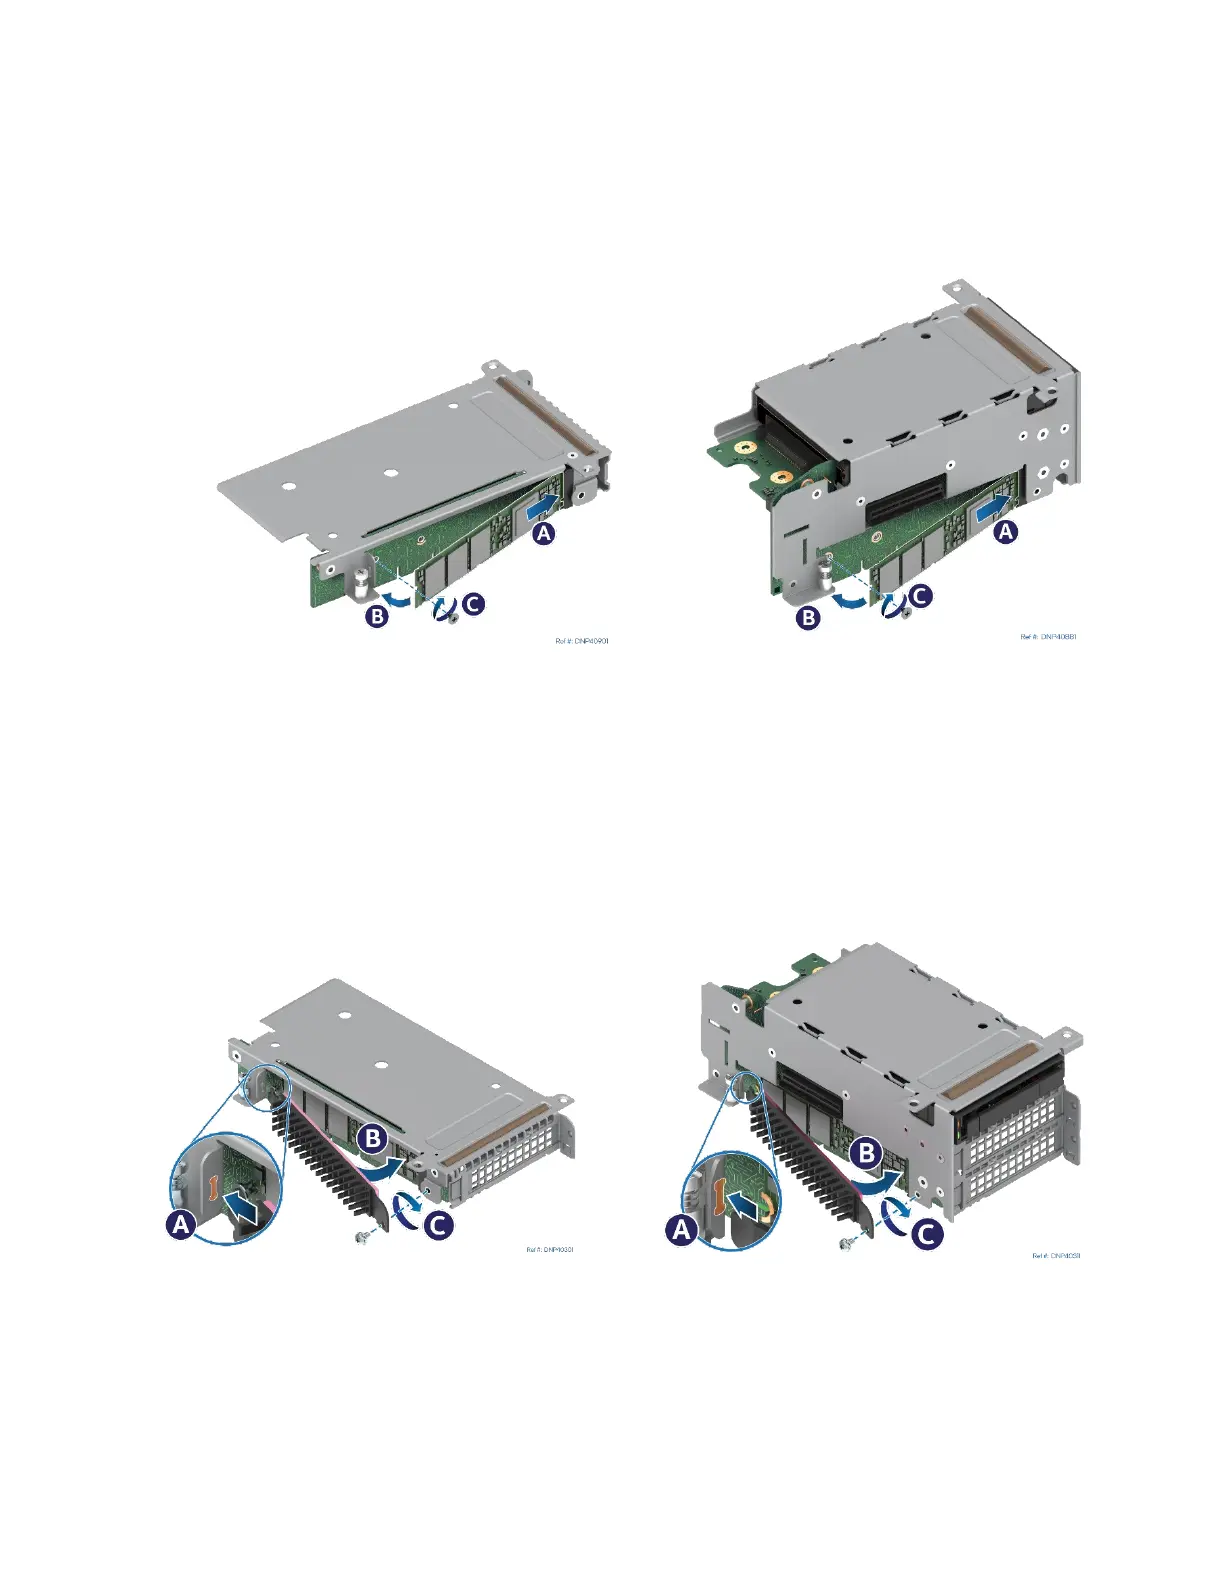
10. Remove the screw (if present) from the M.2 mounting standoff on the left side of the riser assembly.
11. Attach a new or used thermal pad to the rear side of the SSD under the tallest SSD component. This is
usually the SSD controller IC.
12. Align the notch within the SSD edge connector with the key in the M.2 connector and insert the SSD into
the connector (see Letter A).
13. Push the free end of the SSD towards the riser assembly (see Letter B).
14. Secure the M.2 SSD to the mounting standoff with the previously removed screw (see Letter C).
Figure 201. Installing Air-Cooled M.2 Heat Sink
15. If installing a new heat sink, peel off the protective film from the thermal interface material.
16. Insert the tab at the edge of the heat sink into the slot on the riser assembly (see Letter A) making sure
the heat sink side covered with the thermal pad is facing the M.2 SSD.
17. Push the loose end of the heat sink towards the SSD (see Letter B).
18. Secure the heat sink to the riser assembly with a screw (see Letter C).