Intel® Server D50DNP Family Integration and Service Guide
67
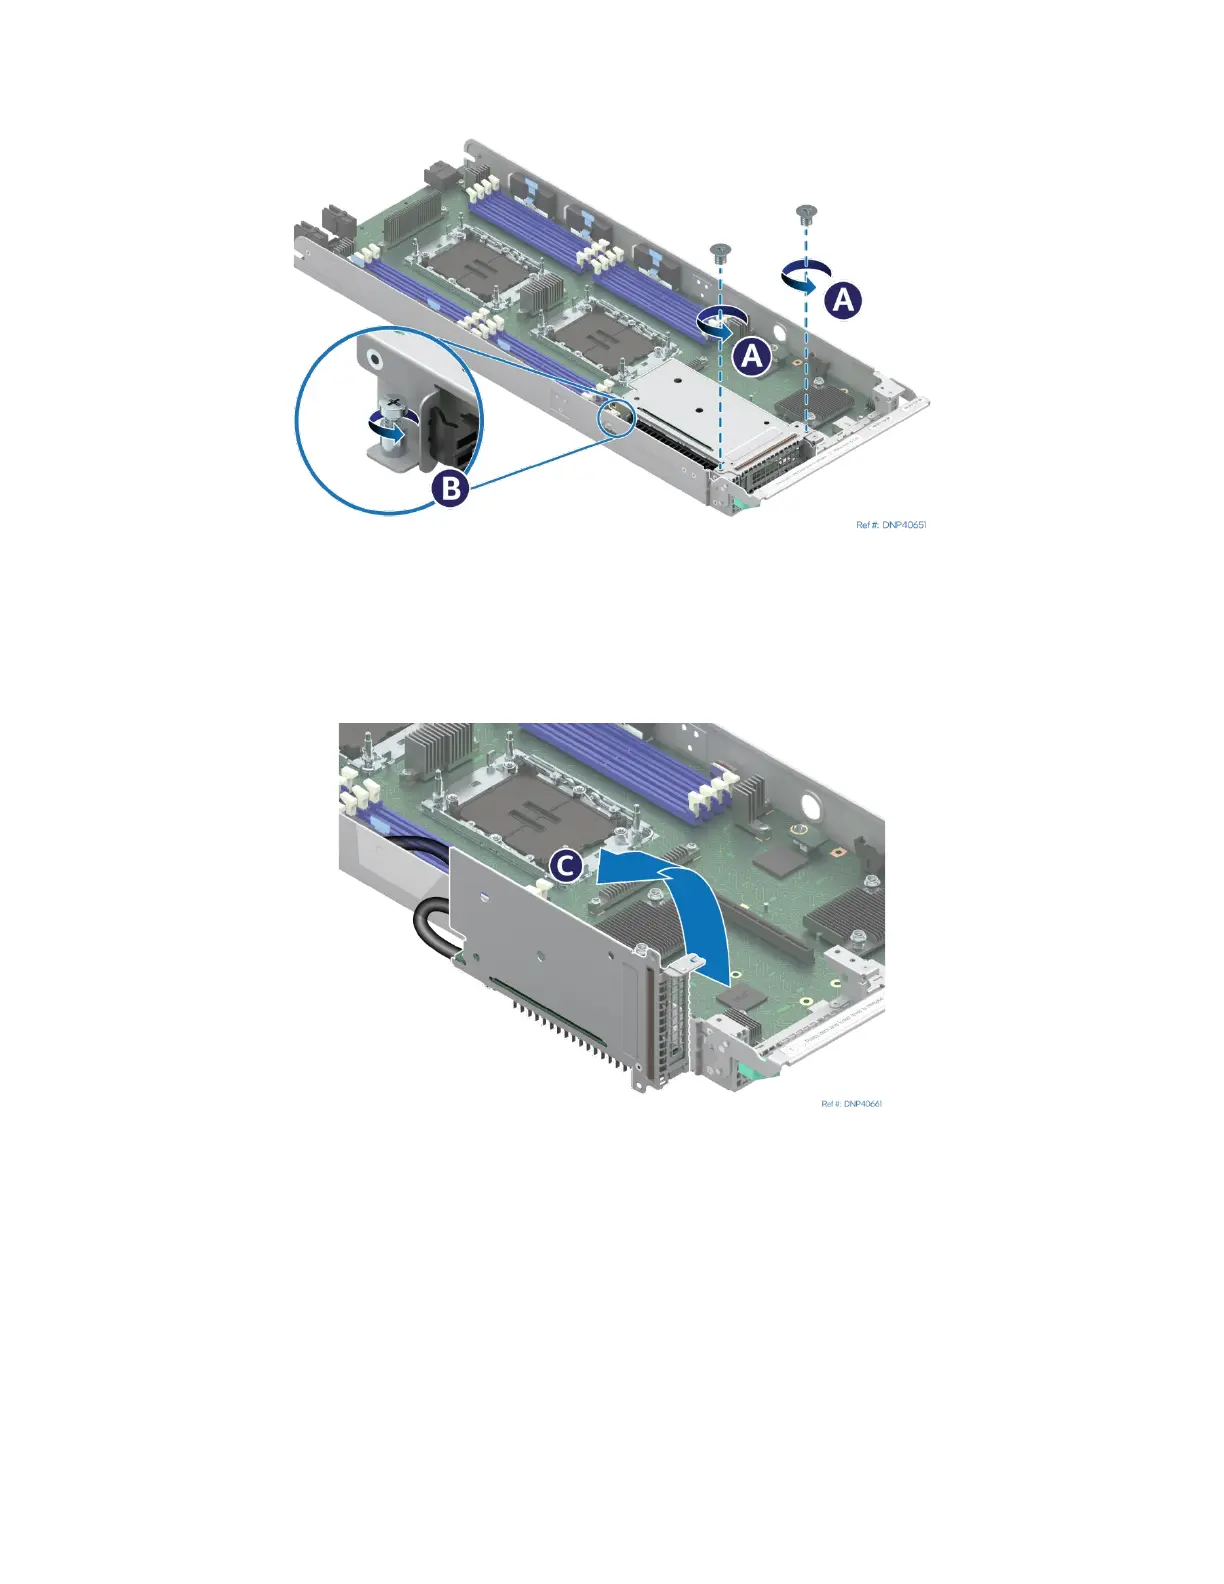
3.4.2 MCIO* Riser Assembly Removal
Figure 70. Removing the Screws for MCIO Riser Assembly
1. Using Phillips screwdriver #1 remove two screws that secure the riser assembly to the front of the
module (see Letter A).
2. Using Phillips screwdriver #2 loosen the captive screw at the back of the riser assembly. (see Letter B)
Figure 71. Tilting the MCIO* Riser Assembly
3. Disconnect the riser board from the riser slot connector by lifting it up.
4. Tilt the riser assembly on its side (see Letter C) to make room to install the add-in card. Refer to the
following section for add-in card installation.
1U air-cooled
module shown