Intel® Server D50DNP Family Integration and Service Guide
181
7.13 Server Board Replacement
Before performing this procedure, review all the safety and ESD precautions found in the Safety Warnings
section at the beginning of this document.
Note: All components removed from the module must be kept on an ESD safe work surface or into an ESD
safe bin or bag while full module/system disassembly and reassembly is in progress.
Required Tools and Supplies
• New Intel® Server Board D50DNP1SB
• Anti-static wrist strap and conductive workbench pad (recommended)
• Phillips* head screwdriver #2
• ESD gloves
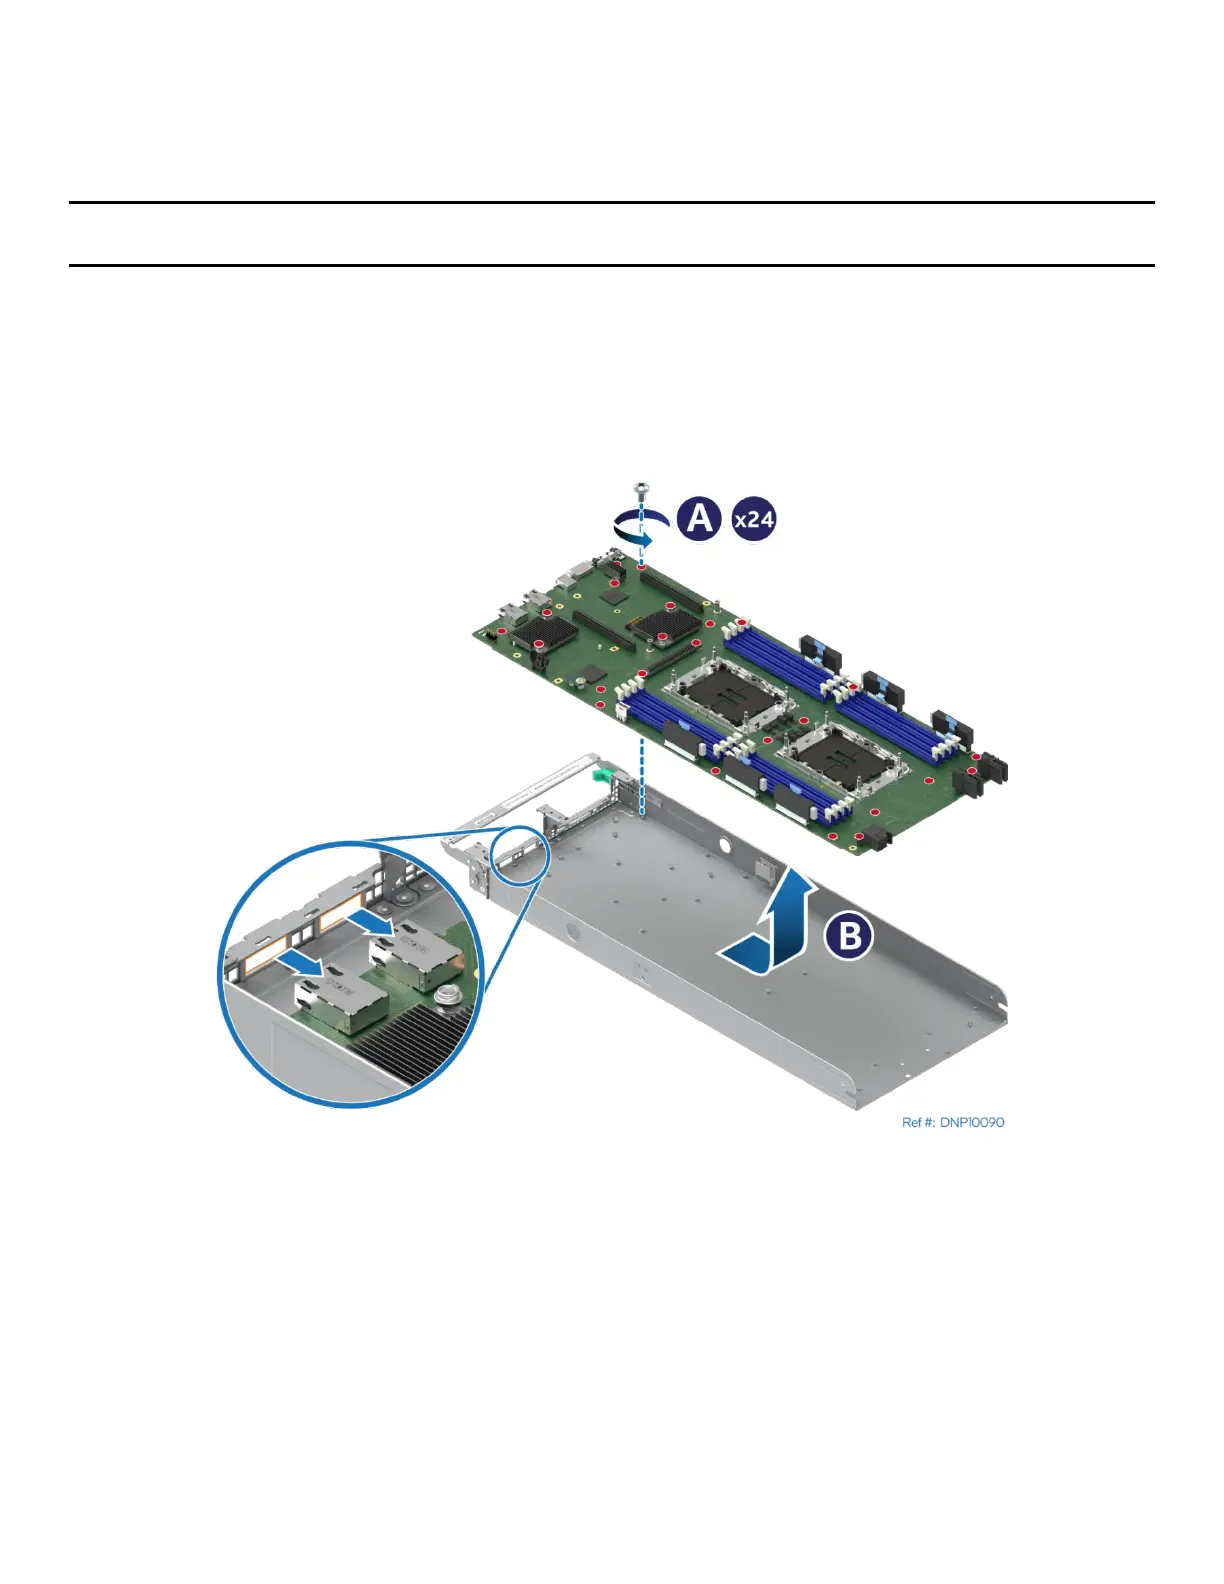
Figure 247. Server Board Removal
1. Remove the module from the chassis (see Section 7.1).
2. For air-cooled modules, remove the air duct (see Section 7.2).
3. Remove riser card assemblies (see Section 7.5).
4. Remove all options installed onto the server board.
5. Remove all memory modules (see Section 7.4).
6. For the liquid-cooled module, remove the liquid-cooling loop (see Section 7.7).
7. Remove processors (see Section 7.3).
8. Remove 24 screws securing the server board to the module tray (see Letter A).