Intel® Server D50DNP Family Integration and Service Guide
171
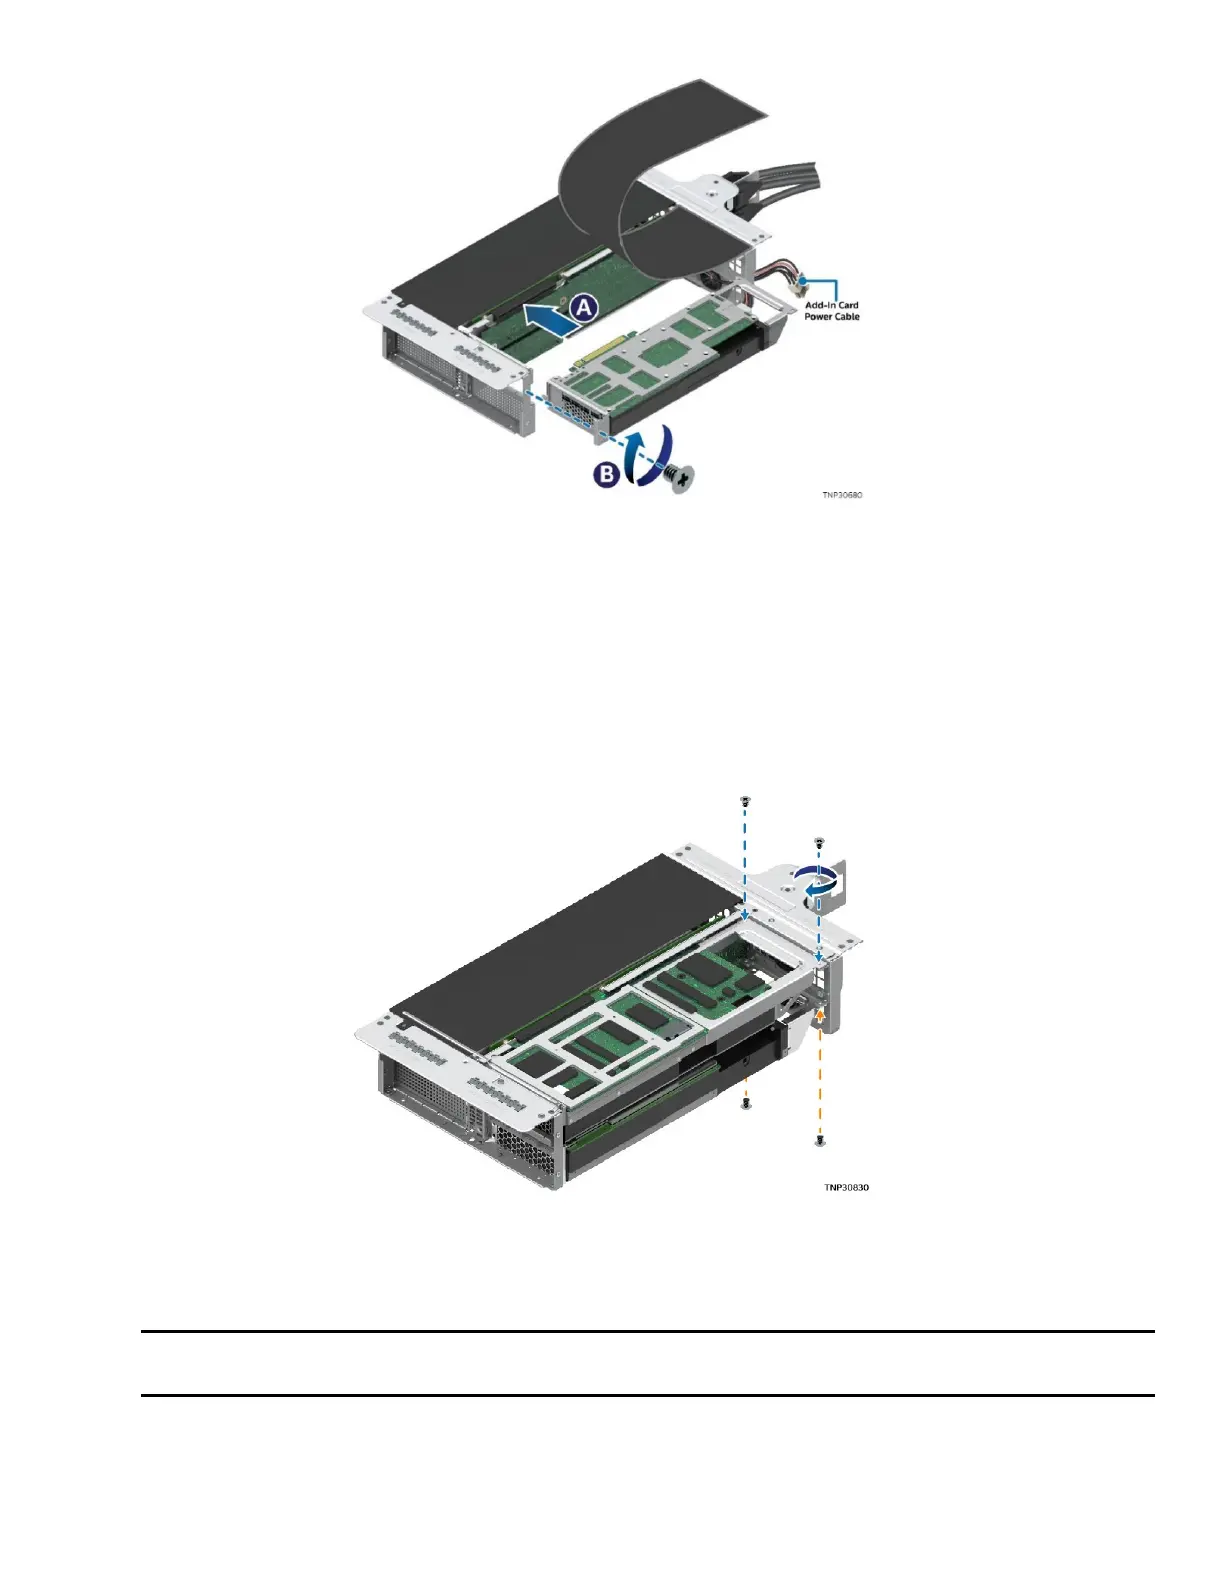
Figure 229. Installing Accelerator Add-In Card in Riser Assembly
13. Connect the power cable to the new add-in card if needed and route the power cable through the
plastic shield opening in the rear of the riser assembly.
14. Align the bracket of the accelerator add-in card with the opening of the riser assembly.
15. Carefully push the add-in card into the PCIe* slot (see Letter A). Ensure that the add-in card is fully
seated.
16. Fasten the screw on the metal bracket to secure the accelerator add-in card to the riser assembly
(see Letter B).
Figure 230. Securing the Accelerator Add-In Card in the Riser Assembly
17. Fasten the two screws on each corner of the back side to firmly attach the accelerator add-in card to
the riser assembly.
Note: T
he direction of the screws on the back side depends on whether the accelerator add-in card is
in the top slot or bottom slot of the riser assembly.
18. Repeat step 5 through step 17 to replace other accelerator add-in cards as needed.
19. Install the screw that holds the flap on the front side of the riser assembly.