4-32 Service Manual
4023-001
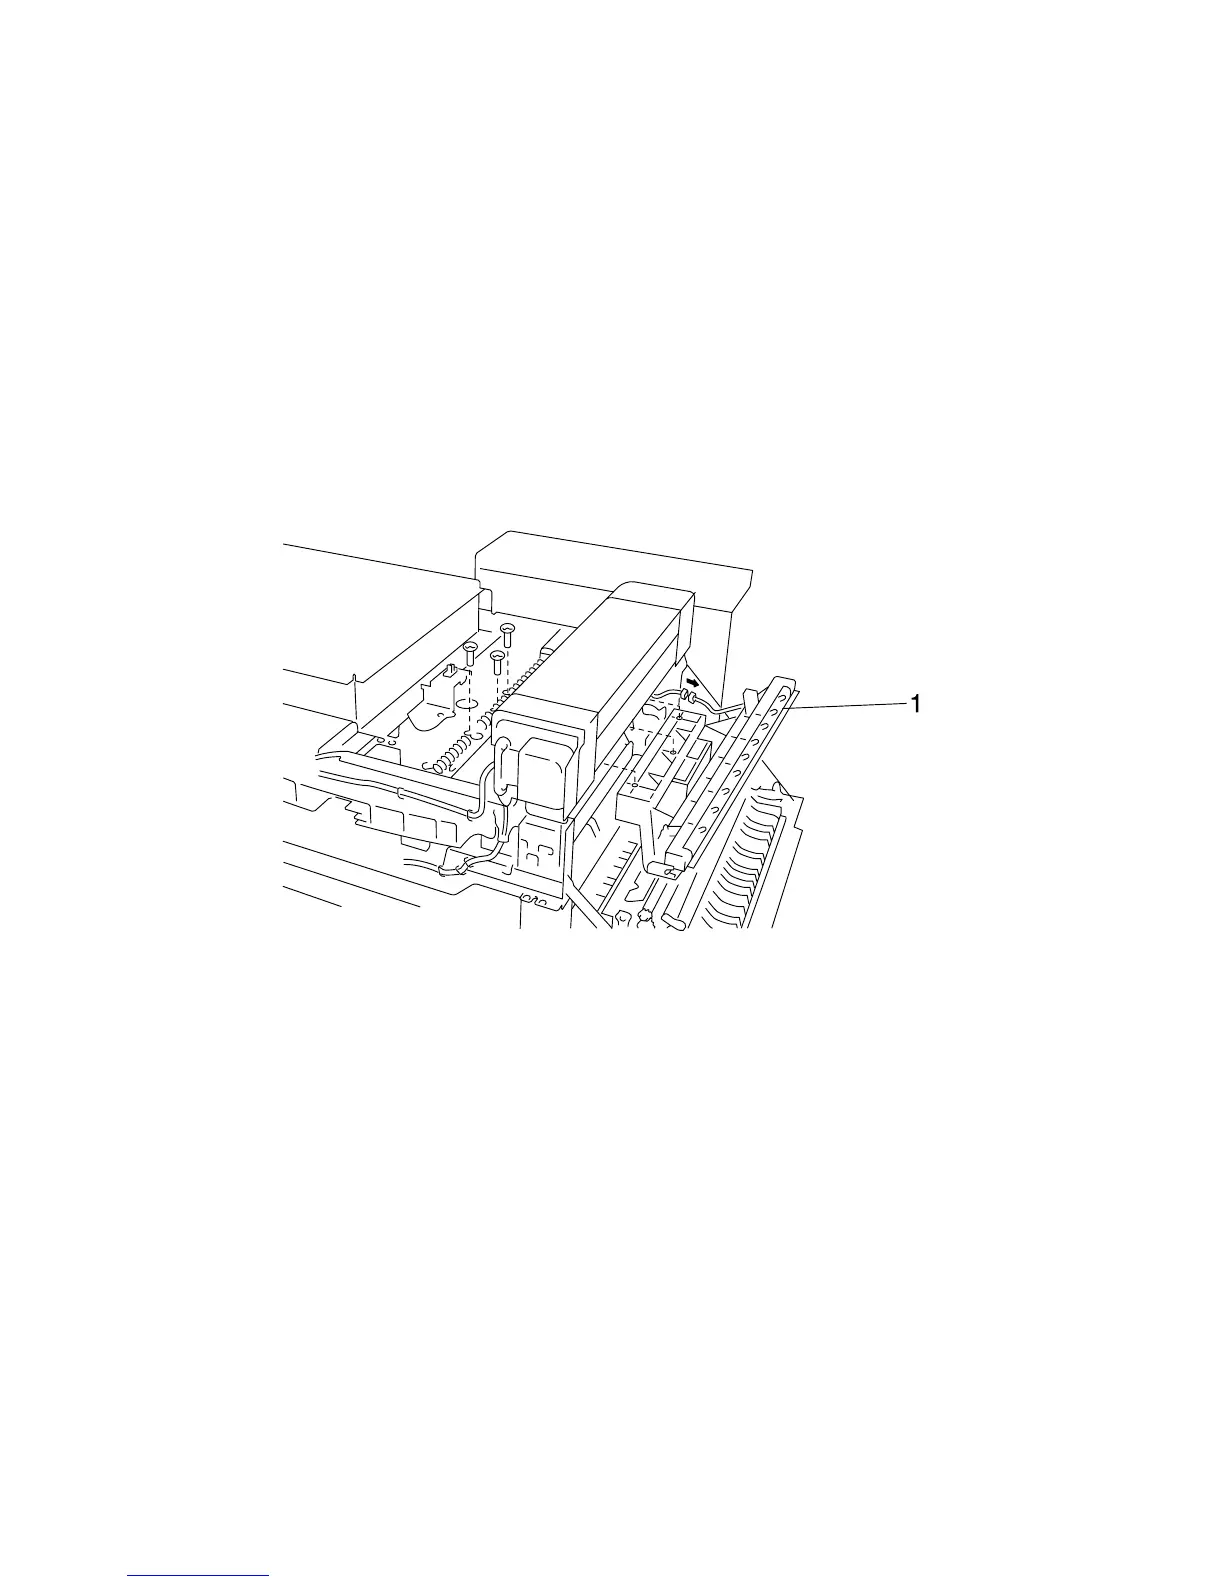
Eraser Duct Assembly Removal
1. Remove the top cover. (2 screws)
Note: When reinstalling the top cover, securely insert the
projections of the top cover into the appropriate cutouts of the
printer frame.
2. Raise the right cover release lever and open the right cover.
3. Remove the imaging cartridge.
4. Remove the eraser duct assembly (1). (3 screws, 1 connector)