SECTION 05: COOLING SYSTEM
DOB 1300-1556 | X3-45 Commuter PA-1648 Maintenance Manual First release Oct 2020
16. Support the cooling assembly with a lift table
positioned under the lower support.
17. Unscrew the lower support from the vehicle
(two hex bolts at each end of the support
Figure 37).
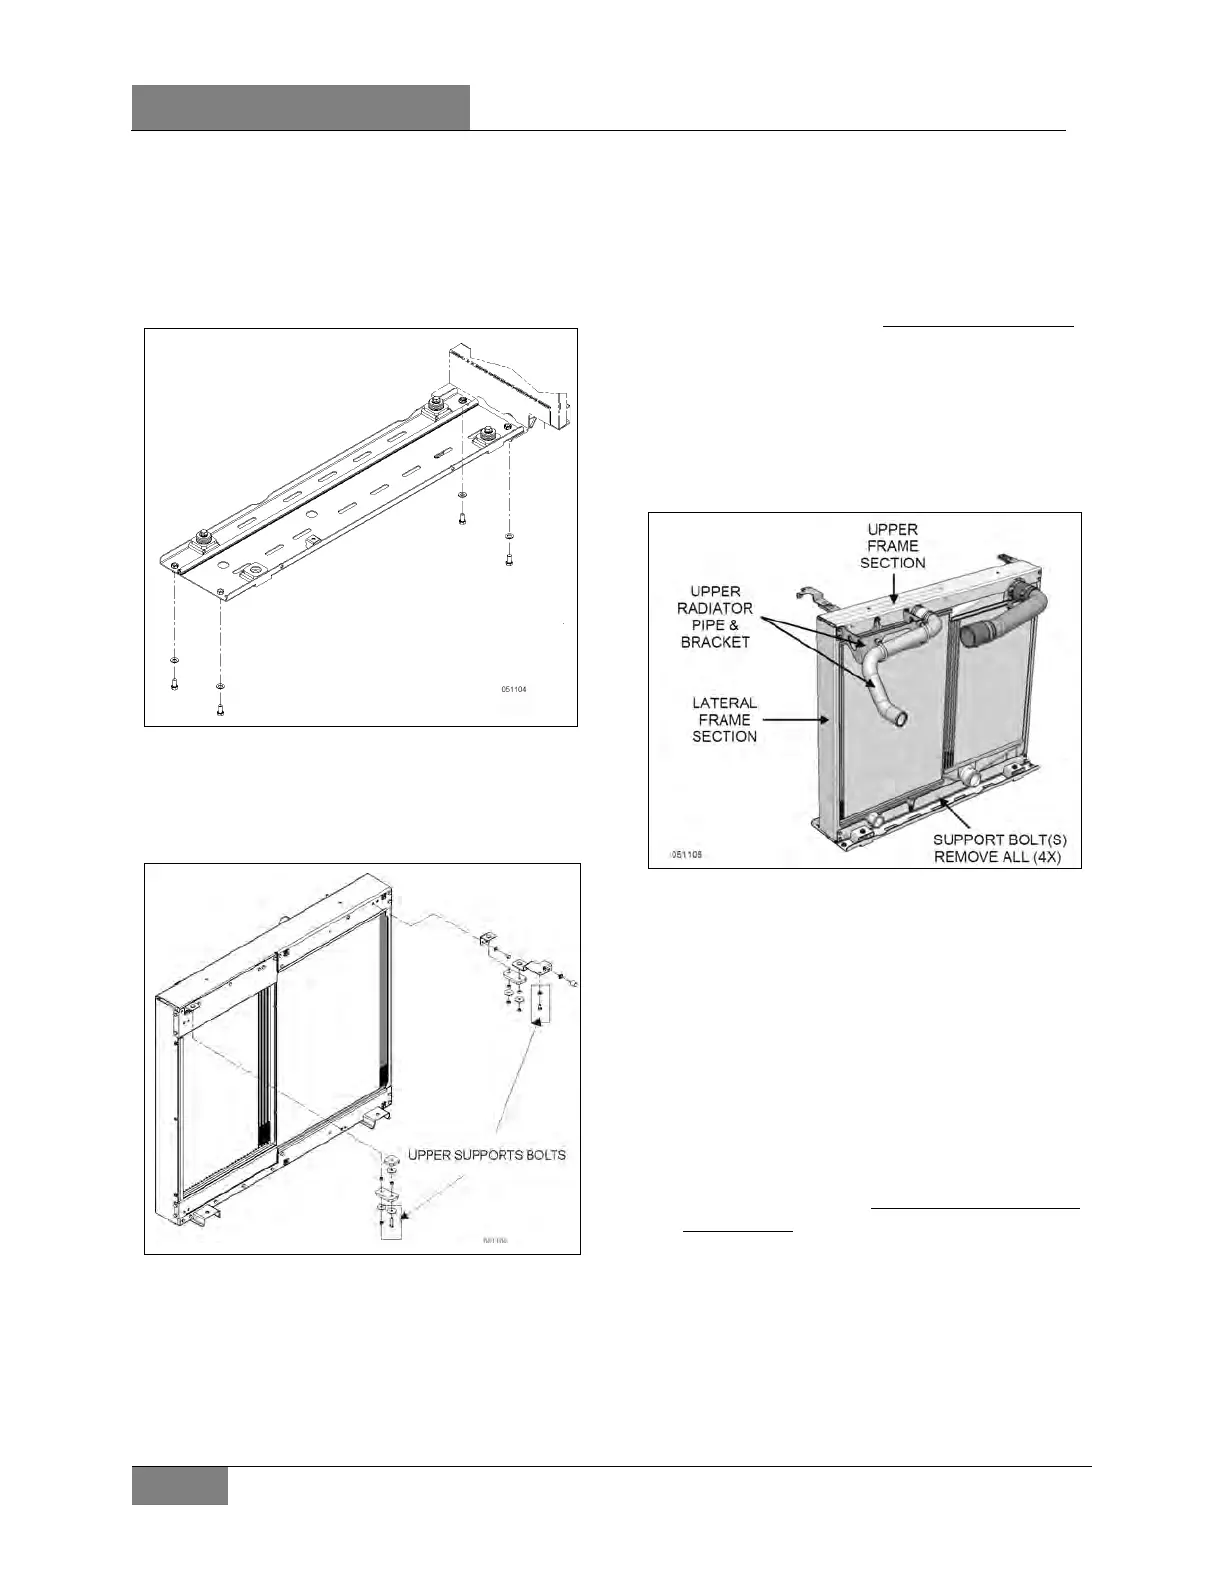
FIGURE 37: LOWER SUPPORT MOUNTING BOLTS
18. Unscrew the two upper supports from the
vehicle structure so they will be removed
with the cooling assembly (Figure 38).
FIGURE 38: UPPER SUPPORTS MOUNTING BOLTS
19. Slightly lift the assembly and slide it out of
the vehicles.
• Check interference at the back of the
assembly with the pipe sections still
attached to the assembly and the vehicle
structure (slack hose clamps and turn
down tubes as necessary).
20. To proceed to the radiator replacement,
remove radiator upper pipe section, bracket
and hardware, unbolt the four support bolts
passing through the radiator and holding it to
the frame (upper & lower) also unbolt the
cooling pack frame upper and lateral
sections and slide the old radiator out
(
Figure 39).
FIGURE 39: COOLING PACK PARTS TO BE REMOVED
FOR RADIATOR REPLACEMENT
21. Insert a new radiator in the lower support
making sure that insulating foam is installed
all around the radiator body.
22. Reinstall the four support bolts and the
upper and lateral frame sections only (go to
step 24 below) Torque all support bolts and
frame bolts to specified torque below.
TORQUE: 9 lb-ft (12 Nm)
23. To proceed to the complete cooling pack
replacement, ignore steps 20 to 22 above
and remove and transfer to the new
assembly:
• Both upper supports & brackets
• Lower support & rubber mounts
• Shroud support bracket
• Lower hinge & hinge bracket
 Loading...


