SECTION 12: BRAKE AND AIR SYSTEM
DOB 1300-1556 | X3-45 Commuter PA-1648 Maintenance Manual Section 12 revised Jan 2021
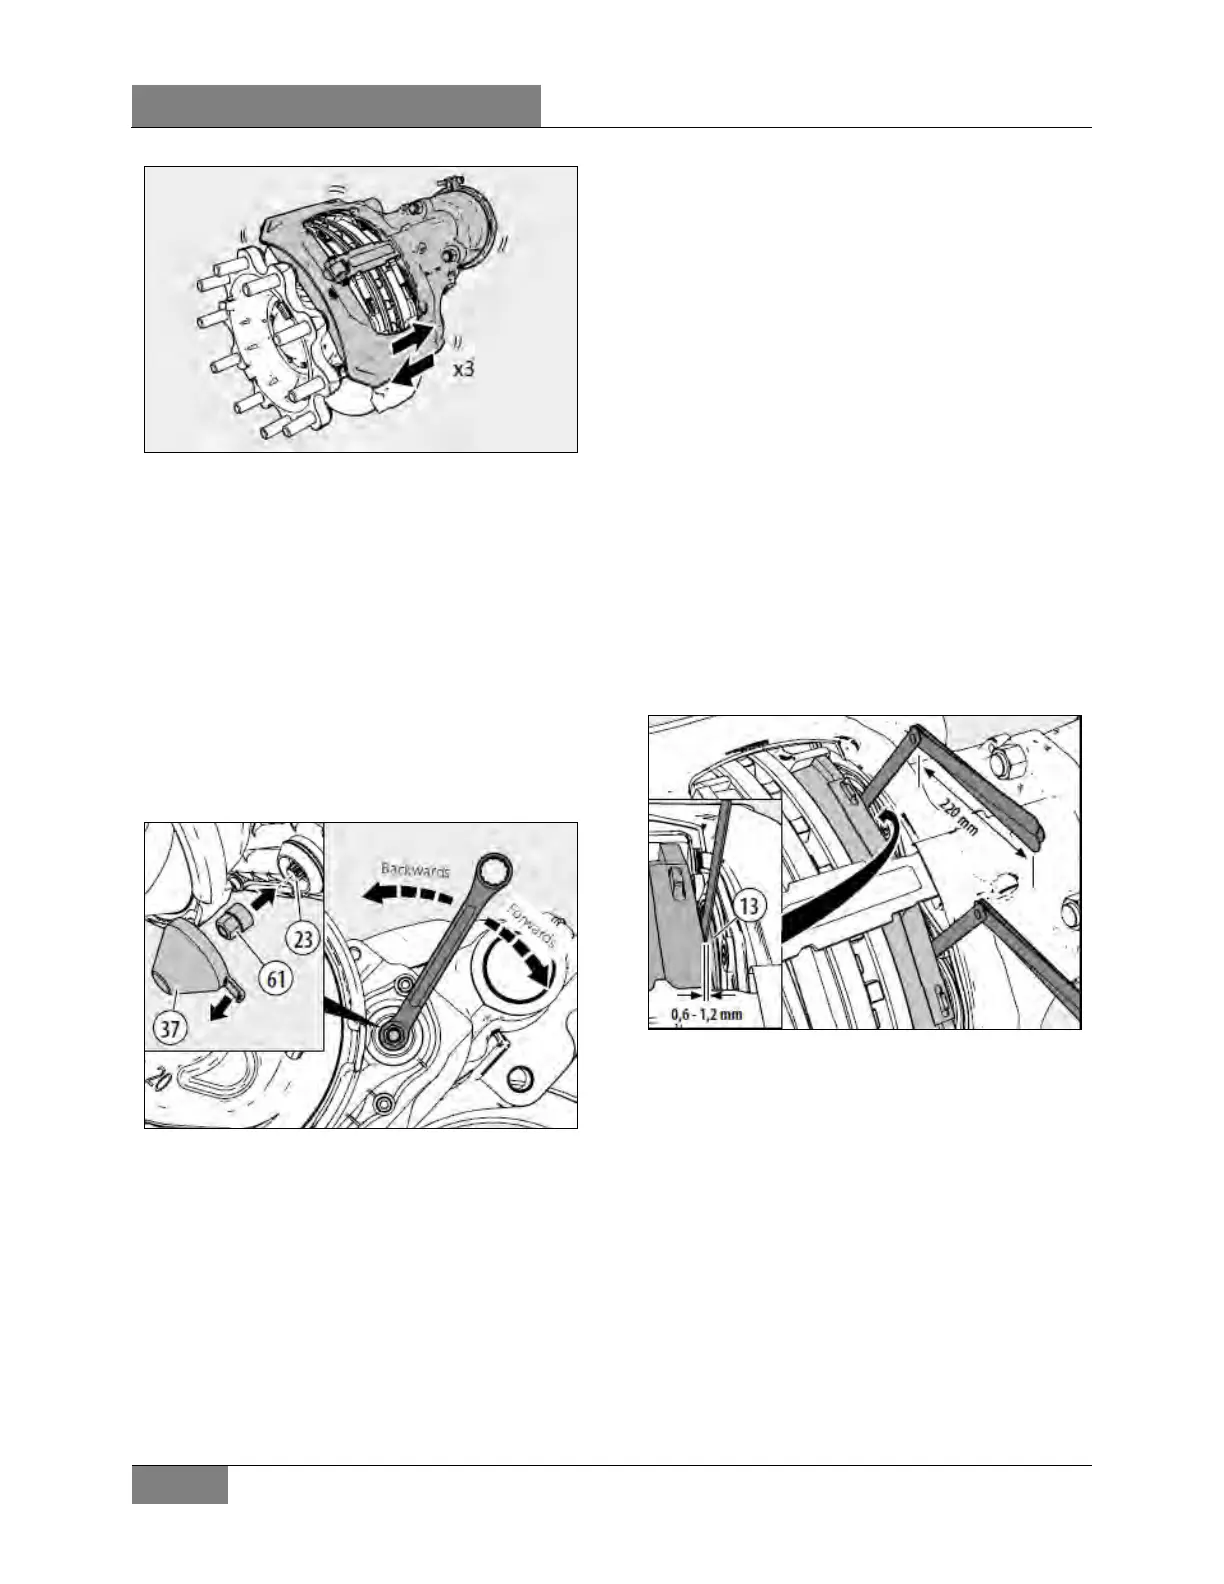
FIGURE 40: PUSH CALIPER THREE T IMES IN AXIAL
DIRECTION
6. Push and pull caliper three times in axial
direction to assess any existing air gap
(see Figure 40. If no movement is possi-
ble, clean the disc brake and if necessary,
replace the bearings. Once movement is
obtained, continue as follows:
7. Pull off the adjuster cap (37) using the
tag, taking care not to lose the shear
adapter (61) (see Figure 41).
Removal of the adjuster cap (37) with a
screwdriver, or similar, is not allowed since the
seal may be damaged.
FIGURE 41: REMOVE CAP, INSERT NEW BRAKE PADS,
SET THE STARTING GAP
8. Insert new brake pads).
9. Set the starting gap by turning the
adjuster (23) with the shear adapter (61)
backwards and then forwards (note that
when turning backwards a noticeable
clicking can be heard and felt), until a
value of 0.051 in (1.3 mm) air gap has
been achieved (measure between the
brake pad and tappets (13).
10. Apply the brakes 20x with medium
pressure.
11. Check the gap between each of the
tappets (13) and inboard pad backplate
(12). This must be measured over the
whole tappet surface of both tappets us-
ing two feeler gages simultaneously (feel-
er gages must be at least 8 ½ in / 220
mm long) (see Figure 42).
12. If the gap difference between the two
tappets is > 0.009 in / 0.25 mm then the
caliper bearing clearance must be
checked (see 16.2.7 Caliper check -
Caliper Running Clearance & 16.2.8 Cal-
iper check - Caliper Movement Along
Guide Pins).
13. In addition, each gap must measure
between 0.023 - 0.047 in (0.6 - 1.2 mm).
If the clearance is too great, there is a danger
of brake failure. If the clearance is too small,
there is a danger of overheating that may lead
to consequential damage.
FIGURE 42: CHECK GAP BETWEEN TAPPETS AND
INBOARD PAD
If the air gap is larger than 0.047 in / 1.2 mm,
the adjuster must be checked as follows:
14. Turn the adjuster with adapter (61) 3
clicks anticlockwise (increasing the air
gap) (see Figure 43).
Make sure the ring spanner or socket can turn
freely clockwise during the following procedure.
 Loading...


